All new equipment, build...with pics!
May 30, 2018 22:12:02 GMT -5
wyomama, simplynaturalfarm, and 11 more like this
Post by gjhinesjr on May 30, 2018 22:12:02 GMT -5
Well everyone, tis that merry time again. I am exactly 1 month out from my first calving of the year and it's time for christmas.
I told myself I was gonna make some upgrades this year. And I'm in the process of doing exactly that. Since I like the equipment side of dairying, I wanted to showcase what I got and what I'm building. Without further adue...
So the first thing I'm changing out is my pump. If you recall, last year I built myself the pump that I built in this thread here:
Well this year I'm upgrading. I wanted something with big boy air. So instead of the 2 series rotary lobe blower from Sutorbilt, I'm building myself a 3 series. I was SUPER lucky and managed to get a commercial built blower setup off ebay last year for a killer deal. With the model 3HP (not 3 horse power) pump that I was looking for. Looking at the pump curves that I got from my acquaintence at C Emery Nelson in Minnesota. I'm looking at making about 76 CFM at a legit 15" of vacuum. *Insert Tim the Tool Man Tailor grunting* .
.
The astute follower will remember that last year I found some research that suggested a single claw can use as much as 40 CFM during a knockoff or apply/detach event. So I wanted something that will easily provide that. And this baby will do it.
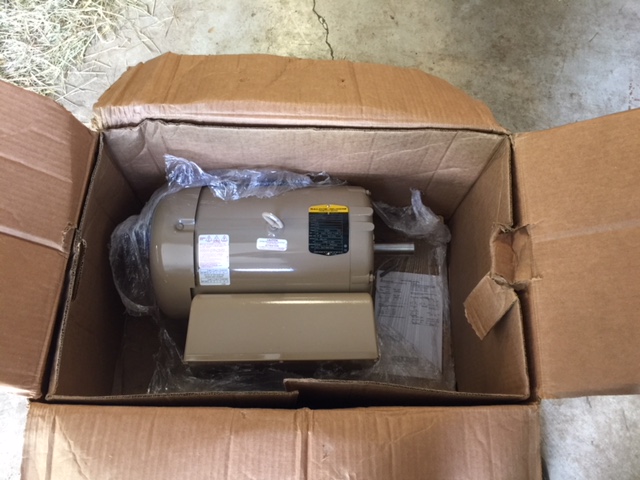
As it came, the motor was a 10hp 3-phase motor. As you've heard me state, 3 phase is industrial power and is worthless for our application. So a new motor had to be acquired. That came today. I decided to spare no expense, and get a Baldor F3731M Farm Duty, 5HP motor. Baldor makes top of the line motors and she's a beauty. Here's the unboxing for your enjoyment:
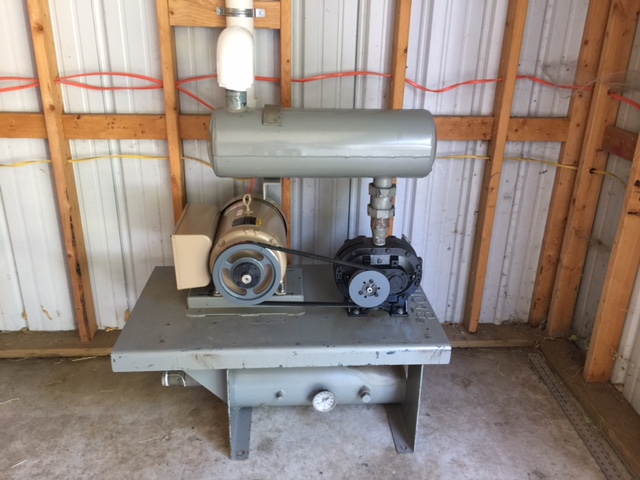
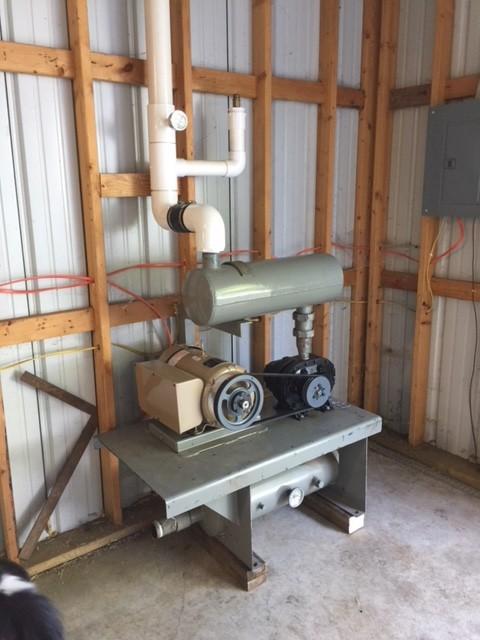
So after that I had to get in on the pump stand with the pump. Here's how she's sitting:

Sorry for the crappy lighting. Just so you know what you're looking at. The motor is on the left, the pump is on the right (I sandblasted and re-painted it John Deere Blitz black, a sort of hot rod flat black, lol) and the gray assembly is the pump stand from an original manufacturer. The cylinder things on the top and bottom are the silencers. You can see last years pump stand and silencer off to the right. So what's cool about this purchased stand is that it has a discharge silencer welded into the bottom of the stand ANNNND has an inlet silencer on the top. Super excited to hear the difference as last years pump only had the discharge silencer.
So as you look at it there, the white vacuum line coming from the stanchion on the left, will connect to the spot with the white screw cap, the air goes through the pump, and is discharged out of the discharge silencer exhaust underneath (you can barely see it under the main platform there).
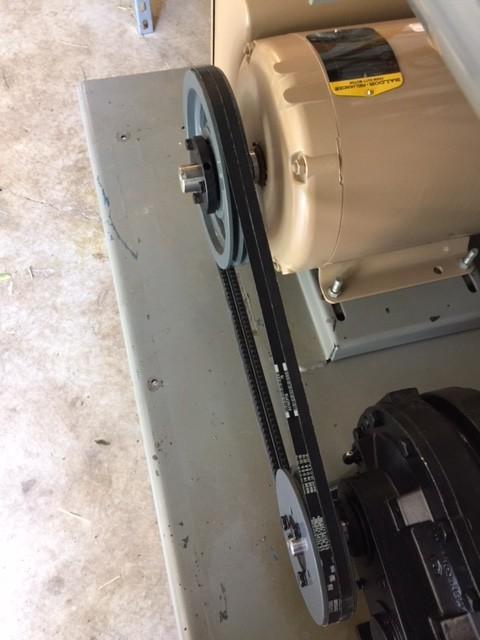
Since this pump originally had a 10HP motor, it had sheaves to spin it faster than I am planning, so those had to be replaced. I used the same method I talked about in last years build thread, to pick out the correct sheave diameters for this project and ordered those. You can see the shiney new sheave on the motor there. The pump one should be here tomorrow. Had a chance to learn a bit more about picking the correct belts and sheaves, and learned for higher horsepower "power transmission" applications like these, it's best to use "wedge" style v-belts, as opposed to the "classical" belts like your "A" or "B" series. The wedge styles are the "V" series. So "3V", "5v", etc. The benefits being that you get a 50% greater torque rating in a slimmer belt. Allowing you to stack multiple belts on a sheave to facilitate your horsepower needs. I'll be using 2 belt style sheaves for this project. Maybe I'll grab a closer photo of what I'm talking about later if anyone is interested.
After getting the other pump sheave on, all I have to do is hook up the wiring, and move the plumbing connection on the vac line up and I'll be cranking her up this weekend, hopefully!
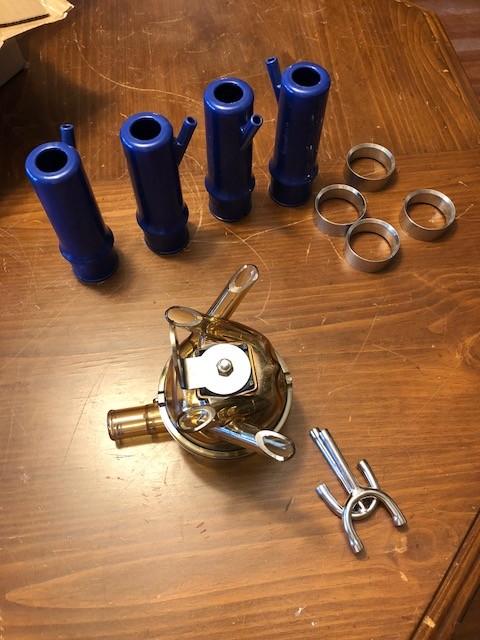
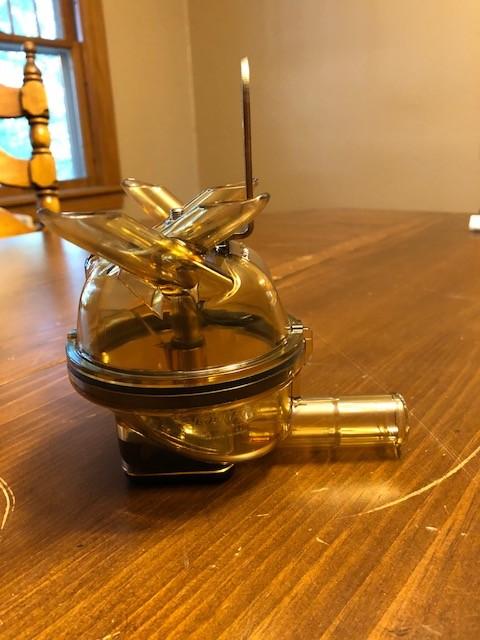
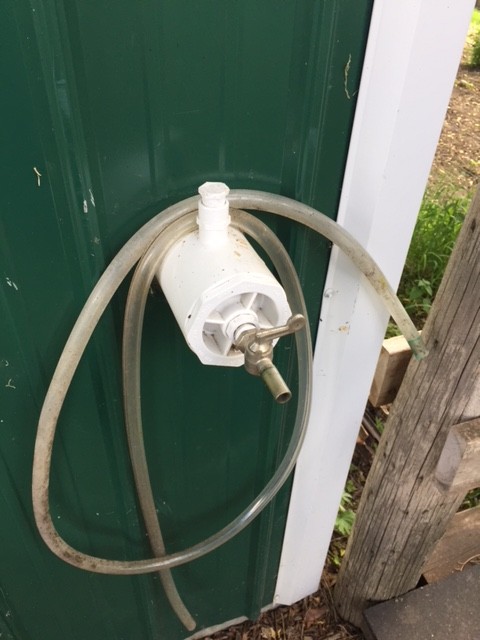
I also decided to make some changes at the stanchion side of things. So I've hated how restricted the airflow was through those super crap brass stallcocks that all the dairy suppliers sell. This is what I'm talking about:
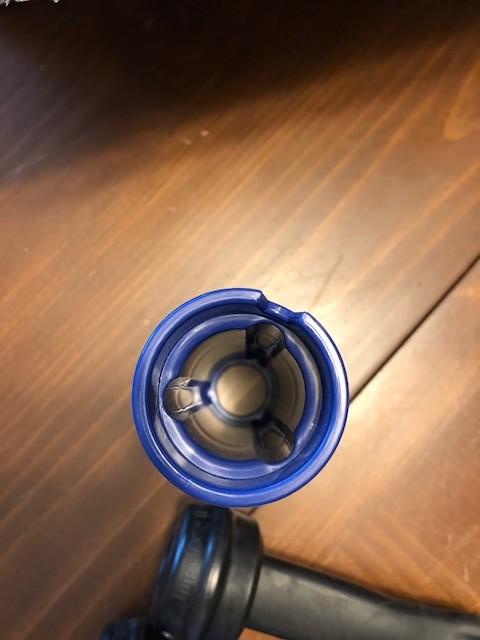
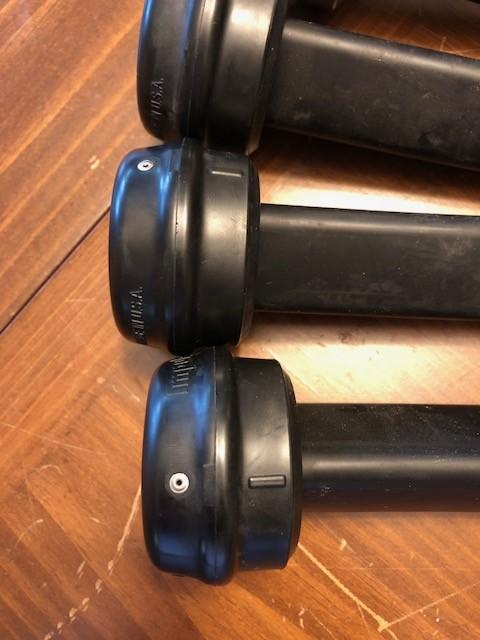
The thing is sticky and hard to turn and freakin small. Can't have that so it had to go. Swapped it out for an all stainless steel american made beauty of a ball valve here:
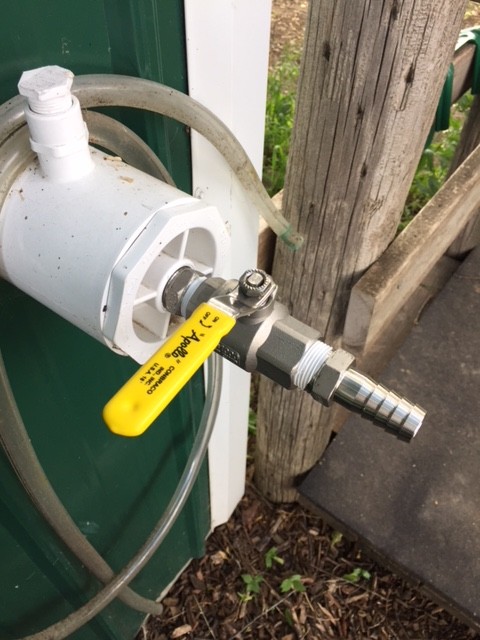
It's 3/4" size all the way through to the 3" vac line. Full port ball valve as well. She is sexy. I picked the 3/4" size because the outlet on the newer claws is 3/4". Seems the industry has gone to that size to alleviate milk slugging of the milk line and even out vacuum fluctuations resulting from that. Along with keeping the claw bowls from flooding on the super fast big producers on commercial farms. Even though I have grass fed jersey's, I liked the idea of eliminated vacuum drops with slugged milk flow, so the 3/4" line sounded good. Plus it'll allow more air to come through the claw assembly, hopefully giving me a better experience.
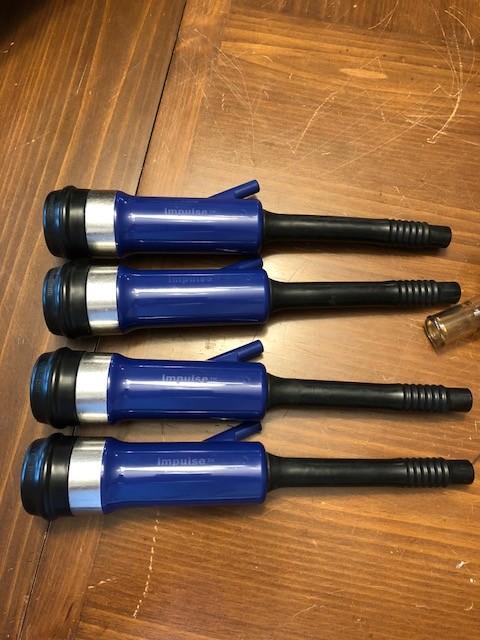
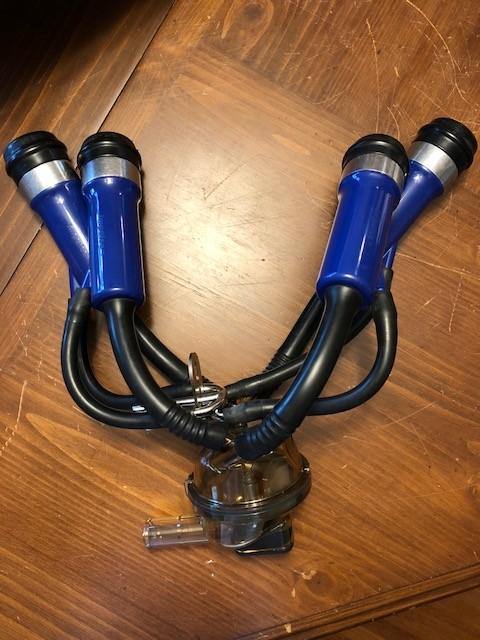
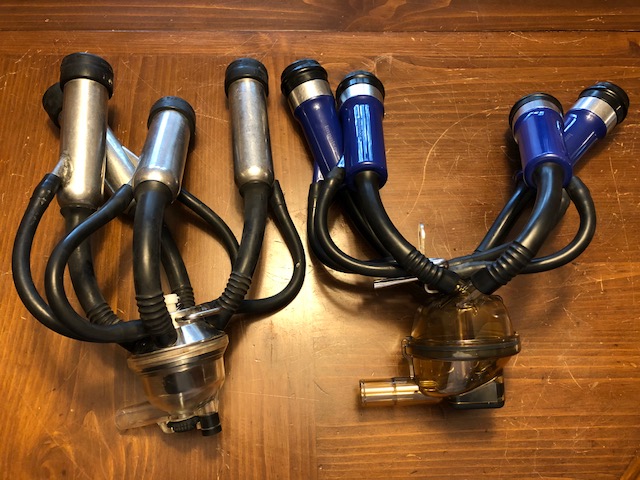
That's all the equipment I have here at the moment. On deck I still got some exciting stuff planned. I'm expecting to upgrade my claw and inflations. Got a dealer that's gonna get me the new Boumatic Flow Star Max claw, and I'm gonna go with the Milk Rite Impulse Air - Mouthpiece Vented inflations and plastic shells. Exactly like this here from their webpage:
Should be a sweet sweet setup. Can't wait!
Annnnnnnnd as one last point of cool. I think I'm gonna move to electronic pulsation. Sayyyy whaaaaaa? Yep. After talking to the dealer, he suggested I go to electronic for the performance benefits, and because of the nature of the milkrite impulse air inflations. Since we family cowers are quite outside the norm, I had to do some digging but have come up with pretty sweet solution. I'm gonna go with the Interpuls LP30. It looks like this here:

So the thing with vacuum pulsation that we all use, is that it is dependent on air to move the cams that rotate your suction. Depending on air quality, filter cleanliness, air moisture levels, etc, changes the "pace" of your pulsation. Electronic pulsation uses an electronic circuit board to control a couple solenoids. So it's dead constant no matter what. It also gives you the ability to change the characteristics of your pulsation if you so choose. In most cases not just your pulsation ratio and rate, but the length of your A,B,C, and D phases as well.
The issue many of will have in implimenting electronic pulsation is that they are low voltage and require a controller. So they run on either 12volt or 24 volt power, and need a controller. But Interpuls has 2 series, the LE which uses a central controller (which is expensive, used in a parlor with many many pulsators) or the LP series which has an onboard controller on each pulsator. So that's how I decided on the LP unit. The super cool part about this is the powering it. Since it only needs half an amp of power at 12volts DC, I'm simplly going to use a 1amp 12v DC LED light fixture power supply. You can buy these at any home store. Shoot you could even use the a/c power cord off your laptop. It does the same thing. Basically converts 120 volt voltage, down to 12volt dc. I'll wire it directly off my motor on/off switch out by the stanchion. Literally pulling the 120v power from one of the legs of the 230volt power going to the pump switch. EASY PEASY. Gonna be too cool!
These pulsator are pretty cool, they're completely water proof (which is a necessity since this will be permanently mounted on the vacuum line out by the stanchion, just like in a parlor). They're even submersible. Really cool design.
And to round things off I'm gonna go ahead and get a new bucket and lid too, just so everything is shiney and new.
Ok guys. That's all I got for now. I'll report back when I make some more progress. If you have any questions about anything, just fire away!
I told myself I was gonna make some upgrades this year. And I'm in the process of doing exactly that. Since I like the equipment side of dairying, I wanted to showcase what I got and what I'm building. Without further adue...
So the first thing I'm changing out is my pump. If you recall, last year I built myself the pump that I built in this thread here:
Well this year I'm upgrading. I wanted something with big boy air. So instead of the 2 series rotary lobe blower from Sutorbilt, I'm building myself a 3 series. I was SUPER lucky and managed to get a commercial built blower setup off ebay last year for a killer deal. With the model 3HP (not 3 horse power) pump that I was looking for. Looking at the pump curves that I got from my acquaintence at C Emery Nelson in Minnesota. I'm looking at making about 76 CFM at a legit 15" of vacuum. *Insert Tim the Tool Man Tailor grunting*
 .
.The astute follower will remember that last year I found some research that suggested a single claw can use as much as 40 CFM during a knockoff or apply/detach event. So I wanted something that will easily provide that. And this baby will do it.
As it came, the motor was a 10hp 3-phase motor. As you've heard me state, 3 phase is industrial power and is worthless for our application. So a new motor had to be acquired. That came today. I decided to spare no expense, and get a Baldor F3731M Farm Duty, 5HP motor. Baldor makes top of the line motors and she's a beauty. Here's the unboxing for your enjoyment:
So after that I had to get in on the pump stand with the pump. Here's how she's sitting:
Sorry for the crappy lighting. Just so you know what you're looking at. The motor is on the left, the pump is on the right (I sandblasted and re-painted it John Deere Blitz black, a sort of hot rod flat black, lol) and the gray assembly is the pump stand from an original manufacturer. The cylinder things on the top and bottom are the silencers. You can see last years pump stand and silencer off to the right. So what's cool about this purchased stand is that it has a discharge silencer welded into the bottom of the stand ANNNND has an inlet silencer on the top. Super excited to hear the difference as last years pump only had the discharge silencer.
So as you look at it there, the white vacuum line coming from the stanchion on the left, will connect to the spot with the white screw cap, the air goes through the pump, and is discharged out of the discharge silencer exhaust underneath (you can barely see it under the main platform there).
Since this pump originally had a 10HP motor, it had sheaves to spin it faster than I am planning, so those had to be replaced. I used the same method I talked about in last years build thread, to pick out the correct sheave diameters for this project and ordered those. You can see the shiney new sheave on the motor there. The pump one should be here tomorrow. Had a chance to learn a bit more about picking the correct belts and sheaves, and learned for higher horsepower "power transmission" applications like these, it's best to use "wedge" style v-belts, as opposed to the "classical" belts like your "A" or "B" series. The wedge styles are the "V" series. So "3V", "5v", etc. The benefits being that you get a 50% greater torque rating in a slimmer belt. Allowing you to stack multiple belts on a sheave to facilitate your horsepower needs. I'll be using 2 belt style sheaves for this project. Maybe I'll grab a closer photo of what I'm talking about later if anyone is interested.
After getting the other pump sheave on, all I have to do is hook up the wiring, and move the plumbing connection on the vac line up and I'll be cranking her up this weekend, hopefully!
I also decided to make some changes at the stanchion side of things. So I've hated how restricted the airflow was through those super crap brass stallcocks that all the dairy suppliers sell. This is what I'm talking about:
The thing is sticky and hard to turn and freakin small. Can't have that so it had to go. Swapped it out for an all stainless steel american made beauty of a ball valve here:
It's 3/4" size all the way through to the 3" vac line. Full port ball valve as well. She is sexy. I picked the 3/4" size because the outlet on the newer claws is 3/4". Seems the industry has gone to that size to alleviate milk slugging of the milk line and even out vacuum fluctuations resulting from that. Along with keeping the claw bowls from flooding on the super fast big producers on commercial farms. Even though I have grass fed jersey's, I liked the idea of eliminated vacuum drops with slugged milk flow, so the 3/4" line sounded good. Plus it'll allow more air to come through the claw assembly, hopefully giving me a better experience.
That's all the equipment I have here at the moment. On deck I still got some exciting stuff planned. I'm expecting to upgrade my claw and inflations. Got a dealer that's gonna get me the new Boumatic Flow Star Max claw, and I'm gonna go with the Milk Rite Impulse Air - Mouthpiece Vented inflations and plastic shells. Exactly like this here from their webpage:
Should be a sweet sweet setup. Can't wait!
Annnnnnnnd as one last point of cool. I think I'm gonna move to electronic pulsation. Sayyyy whaaaaaa? Yep. After talking to the dealer, he suggested I go to electronic for the performance benefits, and because of the nature of the milkrite impulse air inflations. Since we family cowers are quite outside the norm, I had to do some digging but have come up with pretty sweet solution. I'm gonna go with the Interpuls LP30. It looks like this here:
So the thing with vacuum pulsation that we all use, is that it is dependent on air to move the cams that rotate your suction. Depending on air quality, filter cleanliness, air moisture levels, etc, changes the "pace" of your pulsation. Electronic pulsation uses an electronic circuit board to control a couple solenoids. So it's dead constant no matter what. It also gives you the ability to change the characteristics of your pulsation if you so choose. In most cases not just your pulsation ratio and rate, but the length of your A,B,C, and D phases as well.
The issue many of will have in implimenting electronic pulsation is that they are low voltage and require a controller. So they run on either 12volt or 24 volt power, and need a controller. But Interpuls has 2 series, the LE which uses a central controller (which is expensive, used in a parlor with many many pulsators) or the LP series which has an onboard controller on each pulsator. So that's how I decided on the LP unit. The super cool part about this is the powering it. Since it only needs half an amp of power at 12volts DC, I'm simplly going to use a 1amp 12v DC LED light fixture power supply. You can buy these at any home store. Shoot you could even use the a/c power cord off your laptop. It does the same thing. Basically converts 120 volt voltage, down to 12volt dc. I'll wire it directly off my motor on/off switch out by the stanchion. Literally pulling the 120v power from one of the legs of the 230volt power going to the pump switch. EASY PEASY. Gonna be too cool!
These pulsator are pretty cool, they're completely water proof (which is a necessity since this will be permanently mounted on the vacuum line out by the stanchion, just like in a parlor). They're even submersible. Really cool design.
And to round things off I'm gonna go ahead and get a new bucket and lid too, just so everything is shiney and new.
Ok guys. That's all I got for now. I'll report back when I make some more progress. If you have any questions about anything, just fire away!