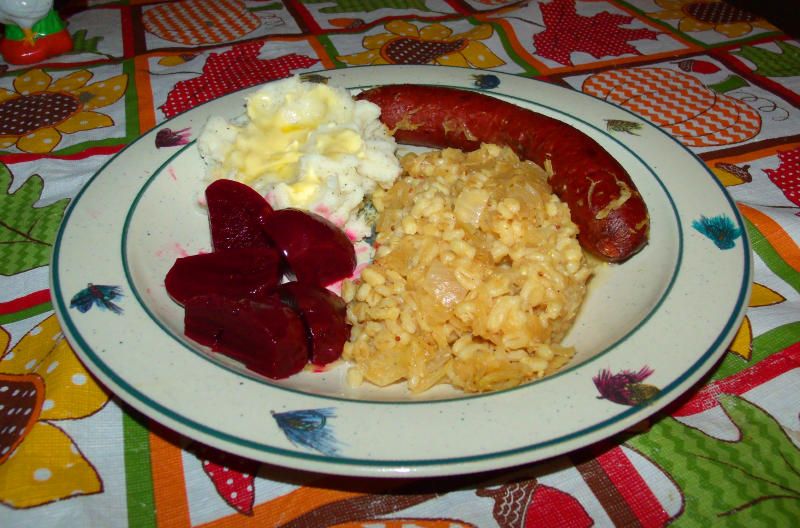
Slovak Homemade Smoked Sausage
Jul 1, 2014 10:32:01 GMT -5
simplynaturalfarm, Dianne Ader, and 2 more like this
Post by TasunkaWitko on Jul 1, 2014 10:32:01 GMT -5
Slovak Homemade Smoked Sausage
Domáce Údené Klobásy
If you have been a member of this forum for any length of time, you know that my love of Slavic cooking has been inspired by my wife; The Beautiful Mrs. Tas has a rich heritage thanks to her Slovak roots, and as we know, the soul of any heritage is in its food - especially the “common” or “peasant” foods of those people who live close to the land and derive their living from it.
To me, the event of the pig slaughter (zabíjačka, in Slovak) is one of those timeless things that truly defines peasant cooking; it is a practice going back hundreds of years - and even further - that borders on ritual, meant to lay meat over for the winter.

Photo Credit: en.wikipedia.org/wiki/Pig_slaughter#mediaviewer/File:Medieval_pig_slaughter.jpg
Indeed, one of the most common food elements of central and eastern Europe is also a natural consequence of the pig slaughter: sausage. It is amazing to see the dozens - possibly even scores - of different varieties of sausage that can be found even within a relatively small region. It is also not difficult at all to understand the underlying reasons that this is so; for centuries, sausage-making has been a practical and often creative method to ensure that every part of an animal that can be considered remotely suitable for food becomes just that: sustenance, able to be stored and kept throughout the year so that it might be used - and even enjoyed - during times of plenty and times of little alike.
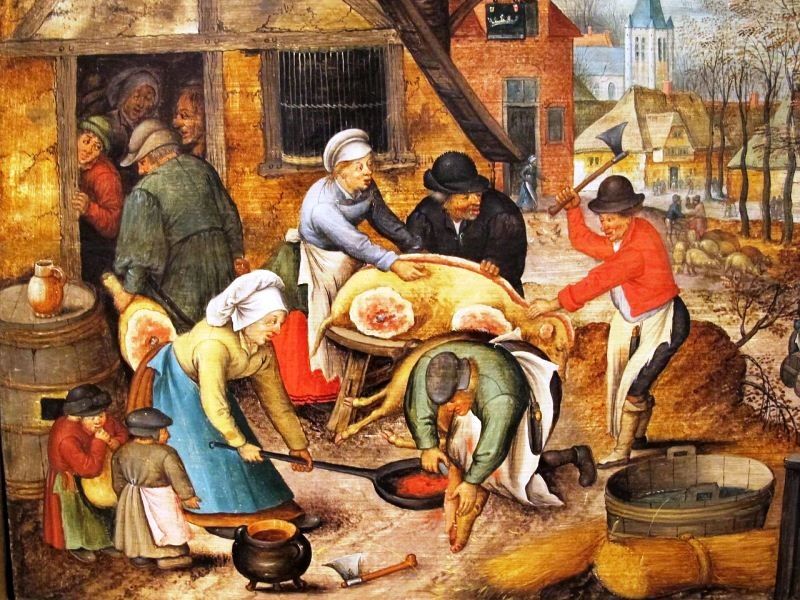
Photo Credit: en.wikipedia.org/wiki/Pig_slaughter#mediaviewer/File:Pieter_bruegel_il_giovane,_autunno_03.JPG
In our modern, refrigerated age, it can be difficult to appreciate the fundamental importance of this simple food; cured meats - including sausage - are borne out of the need for country folk to get through the cold months. For these people, it was not simply something done as a hobby in their spare time; it was survival. It is also pretty incredible how they managed to get so much flavour into such a simple and essential practice, but the proof is undeniable, once it is experienced.
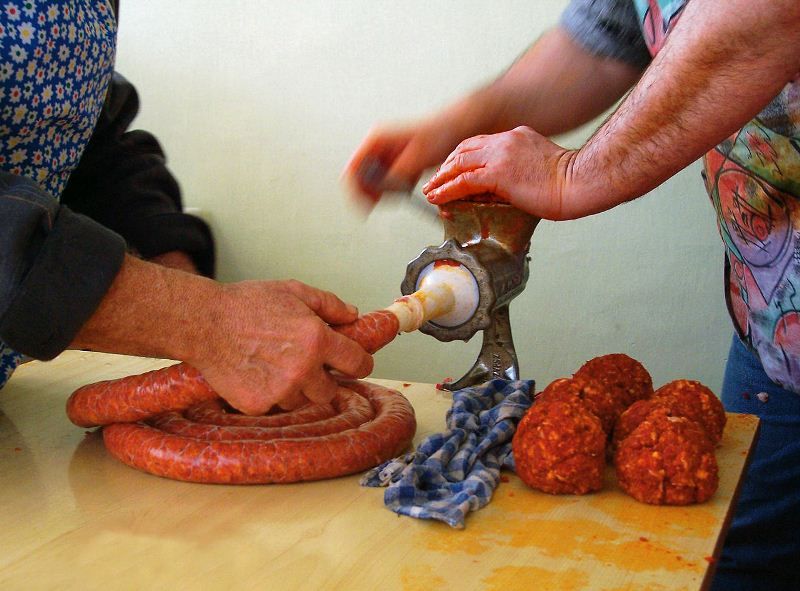
Photo Credit: en.wikipedia.org/wiki/Pig_slaughter#mediaviewer/File:Sausage_making-H-1.jpg
The traditions carry on to this day, much to the credit of the country folk in the rural areas who still depend on the pig slaughter in order to make it through the winter and other lean times.
This Slovak homemade sausage (domáce klobása) recipe is one that I've been wanting to try for quite some time:
www.slovakcooking.com/2010/recipes/sausages
Even though this recipe for klobása is not directly from my wife's grandmother, I am willing to bet money that she enjoyed something very, very much like it during her childhood in Slovakia - which was part of the Kingdom of Hungary in the Austro-Hungarian Empire at the time - and even in her adult years after her family emigrated to the United States and settled in Central Montana. I believe this because traditions such as zabíjačka die hard; the area where her family settled is filled with descendants of immigrants who came to work the coal mines southeast of Great Falls, and Slovak names are on a high percentage of the mailboxes in the five tiny villages in the area known as "The Gulch." I once saw a photo from the 1950s showing a whole hog being slowly roasted over live coals - an event that is a direct descendant of zabíjačka and still happens in my wife's hometown near the end of each summer.
This recipe is comes from an outstanding blog devoted to the preservation of Slovak cuisine, with special attention to “the grandmother recipes” that really define the traditions of Slovak cooking:
www.slovakcooking.com
The gentleman who authors the blog, Luboš Brieda, is a true class act - a man dedicated to sharing Slovak heritage with the world, and I'd like to take this opportunity to thank him for posting his grandmother's recipe for klobása (plural klobásy). Last autumn, I tried his family's recipe for a traditional Slovak liver sausage that is made during (zabíjačka); this sausage, known as jaternica or also hurky, was excellent, especially when removed from the casings, pan-fried as a hash and served with eggs and toast. It's normally made with pork, but I made mine with a combination of deer and pork, and it was outstanding. If anyone is interested in learning about or trying this, I posted a full pictorial here:
foodsoftheworld.activeboards.net/jaternica-also-known-as-hurka_topic3938.html
Making klobásy is simple as can be; yet the results have been nothing short of incredible. We often hear of Polish kiełbasa and Hungarian kolbász, but this version from Slovakia, which falls right between Poland and Hungary geographically and culturally, is definitely a worthy variation, deserving very much to be tried by anyone who is interested in traditional sausages of central Europe.
Not long ago, I had the good fortune to have exactly 4 pounds of freshly-ground fresh pork (mletého bravčového) drop into my lap, which happens to be the precise amount called for in this homestyle Slovak sausage recipe. Also - by some miracle of kismet - I had nearly all of the rest of the ingredients for this at home, including some really nice Hungarian Paprika. The only thing in the original recipe that I was missing was the caraway (rasca), which isn't too big of a deal, for reasons that will be explained below.
Note: In this pictorial, I will take you step-by-step through the entire process that I went through in making homemade smoked Slovak klobásy , with plenty of photos and explanations of why I did what I did; those of you who know me know that I tend to go into a lot of detail, but the truth is that the process is much simpler than it might sound. If you need any clarification, just ask - and answers will be provided!
For clarification purposes, it’s good to know that pretty much any variation of smoked sausage will follow these 10 steps:
1. Clean, sanitise and chill your equipment.
2. Grind your chilled meat.
3. Add your curing agent and other ingredients (if not smoking sausage, adding a cure is optional, but not required).
4. Cover and chill the mixture overnight.
5. Stuff the sausage into casings (if not smoking sausage, skip directly to step 10).
6. Allow the surface of the sausage to dry before smoking.
7. Smoke the sausage in your chosen wood, then bring the sausage “to temperature.”
8. Immerse the sausage into an ice-water bath to stop the cooking process.
9. Hang the sausage to dry and “bloom” until it reaches the colour and “dryness” that you are looking for.
10. Package your sausage for long-term storage.
As you can see, there isn’t much here that is complicated, so let’s get started! Here is everything that you need for fresh, delicious Slovak klobása:
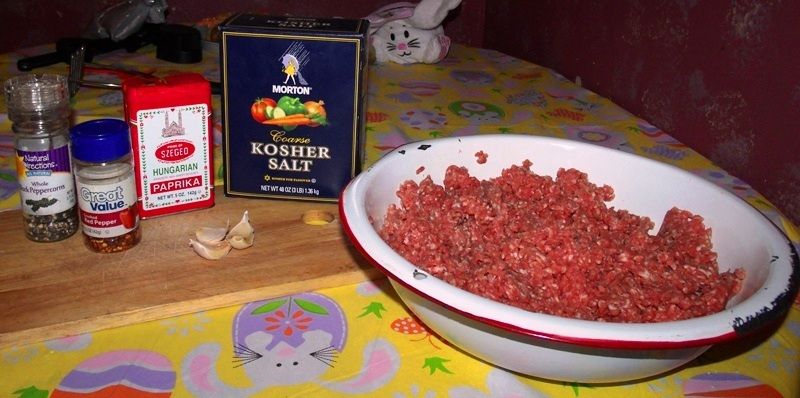
4 pounds of freshly-ground pork (mletého bravčového)
1.5 teaspoons kosher salt (soľ)
2 to 3 crushed and minced cloves of garlic (postrúhaný cesnak)
2 teaspoons of freshly-ground black pepper (mleté čierne korenie)
4 teaspoons of sweet Hungarian paprika (sladká paprika)
Optional: 1 teaspoon of crushed red pepper (štipľavá paprika)
Not pictured: 1 scant teaspoon of caraway (rasca)
Klobásy can be enjoyed fresh or smoked. For smoking the sausage, one needs a couple of extra ingredients:
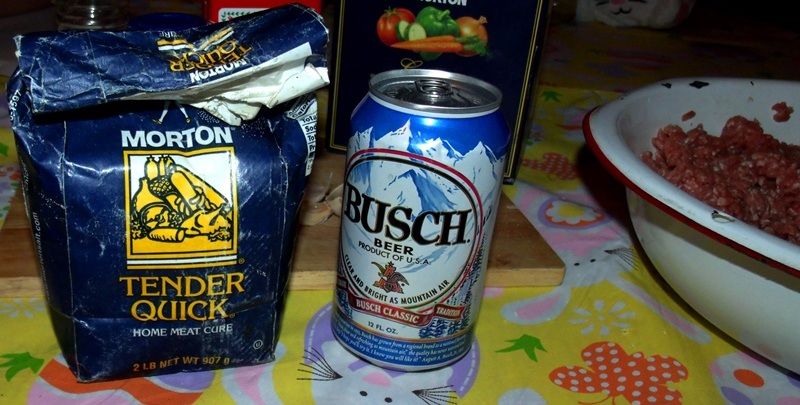
The first is a curing agent, the second is a liquid of some sort, to help ensure that the curing agent is distributed throughout the meat. There are a few curing agents out there, but the one I had on hand was Tender Quick, by Morton:
www.mortonsalt.com/for-your-home/culinary-salts/meat-curing-and-pickling-salts/178/morton-tender-quick/
It’s easy to use and pretty much fool-proof when used according to the package directions. For the liquid, I chose to use common beer (pivo), a beverage that is as popular in Slovakia as anywhere else. One can, if one chooses, use water instead - or wine, or any number of other liquids.
Getting started, I measured my ingredients according to the amounts listed above:
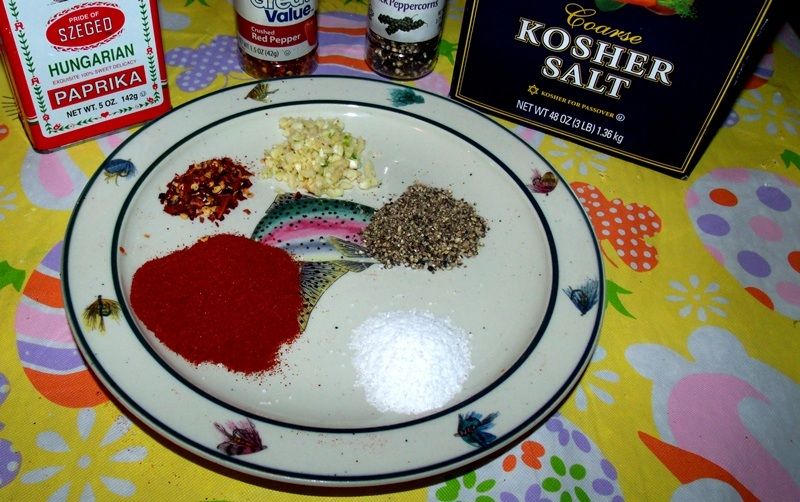
Clockwise from the top: crushed-and-minced garlic, black pepper, kosher salt, Hungarian paprika and crushed red pepper flakes.
If I would have had caraway, I would have included it; but I didn’t have any, so I wasn’t able to. This is not too big of a deal since the amount used is very small. It is probably just as well; my Slovak wife insisted that her straight-off-the-boat Slovak grandmother had never ever cooked with caraway at all. Because of these factors, I didn't worry too much about leaving it out; it seems to be good either way, depending on local or family tastes. If you do have some on hand, I would suggest using it in order to get a feel for the flavour.
A note on the paprika: Slovakia used to be part of the Kingdom of Hungary; as such, good paprika is abundant there. My advice when making klobása is to use the best Hungarian paprika that you can find; it is true that you can find plenty of bargain paprika at the local dollar store, but you will not be as happy with the results. Since you are reading this, I am assuming that you have more than a passing interest in the cuisine of the region, so please, do it right and use the good stuff!
A note on the garlic: The recipe calls for 2 cloves of crushed garlic and cautions against using “too much;” since garlic cloves vary in size, I would suggest starting with the old adage that 1 clove of crushed and minced garlic is equivalent to half of a teaspoon, then carefully add a little more if your recipe looks like it will benefit from it. By this methodology, the 2 crushed and minced cloves of garlic called for in the recipe would equal 1 teaspoon. Measuring out my crushed cloves, I ended up adding just a little less than 3 cloves of the minced garlic that I had, and this seems about right. One could add a little more, but I would caution against over-doing it as the balance can easily be thrown out; fresh garlic goes a long ways in klobásy!
As I said above, I used Tender Quick as a curing agent, since my intention was to smoke the sausages. If you don’t want to smoke the sausage, you don’t have to use a curing agent; just be sure to eat or freeze the sausage as soon as possible. You can use a cure for non-smoked sausage, if desired, but it’s not necessary. Be aware that cured and uncured (fresh) sausages will each have their own unique flavours; both varieties are good, but they are different.
If I would have had enough pork, I would have made one batch of smoked klobásy and a second non-smoked batch; but alas, this was impossible at the time, so I elected to go for smoked klobásy. If you are making smoked sausages, it is essential to use a curing agent of some kind, since the sausage will spend a lot of time in the food-safety “danger zone” between 40 and 140 degrees Fahrenheit. For sausage, the proper amount of Tender Quick cure to use is 1.5 level teaspoons per pound of meat; if you use a cure other than Tender Quick, be sure to follow the instructions for that cure, substituting the amounts and methods for the ones that I use in this pictorial. In my case, using Tener Quick, 1.5 level teaspoons x 4 pounds of ground meat equals 6 level teaspoons, or two level tablespoons:
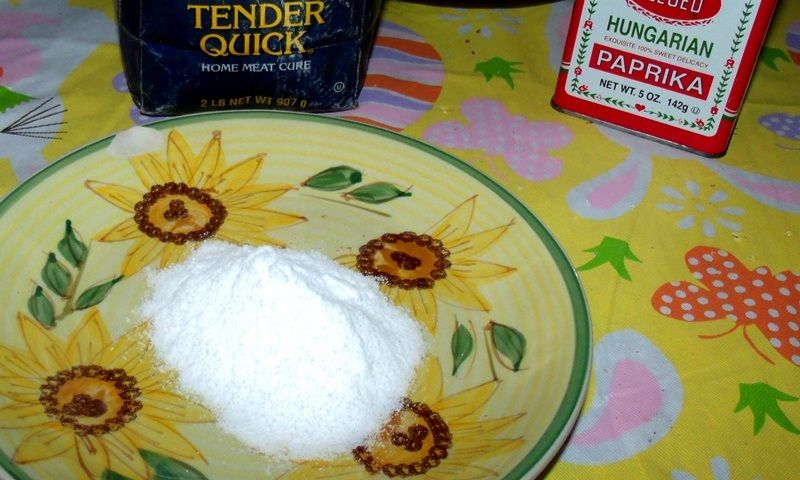
This picture is actually a little misleading, it is a small saucer with 2 tablespoons of Tender Quick on it, but it looks like a lot more than it actually is. This brings up an important point where salt is concerned. Tender Quick is comprised mostly of salt - a carrier that the Morton company uses in order to make the process user-friendly and to help distribute the curing agents throughout the meat. Because of this, it is usually not necessary to add any salt to a recipe when making some charcuterie products such as jerky or cured whole cuts of meat - if you are using a recipe that calls for a different cure, you can simply use the correct amount of Tender Quick in its place and omit the salt entirely. For sausage, however, I’ve found that when using Tender Quick, there is not quite enough salt flavour in the sausage; if you also find that sausage cured with Tender Quick needs a little extra salt, I would suggest adding some salt to the recipe, as I did when I made this klobása. The amount of added salt that I recommend (remember that there is already some in the Tender Quick) is one-quarter teaspoon per pound; you can tweak it from there, if you want to. This recommendation does not apply to whole cuts of meat cured with Tender Quick - for those, the recommended amounts of Tender Quick are darn-near perfect as they are and no added salt is needed for whole cuts, especially when balanced with up to an equal amount of dark-brown sugar. This advice might apply to jerky, depending on the other ingredients that you use which may or may not contain salt of their own. If you use a cure other than Tender Quick, simply use the amount of salt normally called for in the recipe. It sounds more complicated than it actually is, and it is very easy to grasp the concept after a couple of projects; in the meantime, if you ever have any questions, simply ask!
Once my ingredients were measured, I was ready to make the sausage. A good practice to follow is to mix the curing agent and other ingredients into a slurry before mixing in the ground meat. This accomplishes a couple of different things: first, it ensures that the curing agent (as well as the flavours) will be evenly distributed throughout the sausage; also, the addition of liquid will often help feed the sausage through whatever is being used to stuff it into casings. As mentioned above, I chose to use a can of beer for my slurry:
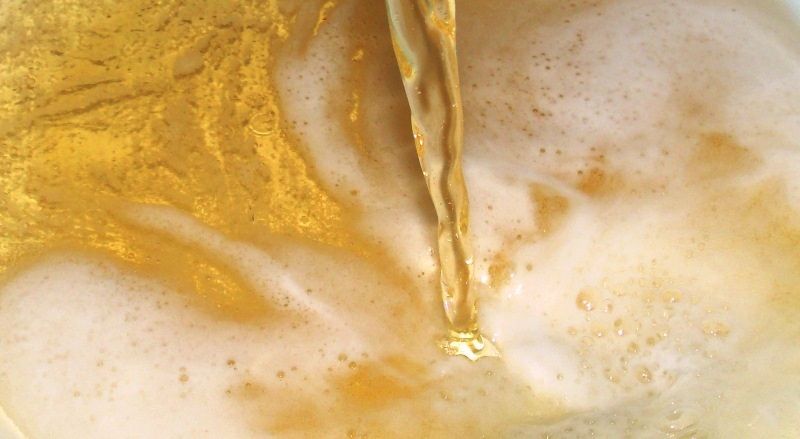
Water, wine or any number of other liquids can be used, as you please.
Next, I added all of my spices and the curing agent to the beer and whisked it into a beautiful brick-red, aromatic slurry:
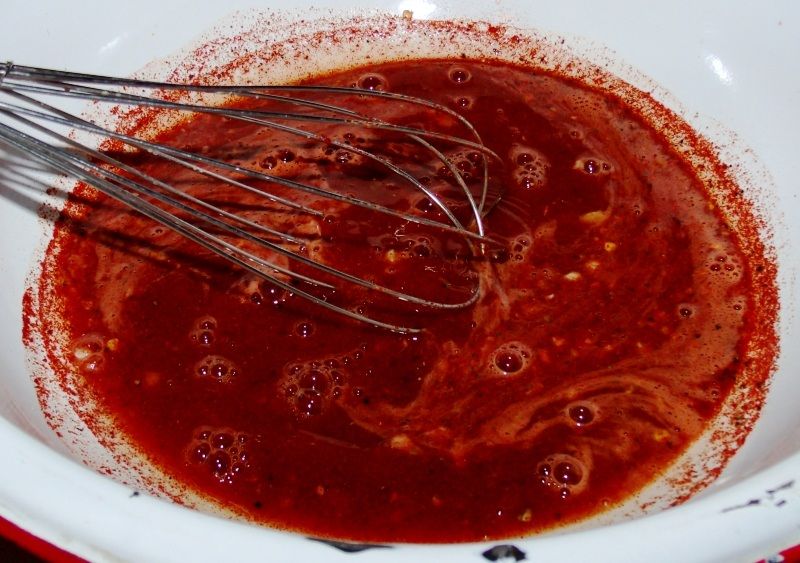
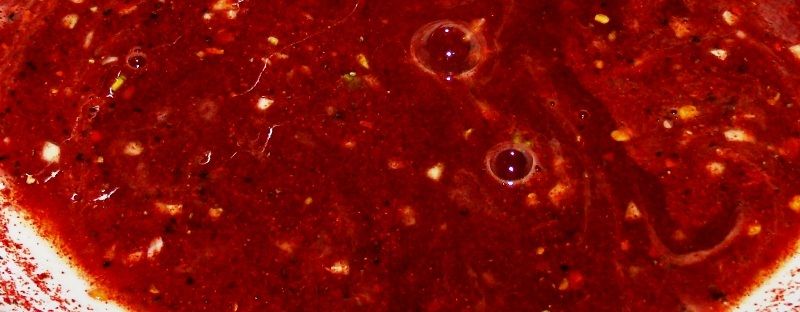
I often find myself at a loss for words when I try to think of adjectives to describe a project that really comes together well; wonderful, amazing, beautiful, delicious and incredible are words that I commonly use, but I am sure that so many more would fit well. For instance, when I took a close look at this mix of flavours that I was about to add to my ground pork, I was simply speechless at the colours I saw and the aromas that I was getting:
With that, I mixed the slurry into the ground pork, using an old-fashioned, hand-held potato masher in order to ensure that the flavours and the curing agents were thoroughly incorporated throughout the sausage:
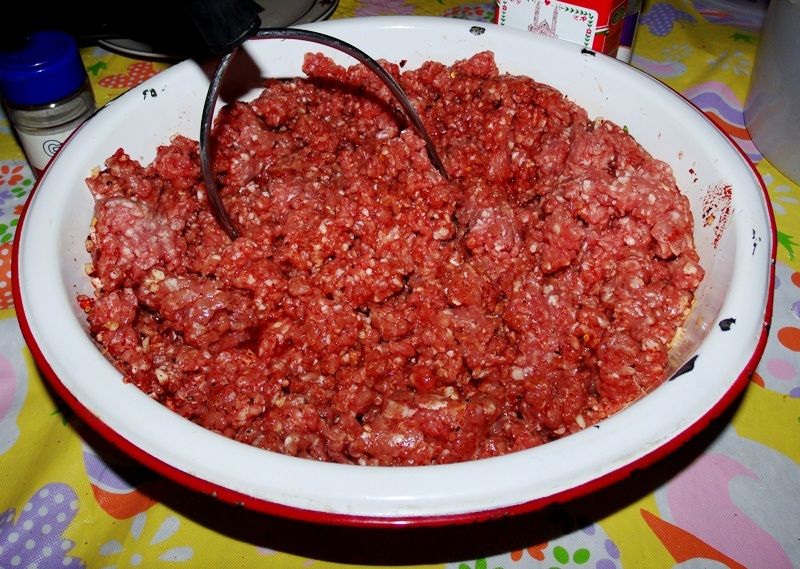
It is a good practice to mix for several minutes, as the salt, cure and liquid all cause various changes in the nature of the ground meat; I’m no scientist, but I do know that as the meat becomes denatured, it tends to bind to itself better, resulting in a sausage that is more cohesive and retains moisture better. You will know when the meat reaches this stage, as it tends to become rather spongy.
And that’s how easy it is to make sausage! When it seemed to reach the aforementioned spongy stage, I transferred it to a bucket with a lid:
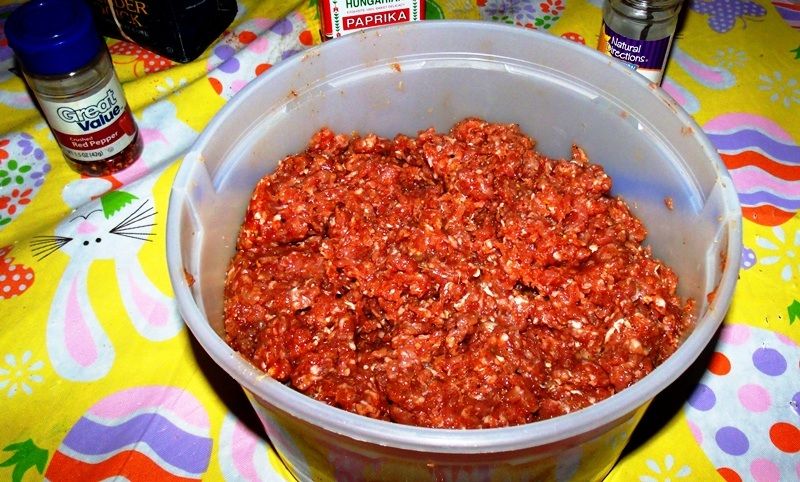
I covered the bucket and placed it in the refrigerator overnight in order to allow the cure to work into the sausage. It smelled great, and I was eager to let the flavours marry for the next day or so, in order to discover what the final result would be.
The next evening, I washed, dried and laid out the parts to my #10 Porkert grinder, manufactured in the old Czechoslovakia:
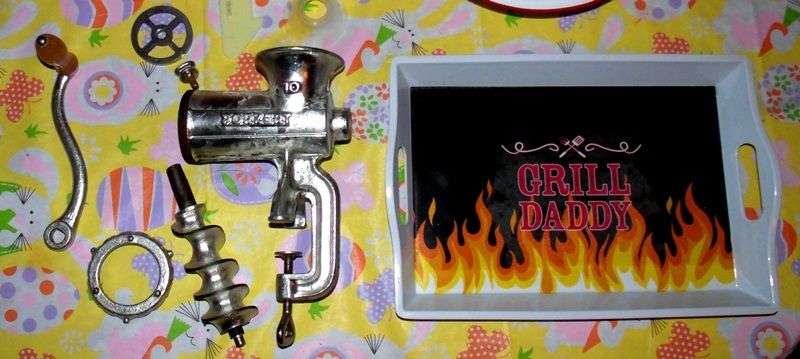
The Porkert comes with parts and attachments for stuffing three sizes of sausage; I chose the largest size, suitable for hog casings (črevá), which would be the traditional vessel for holding all of this Slovak flavour:
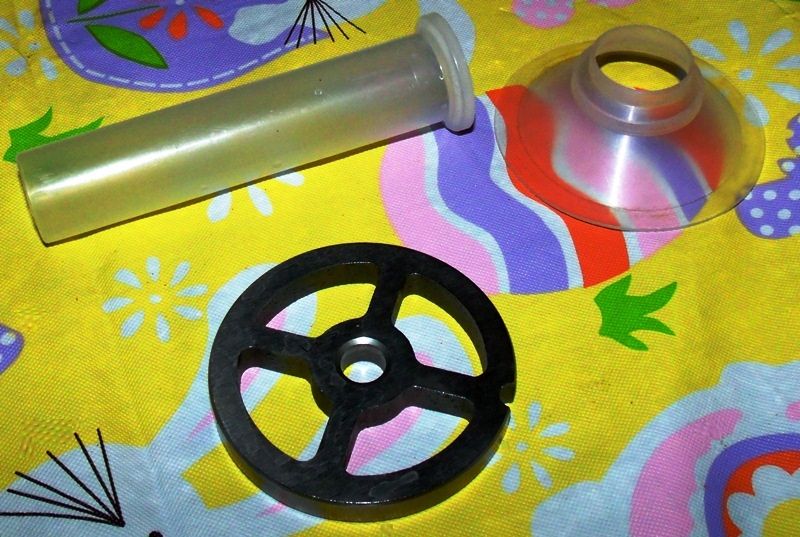
I then set up the grinder with the stuffing attachments:
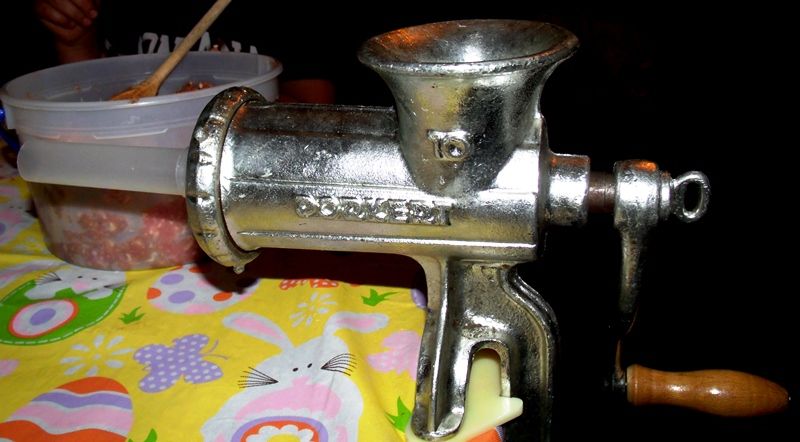
There are many ways to stuff sausage into casings, but this is one that I enjoy quite a bit, as it allows me to get down to the fundamentals of the process. A lot of folks use a dedicated sausage stuffer, and this item is on my “wish list” for the future.
Meanwhile, I had earlier taken out some hog casings to soak in warm water:
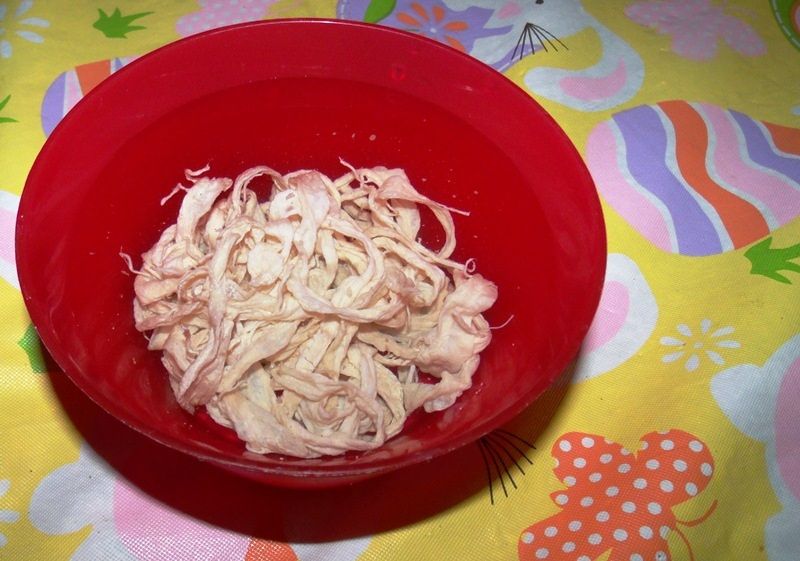
The soaking limbers them up and allows them to stretch a bit so that they can be fitted onto the grinder attachment and stuffed with the sausage.
Speaking of the sausage, here is how it looked after about 24 hours of chilling in the refrigerator:
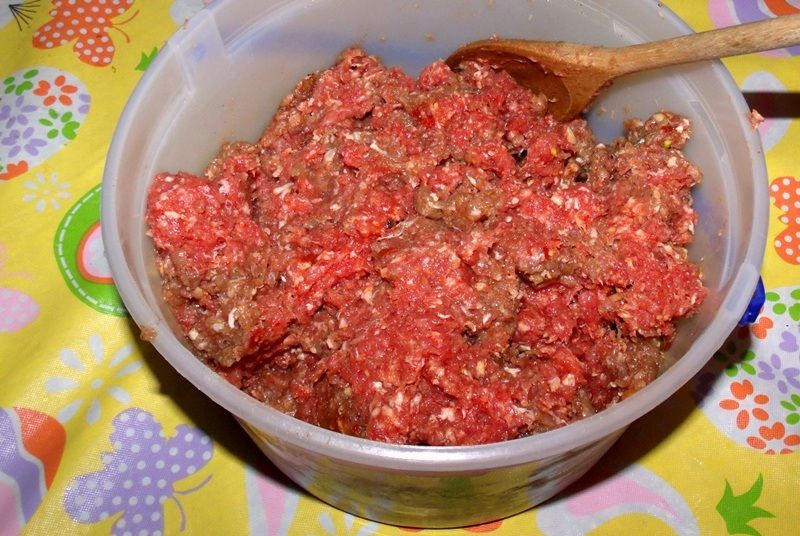
You see some brown areas here, but this is normal; I don’t fully know the science behind it, but it has to do with air and oxidation of the surface of the meat. In any case, the aroma wafting up from the bucket was really something - I was able to identify many of the individual components, even as they all melded together in wonderful harmony. This was definitely the beginning of something special! The garlic, beer and paprika especially played off each other very well, filling the room with the promise of good things. Equally important, the colour was simply beautiful, a nice, rich red that was a testament to the high-quality Hungarian paprika that I used. The sausage might have been just a little more "wet" than it needed to be, but not by much, and a can of beer seemed about right for this 4-pound batch of sausage.
This was my third time using the Porkert grinder to stuff sausage into casings; the first time was with a fresh Swedish potato sausage:
foodsoftheworld.activeboards.net/potatis-korv-fr-sankta-lucia-och-julafton_topic2970.html
The second time was with the cooked Slovak liver sausage known as jaternica or hurky that I mentioned earlier:
foodsoftheworld.activeboards.net/jaternica-also-known-as-hurka_topic3938.html
This klobása is the first time that I fed a cured sausage into the casings that is intended to be smoked, and while I was somewhat familiar with the process, I don’t mind admitting that I was filled with anticipation and eager to see how things would turn out. With that,.I slipped a casing onto the attached feeding tube, then I loaded the grinder up with the sausage and began to turn out some beautiful Slovak goodness, running the sausage through the grinder and into the casing:
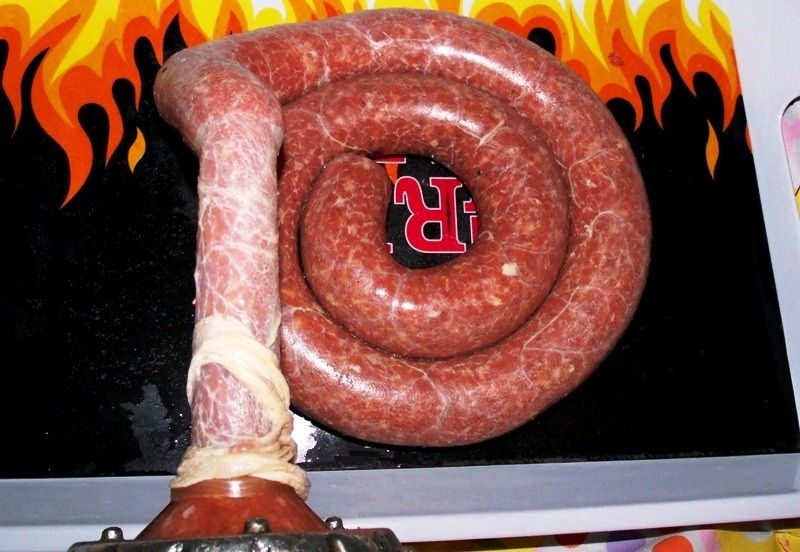
The hog casings that I used have little white “strings” on the outer surface; this does not affect the sausage, but for presentation purposes, many people turn them inside out, using a tricky maneuver that involves running water through the length of the casing as you turn it in on itself. It is not a difficult concept, but it does take a little coordination and self-training. I decided to use this method for these sausages and do agree that it results in a nice look.
The stuffing of the sausage went fairly well; I only had one blow-out early on during the process, which is a huge improvement for me. I'm guessing that the blow-out happened because I failed to wet down the stuffing tube, causing the casing to get hung up on the tube without my knowledge. In any case, I simply tied the casing off on both sides of the blow-out, squeezed the homeless sausage back into the hopper of the grinder and proceeded with the stuffing.
By the time we ran out of meat to stuff into the casings, this is what we had:
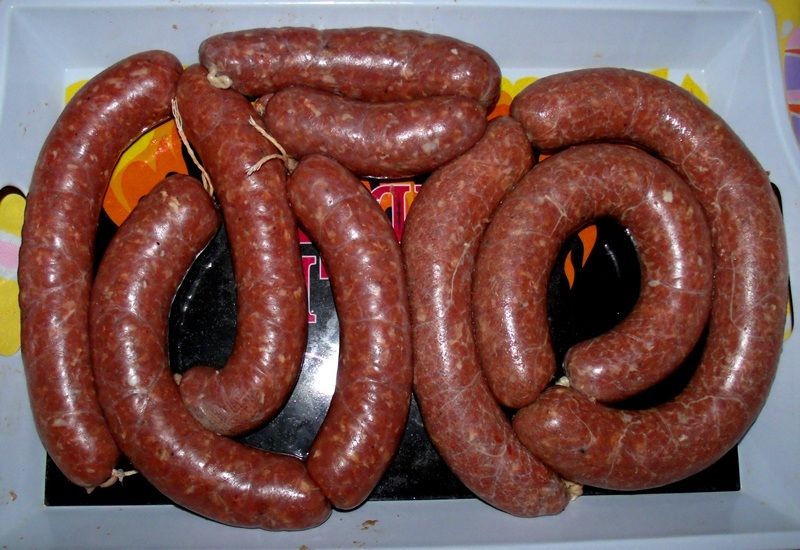
How’s that for some nice-looking sausage?
Due to my continuing learning curve vis a vis stuffing casings, my finished klobásy links were of various lengths; having said that, I have improved dramatically over previous attempts and expect to be pretty darn good at it before too long. Even better, my youngest son was an excellent helper and is learning quite a bit along the way; during this project, he took turns both at feeding the grinder and also at controlling the output. He also did very well in helping with preparation of the casings, set-up and cleanup. Now that he is 12 and old enough to hunt this fall, I'm eager to see him learn more about sausage-making traditions and techniques.
Out of 4 pounds of pork, a little more than 3.75 pounds made it into the casings. The remainder was the stuff that was "stuck" in the tube and inner workings of the grinder. This remaining 3 or 4 ounces of meat that didn't make it into the casings made a very fine test patty that I fried up for my son and myself. While it was cooking, the smell was absolutely incredible, making me wonder why anyone actually buys sausage; even if it is good store-bought sausage, I don't think it can come close to freshly-made sausage with quality ingredients.
As good as it smelled, it tasted even better. I really liked the play between the different pepper flavours (black pepper, Hungarian paprika and crushed red pepper), and was impressed with the dimension added by the fresh garlic. This is definitely a very tasty sausage; juicy and spicy - without being too hot - with a wonderful depth provided by the high-quality Hungarian paprika. I must admit, I was skeptical that 2 cloves’ worth of garlic would be enough for 4 pounds of sausage, but my concerns were proven wrong, as it seems to be exactly the right amount to work beautifully with the other flavours; you certainly know it is there, but you're not overwhelmed with it, and it seems to me that it blended into the whole very well, for a great balance. The beer was also an excellent idea; it allowed the seasonings and spices to be thoroughly incorporated into the ground pork whilst also providing another layer of outstanding, Old-World character.
At this point, a person can hang the sausage and allow the surface to dry a bit before smoking, or set it on racks in the refrigerator for the same purpose; the reason for this step is to make the sausage more receptive to smoke as well as to ensure a good colour on the finished product. For that matter, one could indeed simply package the sausages without smoking them and either cook them in the next couple of days or freeze them for later use; however, my intent was to smoke them, so I moved forward with that plan. Because I had to work early the next morning, I covered the klobásy and put them in the refrigerator, intending to hang, dry and smoke the after work the next evening.
When I was able to resume my project, I proceeded to hang my klobásy on the rack of my Big Chief smoker - but first, I looked the sausages over carefully for any air pockets, poking the few that I found and squeezing them a bit to get rid of the empty spaces. Due to the varying lengths of the links, I had to get a little creative when hanging them, in order to keep them from touching each other, which would impede smoke penetration and result in poor colour. Also, since this was the first time I had done this, I was concerned about the sausage being too close to any heat source, so I tried to tie the longer ones up high. By the time I was done fumbling my way through with the task, this is what I had:
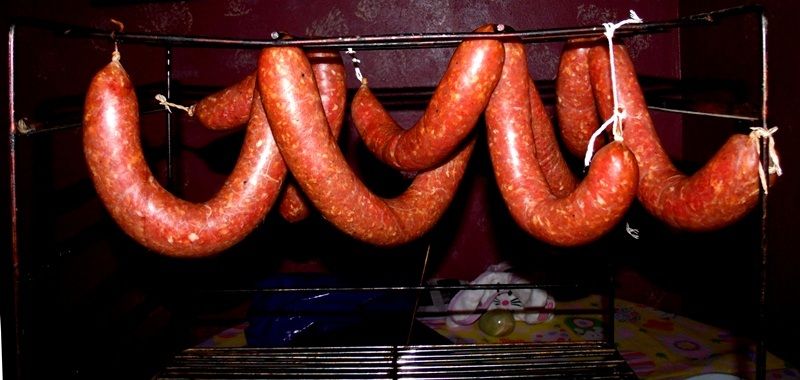
Alright, it looks a little ridiculous, but it worked! Prior to taking this photo, I had allowed the klobásy to dry a bit, for the reasons stated above. During this time, the sausages darkened into a beautiful, rich paprika-red, letting me know (hopefully) that I was on the right track.
When it comes to smoking klobásy - or any sausage, for that matter - there are a lot of woods to choose from. The truth is that you can use any wood you prefer that is safe for smoking, but I wanted to use something that would be “plausible” in Slovakia. There are several available, including apple (jablko), cherry (čerešňa), plum (slivka), apricot (marhuľa) and oak wood (dubové dřevo), which is what I decided to use; you can also use any combination of these, of course. There are probably many others that would be good for the region, but these are the ones that immediately come to mind. If for some reason you do not have any of these available, no worries! Use what you like - if you can’t decide, hickory is always a good choice.
As I said above, I used the rack of my Big Chief smoker for hanging the klobásy; however, I did not the Big Chief’s electric element did not do any smoking during this project. For the actual smoking, I used a very handy tool called the A-Maze-N Pellet Smoker, available from Tanya and Marty Owens at www.owensbbq.com. This “amazing” unit converts pellets of your favourite smoking wood into clean-burning, aromatic smoke that is perfect for projects such as this, where a cool or cold smoke is desired in order to truly infuse the meat with smoke without heating the sausage too quickly. The Big Chief is also a good smoker for adding smoke flavouring to various meats, cheeses, sausages, jerky, nuts, fish and so on, but for this endeavour, I wanted something that smoked with a little less heat, so I only used the body of the Big Chief as an enclosure to hold the klobásy and to direct the flow of smoke and air.
To use the A-Maze-N Pellet Smoker (AMNPS), you simply fill the maze with your desired pellets, light one end of the unit and and let it slowly burn its way through the maze, sending a cool, even and flavour-filled smoke wafting up to whatever is in the enclosure that you are using. In the past, I had had a little trouble keeping it lit using other enclosures due to sporadic airflow, so this seemed like a good time to try a couple of experiments. The first was to use the Big Chief as an enclosure, since its design allows for efficient airflow. The second was to line the bottom of the A-Maze-N smoker with very small pieces of pulverised charcoal from a briquette:
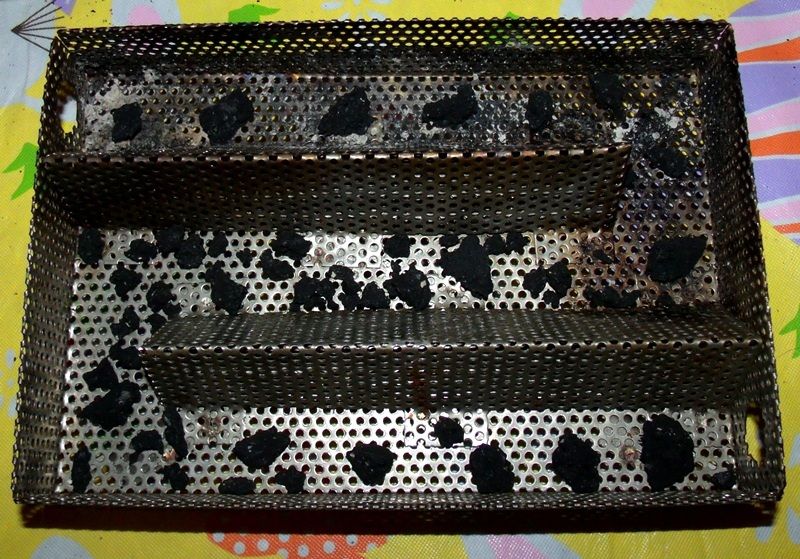
The idea here is to provide a few pockets of higher heat in order to help keep the pellets lit; it seemed to work well, since the AMNPS stayed lit throughout the entire maze.
Next, I filled the AMNPS with pellets and lit one end in order to get the smoke started:
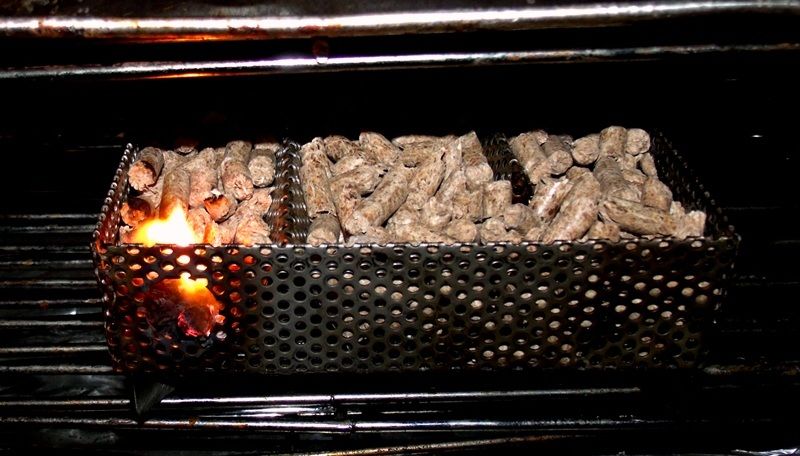
Once it was burning well, I blew the flame out and smelled the sweet, outdoorsy oakwood smoke as it began to waft its way up from the unit. It seemed to be performing exactly as advertised, so I placed it at the very bottom of the frame of my Big Chief, where a drip pan would normally be located. In order to evenly dissipate the smoke (and also the little bit of heat) from the AMNPS, I placed an overturned foil sheet pan with holes in it on the bottom smoking rack of the frame of the Big Chief:
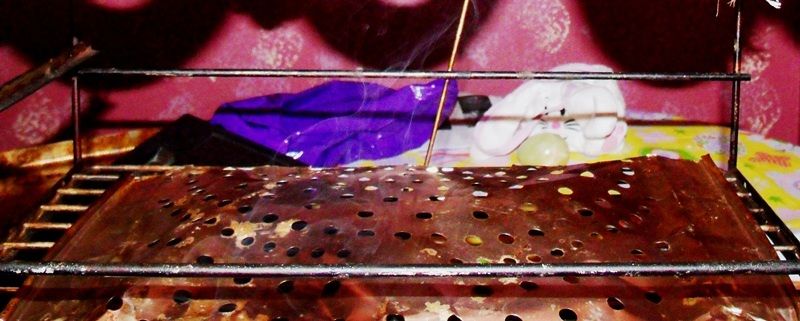
If you concentrate on the purple bag in the background, you can see how this breaks up the smoke - here’s another view:
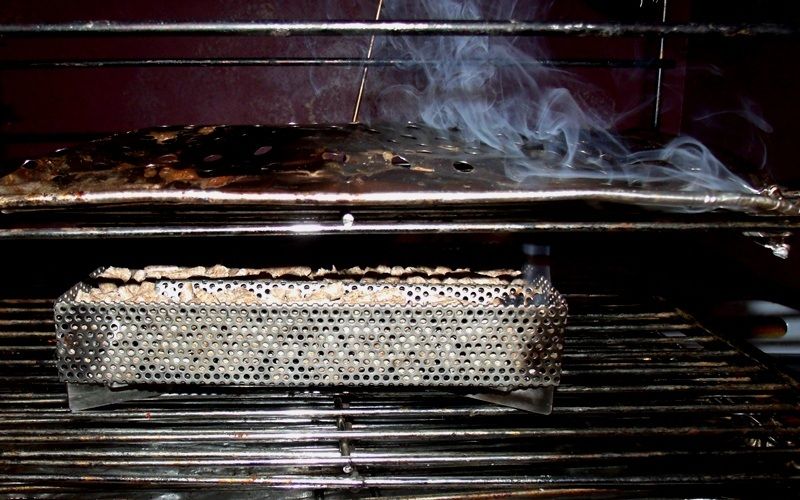
I then carried the frame outside, set it into the outer shell of the Big Chief and put the lid on so that it could do its thing.
I stayed up for a while, checking on the Big Chief now and then in order to make sure that the AMNPS was still putting out smoke. After four hours, I was tired and ready for bed, so I checked a final time:
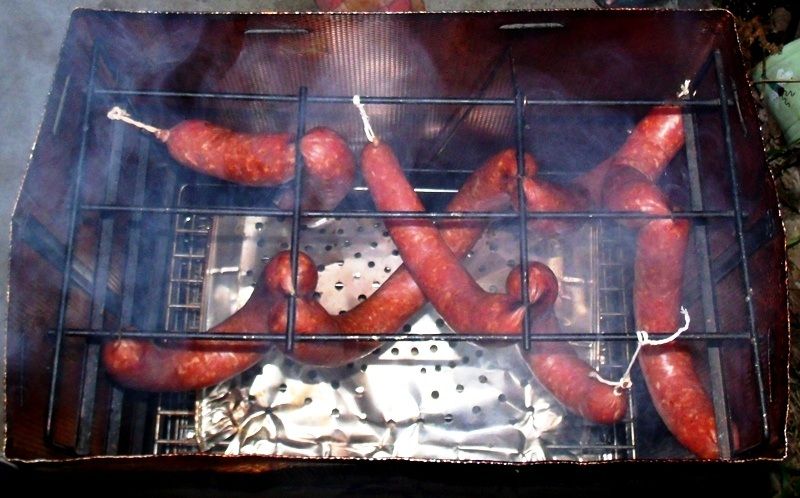
The smell of the smoke was really nice - perfect for this sausage, I think - and the AMNPS was performing beautifully, so I turned in for the night as it continued to impregnate my klobásy with the sweet, aromatic dubové drevo dym.
The overnight temps were below 40 until morning. or nearly all of it, and never got any higher than 42, which is what the temperature was when I woke up the next morning. Because I was sleeping through most of the process, I do not know what the total burn time was for the pellets in the AMNPS, but I do know that a) it stayed lit 4 hours straight with no trouble and b) when I woke up the next morning it had burned completely.
I was in a hurry because I had to go to work, so I wasn’t able to snap a photo; however, they looked pretty much like the above picture, except it was daylight and there was no smoke. In fact, they looked absolutely great; they had a nice colour and had dried just a little, transforming them into a nice, deep reddish-brown. The aroma from the oakwood smoke lingered very nicely, and If I would have had time, I probably would have grilled one of the smaller ones up and served it with a couple of eggs and toast for breakfast - but alas
One thing that I did notice was that I was right to be concerned about the klobásy touching each other during smoking. There were a couple of small spots where the links had touched each other up near the rack while hanging, and I noticed that those spots were much more pale than the rest of the areas on the surface of the klobásy. This is an appearance problem only, and does not affect the quality or flavour, but in the future, I'll use a dowel or broom stick so that they are not able to touch themselves or each other as they drape over. For this project, the spots were so small that I was certainly not going to worry too much about it; besides, in the “bringing up to temperature” and subsequent "bloom," the issue seems to largely take care of itself.
Before leaving for work, I removed the klobásy from the Big Chief and placed them in the refrigerator, until I could get home and deal with them. If you end up doing this, be sure to not wrap your sausages in plastic or cover them; simply place them on a rack and in the refrigerator, perhaps wrapping them in paper towels if you want to. The reason for this is that they tend to release some moisture and there can be come resulting discolouration on the surface of the sausages if the moisture gets trapped in with the sausage; it doesn’t matter much from a taste standpoint, but it does affect the appearance, similar to the circumstance described above.
When I got home from work, I prepared myself for the final phase of this project. I laid out the klobásy on an oven rack and put them in the oven on the lowest setting, which for my oven is 170 degrees. As the klobásy cruised along on their journey to an internal temperature of somewhere in the mid-150s, I checked them periodically and watched their progress as their colour darkened into a beautiful brick red; I also noticed that they swelled a little as they heated up, which is to be expected. Throughout this time, my youngest son and I were really loving the smoky aroma that was rolling around through the house, and we decided that we would use the smallest klobása - which had a temperature probe stuck into it - as a test subject when it reached temperature.
And just what is this temperature that they are supposed to reach, you ask? Well, most sausage “experts” put that goal at 152 to 155 degrees; so I accepted 155 as my target. The reason for this was so that if my test sausage reached 155 in the middle of its thickest part, I would know that the rest of the sausages also reached at least 152 degrees, which would ensure that they would be safe and “ready to eat,” if desired.
As the klobásy came closer this this “finished” temperature,” they swelled a little more and began to sweat a little fat, which is indeed normal. By the time my “test sausage” reached 155 degrees, here is how they looked:
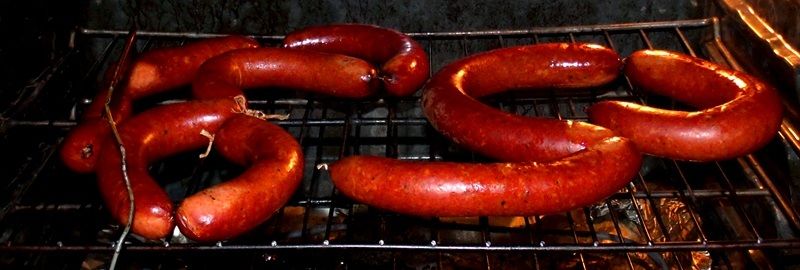
I think I did this right - or very close to it!
At this point, I immediately shut off the oven and removed the klobásy to a sink full of ice-cold water for a few minutes in order to stop the cooking process. I then drained the water and hit theklobásy with a shower of cold water:
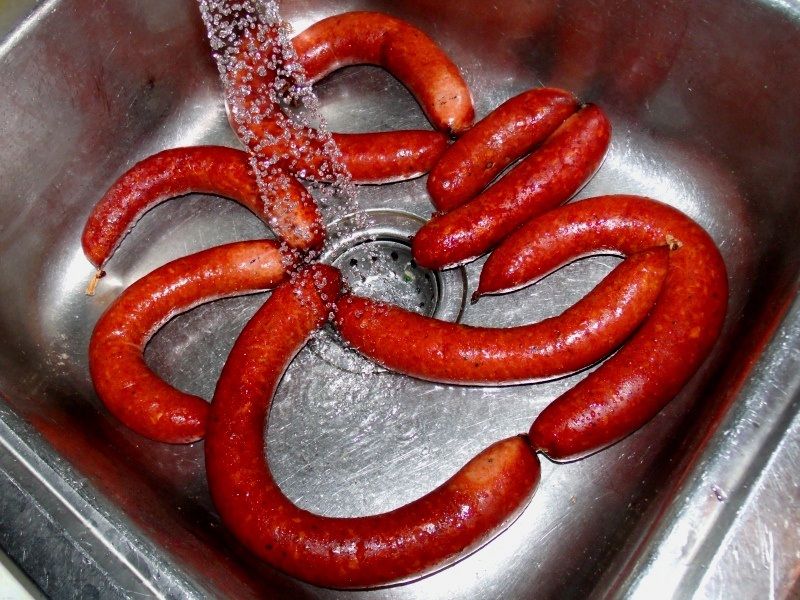
Once I was sure that the klobásy were not cooking any longer, I gently dried them with paper towels; then, I then put them back on the racks of the rapidly-cooling oven to continue drying overnight and “bloom” to the colour that I was looking for. In theory, a person could hang them at room temperature and allow this process to happen for several days, but the oven racks were convenient, so I used them. The klobásy looked great, smelled great and and were getting more enticing by the minute.
After working on this project for so long, the rich and smoky aromas of the klobásy were simply too much to endure any longer, so I decided to sample the smallest klobása, which had been used to track the internal temperatures as they heated. I cut it loose and pan-fried it, first poaching it for a few minutes in a bit of water:
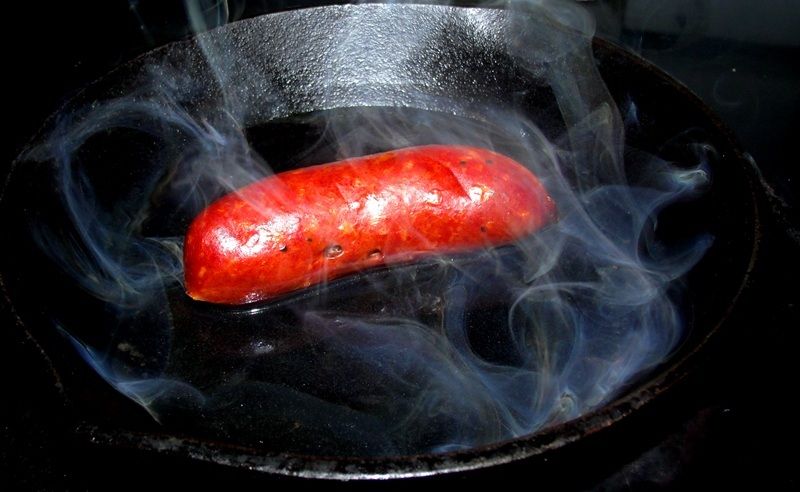
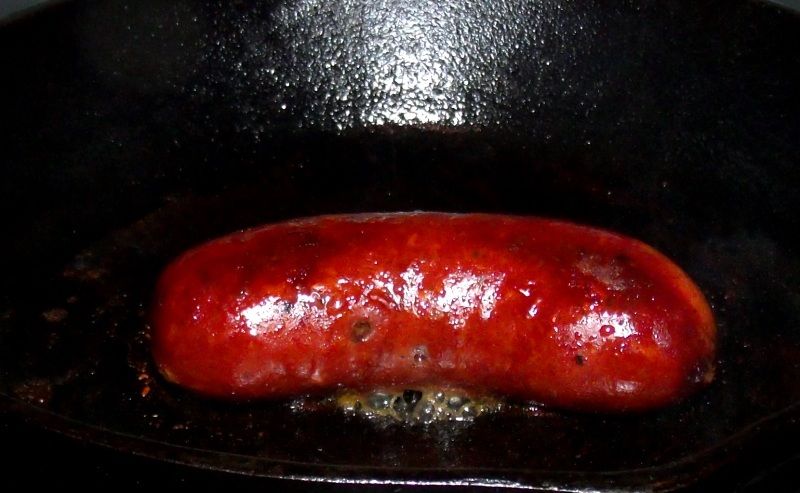
As the cast iron pan heated, I let the water boil away so that the klobása could begin frying until it was nice and crusty-browned on both sides:
When the klobása was finished, I cut it up and gave it a try, sharing it with my son, who had been such a tremendous help during the project:
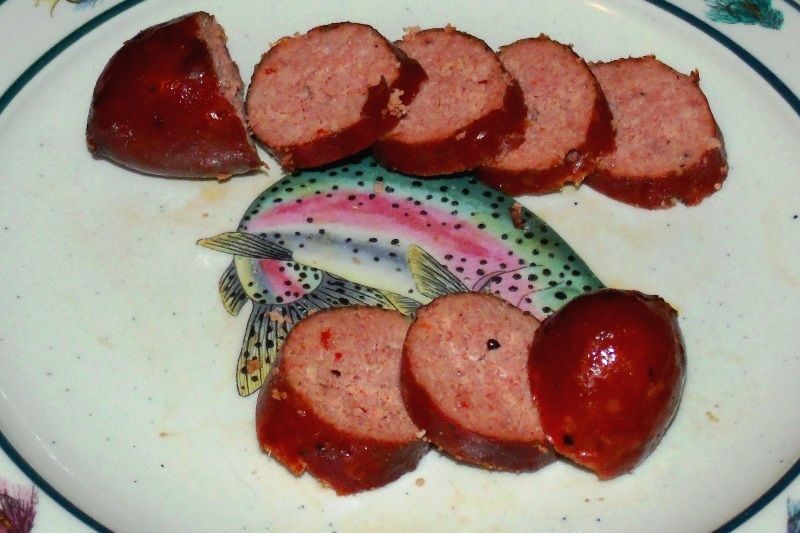
I am happy to say that it tasted absolutely delicious! All of the flavours mentioned above dealing with my "test-fry patty" were present, plus a few that I assume developed through the smoking process. The wonderful balance between the spices and the garlic remained, and the oakwood smoke gave an amazing outdoorsy aroma - a terrific choice for this central-European sausage. There was also a bit of something else - perhaps from the beer; a full-bodied depth in the flavour that was really nice. All-around, a very good sausage, and I was extremely happy with it.
The remaining klobásy “bloomed” through the night on the oven racks, and looked great the next morning. Since I was leaving on a two-day business trip, I wrapped them in paper towels and put them in the refrigerator in order to continue maturing while I was gone.
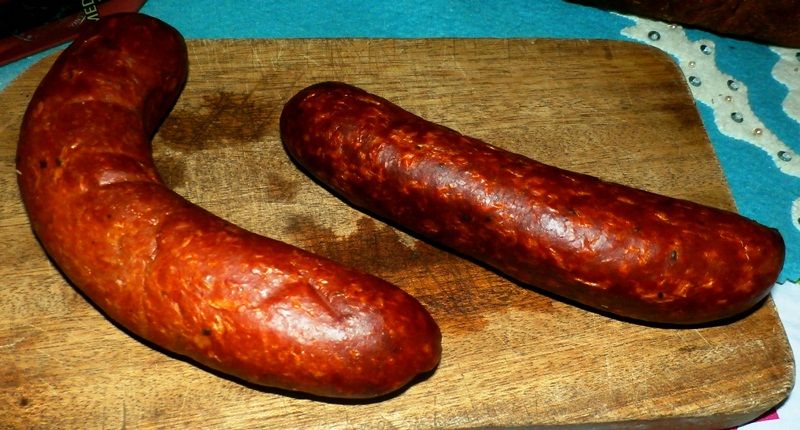
Upon return from my trip, I was eager to see how the klobásy would look. To my delight, they had gotten better, if anything:
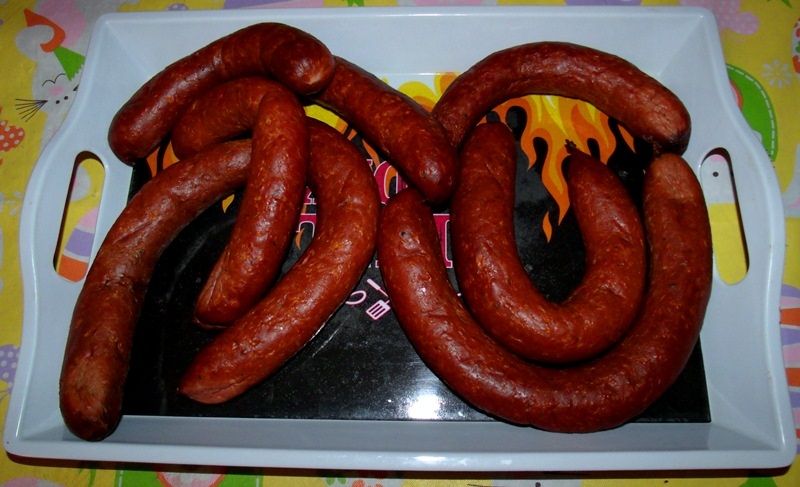
They were nice and dark - with beautiful colour - and were firm-yet-not-hard to the touch. They had a great aroma; a melding of spicy and sweet-smoky with rich undertones from the garlic and beer.
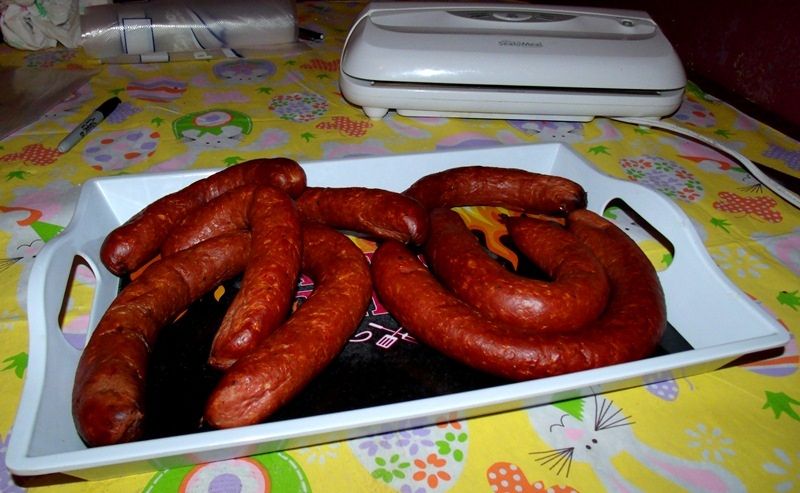
When the sausage was freshly made, these aromas were very assertive and wonderful in their own right, but the smoking and drying seemed to have the effect of lending them a mellower, deeper, more mature quality. It reminded me of the difference between a new and an aged wine or cheese.
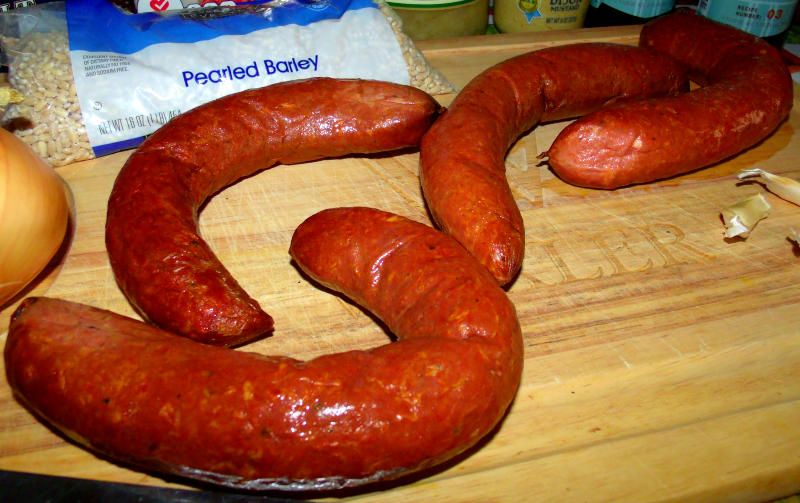
Since I had sampled the smallest klobása on the night that I brought them up to temperature, I was left with eight klobásy of varying lengths. After a few moments' consideration, I elected to arrange them into of groups - each of two klobásy that were close to each other in length. Once this was done, I vacuum-sealed them:
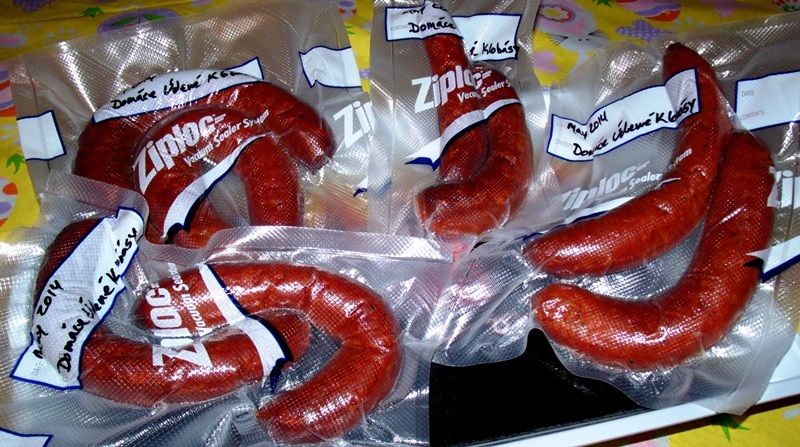
From there, they went into the freezer, awaiting the time when they will be called upon to provide a wonderful meal for the family.
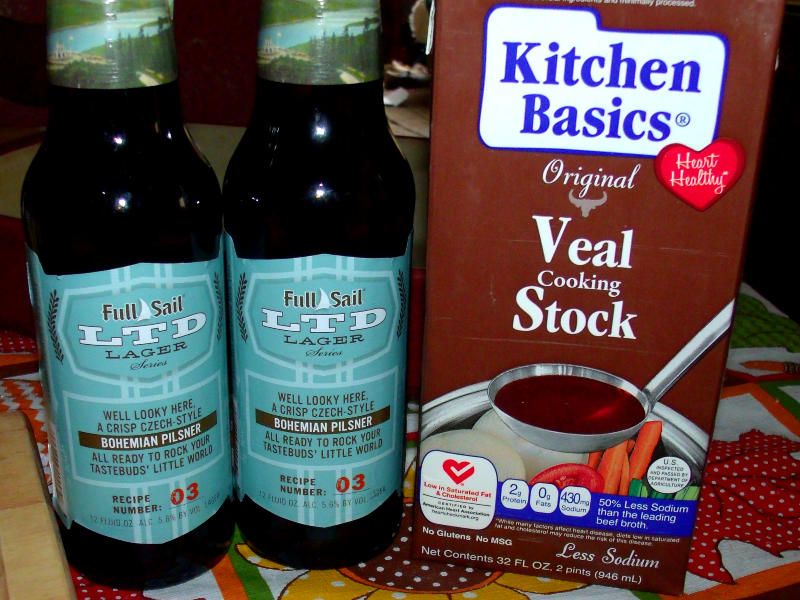
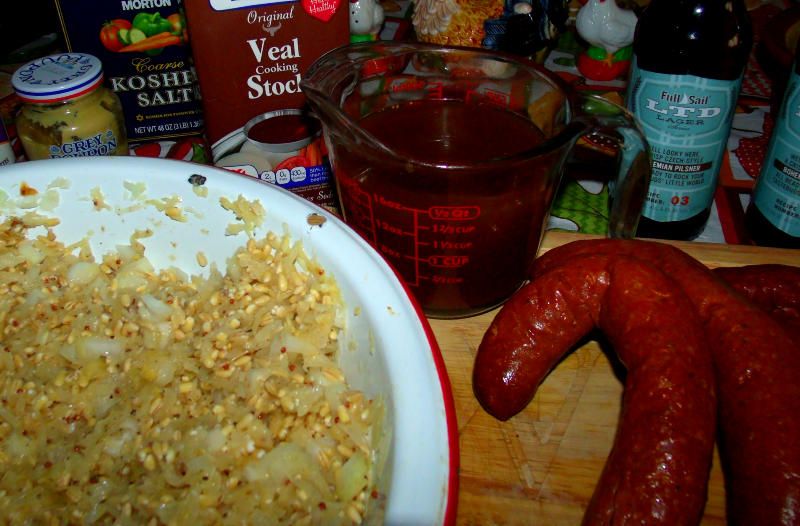
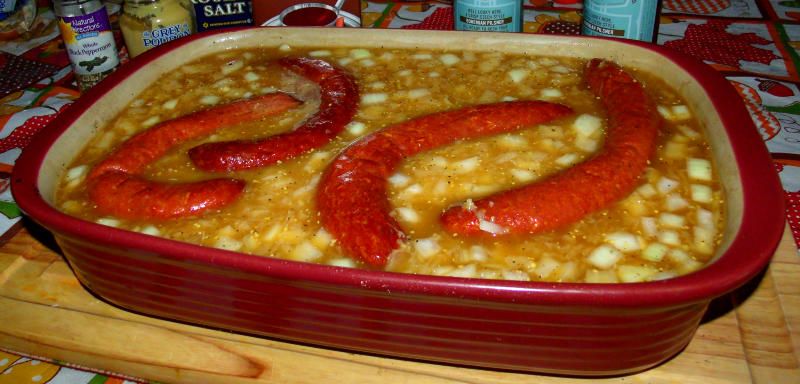
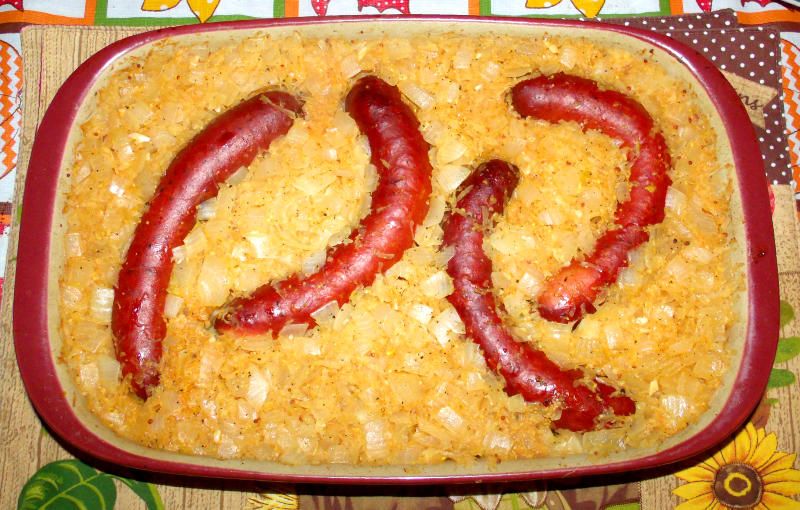
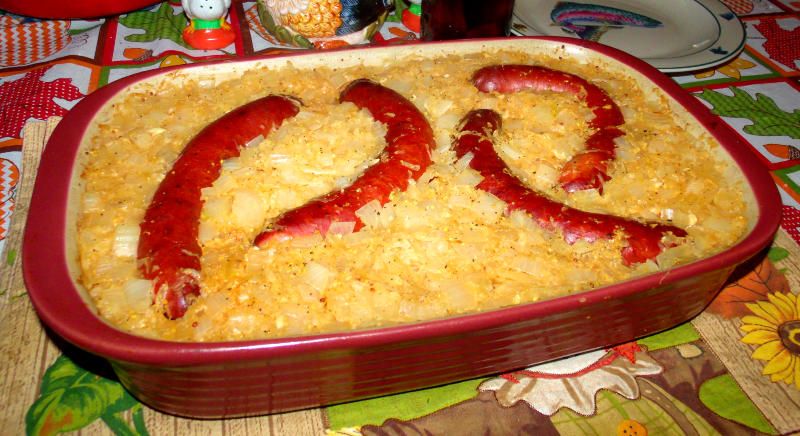
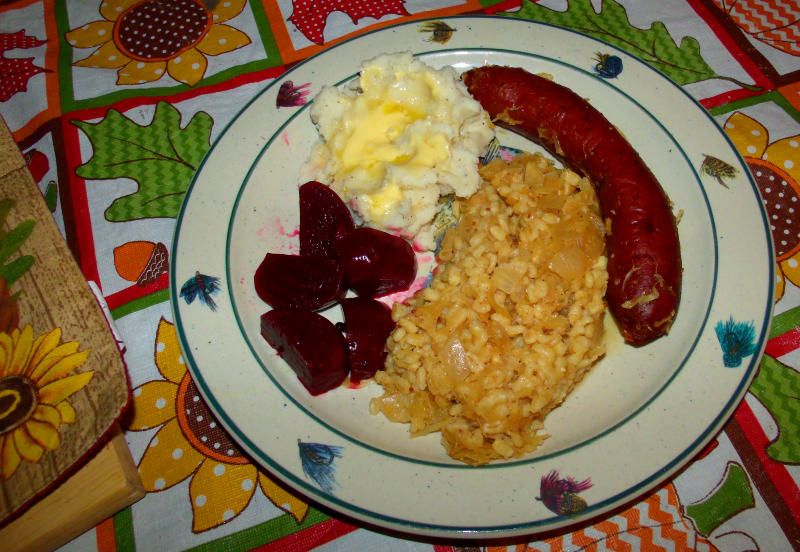
As far as how to use these klobásy, I have a few ideas. The package with the two largest ones will probably be used for a dish that I truly enjoy, a sausage, barley and sauerkraut casserole that is always a favourite in our house:
foodsoftheworld.activeboards.net/wurst-und-gerste-schmortopf_topic3835.html
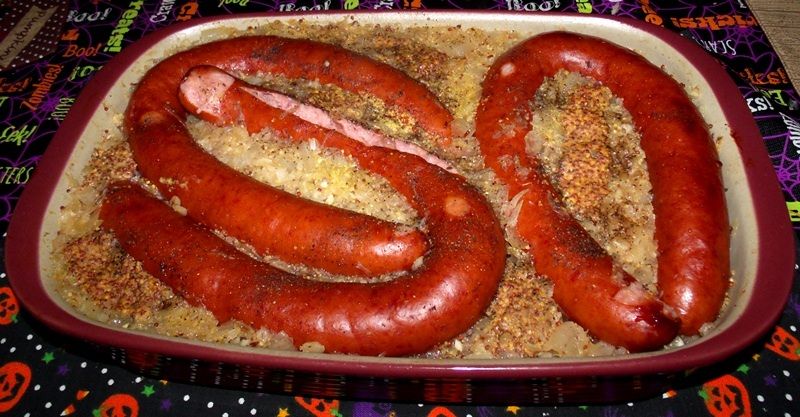
As far as I know, this is not strictly a Slovak meal, but it is composed of ingredients that are definitely a part of Slovak life and it is a dish that could easily be plausible there.
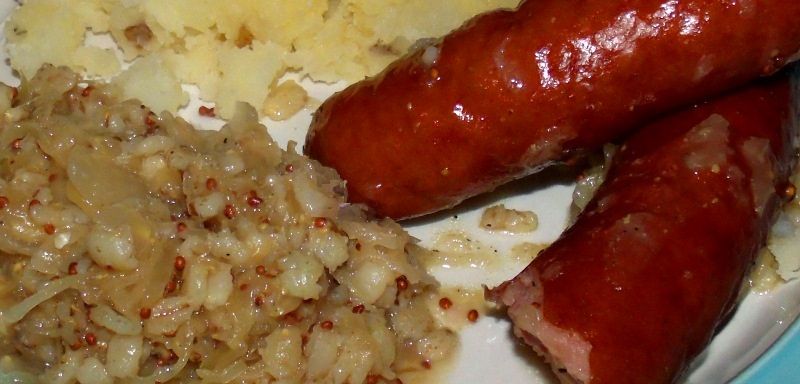
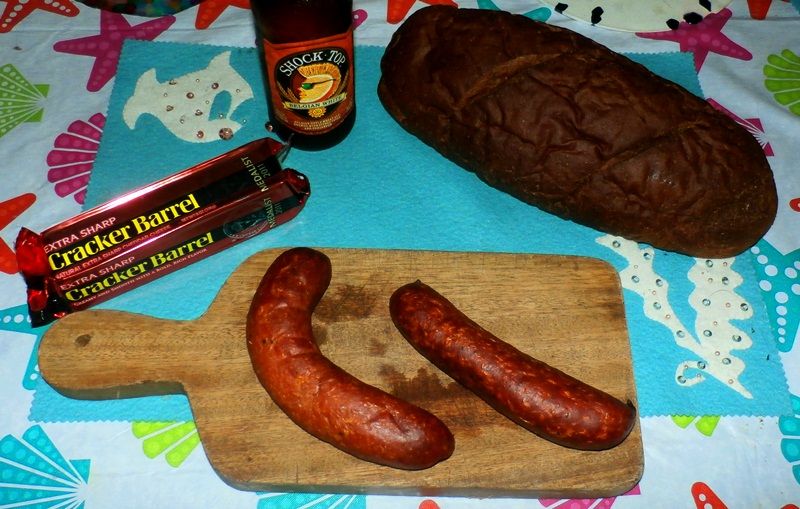
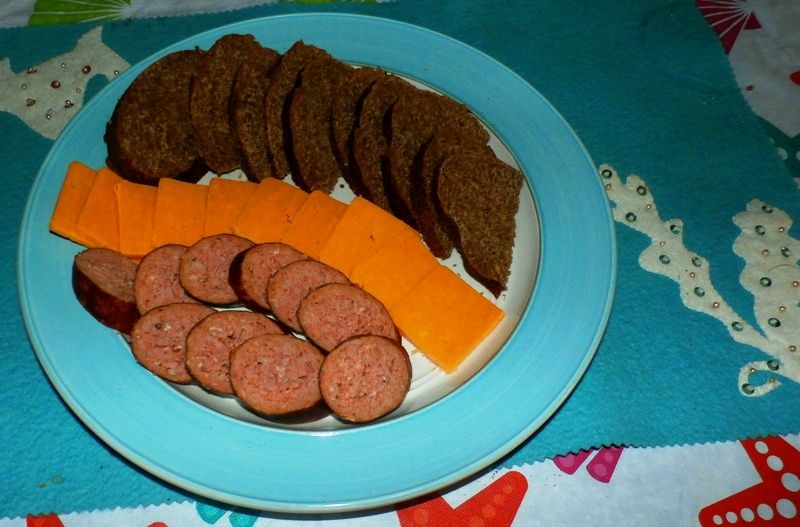
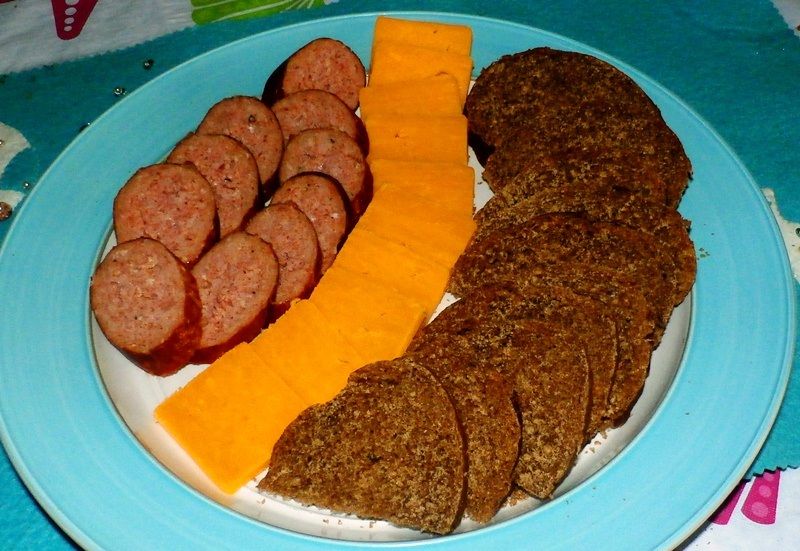
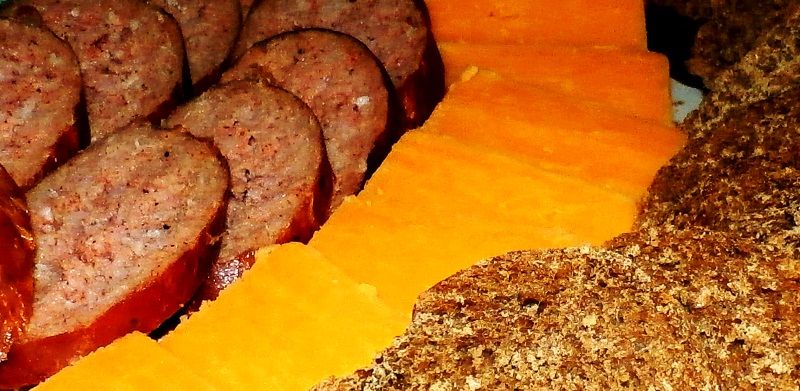
The two packages of medium-sized klobásy will most likely be used for grilling sometime this summer, while the package containing the smallest ones will probably be sliced and sampled with cheese, bread and beer, a favourite preparation in Slovakia and other countries of the region.
I think that this project was - overall - a great success, especially in that I was able to learn quite a bit of new things; that the sausage looks and tastes great is a bonus! As a final note on this endeavour, I ‘d like to share a quote that I came across while I was making my first klobása; I think that it sums up projects like these very well:
Simplicity is the ultimate sophistication. ~ Leonardo da Vinci
I've seen examples of this truth so many times in life, not only in my cooking ventures, but nearly everywhere - at work, at home, in nature and in my spiritual life. Too often, it seems that many of us - myself included - fall into the trap of believing that what we are involved with at the time has to be an elaborate, gussied-up house of cards that may look or sound impressive, but in reality is far removed from fundamental truths and as such is very fragile. I can't count the number of times I've fallen prey to this notion and most times it has either come back to bite me or - even if it was technically a success - the returns were vastly out of proportion with the investment. Yet in nearly all cases when I stripped my efforts down to concentrating on and doing my best to practice the fundamentals, I was never disappointed with the results, and in fact I can say that I really never went wrong. Further, the lack of frivolity and nonsense allowed me to experience the true, unadulterated honesty that comes with an adherence to what made something good in the first place, without distractions or over-complications, and gave me the liberty to truly see where the real and significant possibilities could actually be found.
Such is the case with this Slovak klobása - It would be easy to tie in a plethora of add-ons and "improvements," and I am sure that most would even have tasted pretty good. But by staying true to the fundamentals and keeping it simple and in the right proportions (I resisted the temptation to add a little of this or an extra jolt of that), I was able to experience a really balanced and genuine rendition of the same sausage that has been experienced in my wife's ancestral land for hundreds of years. Salt, pepper, garlic, paprika, red pepper - a bit of caraway if you'd like, and a cure if you're smoking it - simple indeed, but such a simple combination has its own clean, honest credentials. Functional, yet delicious; disciplined, yet versatile. Sausage prepared this way is now ready to be used for anything that it might be called to do, yet it will also be able to speak for itself and stand on its own merits.
This, to me, is a little deeper than simply saying, "If it ain't broke, don't fix it;" such a constraining phrase closes doors and puts a limit on opportunities for growth. Instead, when taking da Vinci's advice to heart, my experience is that possibilities are expanded and true understanding really takes place, providing a fundamental foundation for taking a few basics and applying them not only to the task at hand, but also for future endeavours. While I was making and sampling this klobása, I found myself once again experiencing the significance of zabíjačka and what it means to the humble families that lay up meat for the cold months not simply to survive, but also to live their lives. That experience alone was worth the effort, and I got some delicious sausage, to boot. Wisdom such as this can indeed be passed down, but such lessons don't carry as much weight when learned by rote; it must be experienced to be truly appreciated.
With that, I do hope that you are inspired to give this sausage a try; it’s easy as can be, and it is as good as gold. I hope that this pictorial has contributed to an expanded awareness one of the best cuisines out there, and am very glad to share it with everyone. As always, I welcome questions, comments, thoughts and opinions, and if you do try this, please be sure to let me know.
Dobrú chuť!
Ron
Domáce Údené Klobásy
If you have been a member of this forum for any length of time, you know that my love of Slavic cooking has been inspired by my wife; The Beautiful Mrs. Tas has a rich heritage thanks to her Slovak roots, and as we know, the soul of any heritage is in its food - especially the “common” or “peasant” foods of those people who live close to the land and derive their living from it.
To me, the event of the pig slaughter (zabíjačka, in Slovak) is one of those timeless things that truly defines peasant cooking; it is a practice going back hundreds of years - and even further - that borders on ritual, meant to lay meat over for the winter.

Photo Credit: en.wikipedia.org/wiki/Pig_slaughter#mediaviewer/File:Medieval_pig_slaughter.jpg
Indeed, one of the most common food elements of central and eastern Europe is also a natural consequence of the pig slaughter: sausage. It is amazing to see the dozens - possibly even scores - of different varieties of sausage that can be found even within a relatively small region. It is also not difficult at all to understand the underlying reasons that this is so; for centuries, sausage-making has been a practical and often creative method to ensure that every part of an animal that can be considered remotely suitable for food becomes just that: sustenance, able to be stored and kept throughout the year so that it might be used - and even enjoyed - during times of plenty and times of little alike.

Photo Credit: en.wikipedia.org/wiki/Pig_slaughter#mediaviewer/File:Pieter_bruegel_il_giovane,_autunno_03.JPG
In our modern, refrigerated age, it can be difficult to appreciate the fundamental importance of this simple food; cured meats - including sausage - are borne out of the need for country folk to get through the cold months. For these people, it was not simply something done as a hobby in their spare time; it was survival. It is also pretty incredible how they managed to get so much flavour into such a simple and essential practice, but the proof is undeniable, once it is experienced.

Photo Credit: en.wikipedia.org/wiki/Pig_slaughter#mediaviewer/File:Sausage_making-H-1.jpg
The traditions carry on to this day, much to the credit of the country folk in the rural areas who still depend on the pig slaughter in order to make it through the winter and other lean times.
This Slovak homemade sausage (domáce klobása) recipe is one that I've been wanting to try for quite some time:
www.slovakcooking.com/2010/recipes/sausages
Even though this recipe for klobása is not directly from my wife's grandmother, I am willing to bet money that she enjoyed something very, very much like it during her childhood in Slovakia - which was part of the Kingdom of Hungary in the Austro-Hungarian Empire at the time - and even in her adult years after her family emigrated to the United States and settled in Central Montana. I believe this because traditions such as zabíjačka die hard; the area where her family settled is filled with descendants of immigrants who came to work the coal mines southeast of Great Falls, and Slovak names are on a high percentage of the mailboxes in the five tiny villages in the area known as "The Gulch." I once saw a photo from the 1950s showing a whole hog being slowly roasted over live coals - an event that is a direct descendant of zabíjačka and still happens in my wife's hometown near the end of each summer.
This recipe is comes from an outstanding blog devoted to the preservation of Slovak cuisine, with special attention to “the grandmother recipes” that really define the traditions of Slovak cooking:
www.slovakcooking.com
The gentleman who authors the blog, Luboš Brieda, is a true class act - a man dedicated to sharing Slovak heritage with the world, and I'd like to take this opportunity to thank him for posting his grandmother's recipe for klobása (plural klobásy). Last autumn, I tried his family's recipe for a traditional Slovak liver sausage that is made during (zabíjačka); this sausage, known as jaternica or also hurky, was excellent, especially when removed from the casings, pan-fried as a hash and served with eggs and toast. It's normally made with pork, but I made mine with a combination of deer and pork, and it was outstanding. If anyone is interested in learning about or trying this, I posted a full pictorial here:
foodsoftheworld.activeboards.net/jaternica-also-known-as-hurka_topic3938.html
Making klobásy is simple as can be; yet the results have been nothing short of incredible. We often hear of Polish kiełbasa and Hungarian kolbász, but this version from Slovakia, which falls right between Poland and Hungary geographically and culturally, is definitely a worthy variation, deserving very much to be tried by anyone who is interested in traditional sausages of central Europe.
Not long ago, I had the good fortune to have exactly 4 pounds of freshly-ground fresh pork (mletého bravčového) drop into my lap, which happens to be the precise amount called for in this homestyle Slovak sausage recipe. Also - by some miracle of kismet - I had nearly all of the rest of the ingredients for this at home, including some really nice Hungarian Paprika. The only thing in the original recipe that I was missing was the caraway (rasca), which isn't too big of a deal, for reasons that will be explained below.
Note: In this pictorial, I will take you step-by-step through the entire process that I went through in making homemade smoked Slovak klobásy , with plenty of photos and explanations of why I did what I did; those of you who know me know that I tend to go into a lot of detail, but the truth is that the process is much simpler than it might sound. If you need any clarification, just ask - and answers will be provided!
For clarification purposes, it’s good to know that pretty much any variation of smoked sausage will follow these 10 steps:
1. Clean, sanitise and chill your equipment.
2. Grind your chilled meat.
3. Add your curing agent and other ingredients (if not smoking sausage, adding a cure is optional, but not required).
4. Cover and chill the mixture overnight.
5. Stuff the sausage into casings (if not smoking sausage, skip directly to step 10).
6. Allow the surface of the sausage to dry before smoking.
7. Smoke the sausage in your chosen wood, then bring the sausage “to temperature.”
8. Immerse the sausage into an ice-water bath to stop the cooking process.
9. Hang the sausage to dry and “bloom” until it reaches the colour and “dryness” that you are looking for.
10. Package your sausage for long-term storage.
As you can see, there isn’t much here that is complicated, so let’s get started! Here is everything that you need for fresh, delicious Slovak klobása:

4 pounds of freshly-ground pork (mletého bravčového)
1.5 teaspoons kosher salt (soľ)
2 to 3 crushed and minced cloves of garlic (postrúhaný cesnak)
2 teaspoons of freshly-ground black pepper (mleté čierne korenie)
4 teaspoons of sweet Hungarian paprika (sladká paprika)
Optional: 1 teaspoon of crushed red pepper (štipľavá paprika)
Not pictured: 1 scant teaspoon of caraway (rasca)
Klobásy can be enjoyed fresh or smoked. For smoking the sausage, one needs a couple of extra ingredients:

The first is a curing agent, the second is a liquid of some sort, to help ensure that the curing agent is distributed throughout the meat. There are a few curing agents out there, but the one I had on hand was Tender Quick, by Morton:
www.mortonsalt.com/for-your-home/culinary-salts/meat-curing-and-pickling-salts/178/morton-tender-quick/
It’s easy to use and pretty much fool-proof when used according to the package directions. For the liquid, I chose to use common beer (pivo), a beverage that is as popular in Slovakia as anywhere else. One can, if one chooses, use water instead - or wine, or any number of other liquids.
Getting started, I measured my ingredients according to the amounts listed above:

Clockwise from the top: crushed-and-minced garlic, black pepper, kosher salt, Hungarian paprika and crushed red pepper flakes.
If I would have had caraway, I would have included it; but I didn’t have any, so I wasn’t able to. This is not too big of a deal since the amount used is very small. It is probably just as well; my Slovak wife insisted that her straight-off-the-boat Slovak grandmother had never ever cooked with caraway at all. Because of these factors, I didn't worry too much about leaving it out; it seems to be good either way, depending on local or family tastes. If you do have some on hand, I would suggest using it in order to get a feel for the flavour.
A note on the paprika: Slovakia used to be part of the Kingdom of Hungary; as such, good paprika is abundant there. My advice when making klobása is to use the best Hungarian paprika that you can find; it is true that you can find plenty of bargain paprika at the local dollar store, but you will not be as happy with the results. Since you are reading this, I am assuming that you have more than a passing interest in the cuisine of the region, so please, do it right and use the good stuff!
A note on the garlic: The recipe calls for 2 cloves of crushed garlic and cautions against using “too much;” since garlic cloves vary in size, I would suggest starting with the old adage that 1 clove of crushed and minced garlic is equivalent to half of a teaspoon, then carefully add a little more if your recipe looks like it will benefit from it. By this methodology, the 2 crushed and minced cloves of garlic called for in the recipe would equal 1 teaspoon. Measuring out my crushed cloves, I ended up adding just a little less than 3 cloves of the minced garlic that I had, and this seems about right. One could add a little more, but I would caution against over-doing it as the balance can easily be thrown out; fresh garlic goes a long ways in klobásy!
As I said above, I used Tender Quick as a curing agent, since my intention was to smoke the sausages. If you don’t want to smoke the sausage, you don’t have to use a curing agent; just be sure to eat or freeze the sausage as soon as possible. You can use a cure for non-smoked sausage, if desired, but it’s not necessary. Be aware that cured and uncured (fresh) sausages will each have their own unique flavours; both varieties are good, but they are different.
If I would have had enough pork, I would have made one batch of smoked klobásy and a second non-smoked batch; but alas, this was impossible at the time, so I elected to go for smoked klobásy. If you are making smoked sausages, it is essential to use a curing agent of some kind, since the sausage will spend a lot of time in the food-safety “danger zone” between 40 and 140 degrees Fahrenheit. For sausage, the proper amount of Tender Quick cure to use is 1.5 level teaspoons per pound of meat; if you use a cure other than Tender Quick, be sure to follow the instructions for that cure, substituting the amounts and methods for the ones that I use in this pictorial. In my case, using Tener Quick, 1.5 level teaspoons x 4 pounds of ground meat equals 6 level teaspoons, or two level tablespoons:

This picture is actually a little misleading, it is a small saucer with 2 tablespoons of Tender Quick on it, but it looks like a lot more than it actually is. This brings up an important point where salt is concerned. Tender Quick is comprised mostly of salt - a carrier that the Morton company uses in order to make the process user-friendly and to help distribute the curing agents throughout the meat. Because of this, it is usually not necessary to add any salt to a recipe when making some charcuterie products such as jerky or cured whole cuts of meat - if you are using a recipe that calls for a different cure, you can simply use the correct amount of Tender Quick in its place and omit the salt entirely. For sausage, however, I’ve found that when using Tender Quick, there is not quite enough salt flavour in the sausage; if you also find that sausage cured with Tender Quick needs a little extra salt, I would suggest adding some salt to the recipe, as I did when I made this klobása. The amount of added salt that I recommend (remember that there is already some in the Tender Quick) is one-quarter teaspoon per pound; you can tweak it from there, if you want to. This recommendation does not apply to whole cuts of meat cured with Tender Quick - for those, the recommended amounts of Tender Quick are darn-near perfect as they are and no added salt is needed for whole cuts, especially when balanced with up to an equal amount of dark-brown sugar. This advice might apply to jerky, depending on the other ingredients that you use which may or may not contain salt of their own. If you use a cure other than Tender Quick, simply use the amount of salt normally called for in the recipe. It sounds more complicated than it actually is, and it is very easy to grasp the concept after a couple of projects; in the meantime, if you ever have any questions, simply ask!
Once my ingredients were measured, I was ready to make the sausage. A good practice to follow is to mix the curing agent and other ingredients into a slurry before mixing in the ground meat. This accomplishes a couple of different things: first, it ensures that the curing agent (as well as the flavours) will be evenly distributed throughout the sausage; also, the addition of liquid will often help feed the sausage through whatever is being used to stuff it into casings. As mentioned above, I chose to use a can of beer for my slurry:

Water, wine or any number of other liquids can be used, as you please.
Next, I added all of my spices and the curing agent to the beer and whisked it into a beautiful brick-red, aromatic slurry:

I often find myself at a loss for words when I try to think of adjectives to describe a project that really comes together well; wonderful, amazing, beautiful, delicious and incredible are words that I commonly use, but I am sure that so many more would fit well. For instance, when I took a close look at this mix of flavours that I was about to add to my ground pork, I was simply speechless at the colours I saw and the aromas that I was getting:

With that, I mixed the slurry into the ground pork, using an old-fashioned, hand-held potato masher in order to ensure that the flavours and the curing agents were thoroughly incorporated throughout the sausage:

It is a good practice to mix for several minutes, as the salt, cure and liquid all cause various changes in the nature of the ground meat; I’m no scientist, but I do know that as the meat becomes denatured, it tends to bind to itself better, resulting in a sausage that is more cohesive and retains moisture better. You will know when the meat reaches this stage, as it tends to become rather spongy.
And that’s how easy it is to make sausage! When it seemed to reach the aforementioned spongy stage, I transferred it to a bucket with a lid:

I covered the bucket and placed it in the refrigerator overnight in order to allow the cure to work into the sausage. It smelled great, and I was eager to let the flavours marry for the next day or so, in order to discover what the final result would be.
The next evening, I washed, dried and laid out the parts to my #10 Porkert grinder, manufactured in the old Czechoslovakia:

The Porkert comes with parts and attachments for stuffing three sizes of sausage; I chose the largest size, suitable for hog casings (črevá), which would be the traditional vessel for holding all of this Slovak flavour:

I then set up the grinder with the stuffing attachments:

There are many ways to stuff sausage into casings, but this is one that I enjoy quite a bit, as it allows me to get down to the fundamentals of the process. A lot of folks use a dedicated sausage stuffer, and this item is on my “wish list” for the future.
Meanwhile, I had earlier taken out some hog casings to soak in warm water:

The soaking limbers them up and allows them to stretch a bit so that they can be fitted onto the grinder attachment and stuffed with the sausage.
Speaking of the sausage, here is how it looked after about 24 hours of chilling in the refrigerator:

You see some brown areas here, but this is normal; I don’t fully know the science behind it, but it has to do with air and oxidation of the surface of the meat. In any case, the aroma wafting up from the bucket was really something - I was able to identify many of the individual components, even as they all melded together in wonderful harmony. This was definitely the beginning of something special! The garlic, beer and paprika especially played off each other very well, filling the room with the promise of good things. Equally important, the colour was simply beautiful, a nice, rich red that was a testament to the high-quality Hungarian paprika that I used. The sausage might have been just a little more "wet" than it needed to be, but not by much, and a can of beer seemed about right for this 4-pound batch of sausage.
This was my third time using the Porkert grinder to stuff sausage into casings; the first time was with a fresh Swedish potato sausage:
foodsoftheworld.activeboards.net/potatis-korv-fr-sankta-lucia-och-julafton_topic2970.html
The second time was with the cooked Slovak liver sausage known as jaternica or hurky that I mentioned earlier:
foodsoftheworld.activeboards.net/jaternica-also-known-as-hurka_topic3938.html
This klobása is the first time that I fed a cured sausage into the casings that is intended to be smoked, and while I was somewhat familiar with the process, I don’t mind admitting that I was filled with anticipation and eager to see how things would turn out. With that,.I slipped a casing onto the attached feeding tube, then I loaded the grinder up with the sausage and began to turn out some beautiful Slovak goodness, running the sausage through the grinder and into the casing:

The hog casings that I used have little white “strings” on the outer surface; this does not affect the sausage, but for presentation purposes, many people turn them inside out, using a tricky maneuver that involves running water through the length of the casing as you turn it in on itself. It is not a difficult concept, but it does take a little coordination and self-training. I decided to use this method for these sausages and do agree that it results in a nice look.
The stuffing of the sausage went fairly well; I only had one blow-out early on during the process, which is a huge improvement for me. I'm guessing that the blow-out happened because I failed to wet down the stuffing tube, causing the casing to get hung up on the tube without my knowledge. In any case, I simply tied the casing off on both sides of the blow-out, squeezed the homeless sausage back into the hopper of the grinder and proceeded with the stuffing.
By the time we ran out of meat to stuff into the casings, this is what we had:

How’s that for some nice-looking sausage?
Due to my continuing learning curve vis a vis stuffing casings, my finished klobásy links were of various lengths; having said that, I have improved dramatically over previous attempts and expect to be pretty darn good at it before too long. Even better, my youngest son was an excellent helper and is learning quite a bit along the way; during this project, he took turns both at feeding the grinder and also at controlling the output. He also did very well in helping with preparation of the casings, set-up and cleanup. Now that he is 12 and old enough to hunt this fall, I'm eager to see him learn more about sausage-making traditions and techniques.
Out of 4 pounds of pork, a little more than 3.75 pounds made it into the casings. The remainder was the stuff that was "stuck" in the tube and inner workings of the grinder. This remaining 3 or 4 ounces of meat that didn't make it into the casings made a very fine test patty that I fried up for my son and myself. While it was cooking, the smell was absolutely incredible, making me wonder why anyone actually buys sausage; even if it is good store-bought sausage, I don't think it can come close to freshly-made sausage with quality ingredients.
As good as it smelled, it tasted even better. I really liked the play between the different pepper flavours (black pepper, Hungarian paprika and crushed red pepper), and was impressed with the dimension added by the fresh garlic. This is definitely a very tasty sausage; juicy and spicy - without being too hot - with a wonderful depth provided by the high-quality Hungarian paprika. I must admit, I was skeptical that 2 cloves’ worth of garlic would be enough for 4 pounds of sausage, but my concerns were proven wrong, as it seems to be exactly the right amount to work beautifully with the other flavours; you certainly know it is there, but you're not overwhelmed with it, and it seems to me that it blended into the whole very well, for a great balance. The beer was also an excellent idea; it allowed the seasonings and spices to be thoroughly incorporated into the ground pork whilst also providing another layer of outstanding, Old-World character.
At this point, a person can hang the sausage and allow the surface to dry a bit before smoking, or set it on racks in the refrigerator for the same purpose; the reason for this step is to make the sausage more receptive to smoke as well as to ensure a good colour on the finished product. For that matter, one could indeed simply package the sausages without smoking them and either cook them in the next couple of days or freeze them for later use; however, my intent was to smoke them, so I moved forward with that plan. Because I had to work early the next morning, I covered the klobásy and put them in the refrigerator, intending to hang, dry and smoke the after work the next evening.
When I was able to resume my project, I proceeded to hang my klobásy on the rack of my Big Chief smoker - but first, I looked the sausages over carefully for any air pockets, poking the few that I found and squeezing them a bit to get rid of the empty spaces. Due to the varying lengths of the links, I had to get a little creative when hanging them, in order to keep them from touching each other, which would impede smoke penetration and result in poor colour. Also, since this was the first time I had done this, I was concerned about the sausage being too close to any heat source, so I tried to tie the longer ones up high. By the time I was done fumbling my way through with the task, this is what I had:

Alright, it looks a little ridiculous, but it worked! Prior to taking this photo, I had allowed the klobásy to dry a bit, for the reasons stated above. During this time, the sausages darkened into a beautiful, rich paprika-red, letting me know (hopefully) that I was on the right track.
When it comes to smoking klobásy - or any sausage, for that matter - there are a lot of woods to choose from. The truth is that you can use any wood you prefer that is safe for smoking, but I wanted to use something that would be “plausible” in Slovakia. There are several available, including apple (jablko), cherry (čerešňa), plum (slivka), apricot (marhuľa) and oak wood (dubové dřevo), which is what I decided to use; you can also use any combination of these, of course. There are probably many others that would be good for the region, but these are the ones that immediately come to mind. If for some reason you do not have any of these available, no worries! Use what you like - if you can’t decide, hickory is always a good choice.
As I said above, I used the rack of my Big Chief smoker for hanging the klobásy; however, I did not the Big Chief’s electric element did not do any smoking during this project. For the actual smoking, I used a very handy tool called the A-Maze-N Pellet Smoker, available from Tanya and Marty Owens at www.owensbbq.com. This “amazing” unit converts pellets of your favourite smoking wood into clean-burning, aromatic smoke that is perfect for projects such as this, where a cool or cold smoke is desired in order to truly infuse the meat with smoke without heating the sausage too quickly. The Big Chief is also a good smoker for adding smoke flavouring to various meats, cheeses, sausages, jerky, nuts, fish and so on, but for this endeavour, I wanted something that smoked with a little less heat, so I only used the body of the Big Chief as an enclosure to hold the klobásy and to direct the flow of smoke and air.
To use the A-Maze-N Pellet Smoker (AMNPS), you simply fill the maze with your desired pellets, light one end of the unit and and let it slowly burn its way through the maze, sending a cool, even and flavour-filled smoke wafting up to whatever is in the enclosure that you are using. In the past, I had had a little trouble keeping it lit using other enclosures due to sporadic airflow, so this seemed like a good time to try a couple of experiments. The first was to use the Big Chief as an enclosure, since its design allows for efficient airflow. The second was to line the bottom of the A-Maze-N smoker with very small pieces of pulverised charcoal from a briquette:

The idea here is to provide a few pockets of higher heat in order to help keep the pellets lit; it seemed to work well, since the AMNPS stayed lit throughout the entire maze.
Next, I filled the AMNPS with pellets and lit one end in order to get the smoke started:

Once it was burning well, I blew the flame out and smelled the sweet, outdoorsy oakwood smoke as it began to waft its way up from the unit. It seemed to be performing exactly as advertised, so I placed it at the very bottom of the frame of my Big Chief, where a drip pan would normally be located. In order to evenly dissipate the smoke (and also the little bit of heat) from the AMNPS, I placed an overturned foil sheet pan with holes in it on the bottom smoking rack of the frame of the Big Chief:

If you concentrate on the purple bag in the background, you can see how this breaks up the smoke - here’s another view:

I then carried the frame outside, set it into the outer shell of the Big Chief and put the lid on so that it could do its thing.
I stayed up for a while, checking on the Big Chief now and then in order to make sure that the AMNPS was still putting out smoke. After four hours, I was tired and ready for bed, so I checked a final time:

The smell of the smoke was really nice - perfect for this sausage, I think - and the AMNPS was performing beautifully, so I turned in for the night as it continued to impregnate my klobásy with the sweet, aromatic dubové drevo dym.
The overnight temps were below 40 until morning. or nearly all of it, and never got any higher than 42, which is what the temperature was when I woke up the next morning. Because I was sleeping through most of the process, I do not know what the total burn time was for the pellets in the AMNPS, but I do know that a) it stayed lit 4 hours straight with no trouble and b) when I woke up the next morning it had burned completely.
I was in a hurry because I had to go to work, so I wasn’t able to snap a photo; however, they looked pretty much like the above picture, except it was daylight and there was no smoke. In fact, they looked absolutely great; they had a nice colour and had dried just a little, transforming them into a nice, deep reddish-brown. The aroma from the oakwood smoke lingered very nicely, and If I would have had time, I probably would have grilled one of the smaller ones up and served it with a couple of eggs and toast for breakfast - but alas
One thing that I did notice was that I was right to be concerned about the klobásy touching each other during smoking. There were a couple of small spots where the links had touched each other up near the rack while hanging, and I noticed that those spots were much more pale than the rest of the areas on the surface of the klobásy. This is an appearance problem only, and does not affect the quality or flavour, but in the future, I'll use a dowel or broom stick so that they are not able to touch themselves or each other as they drape over. For this project, the spots were so small that I was certainly not going to worry too much about it; besides, in the “bringing up to temperature” and subsequent "bloom," the issue seems to largely take care of itself.
Before leaving for work, I removed the klobásy from the Big Chief and placed them in the refrigerator, until I could get home and deal with them. If you end up doing this, be sure to not wrap your sausages in plastic or cover them; simply place them on a rack and in the refrigerator, perhaps wrapping them in paper towels if you want to. The reason for this is that they tend to release some moisture and there can be come resulting discolouration on the surface of the sausages if the moisture gets trapped in with the sausage; it doesn’t matter much from a taste standpoint, but it does affect the appearance, similar to the circumstance described above.
When I got home from work, I prepared myself for the final phase of this project. I laid out the klobásy on an oven rack and put them in the oven on the lowest setting, which for my oven is 170 degrees. As the klobásy cruised along on their journey to an internal temperature of somewhere in the mid-150s, I checked them periodically and watched their progress as their colour darkened into a beautiful brick red; I also noticed that they swelled a little as they heated up, which is to be expected. Throughout this time, my youngest son and I were really loving the smoky aroma that was rolling around through the house, and we decided that we would use the smallest klobása - which had a temperature probe stuck into it - as a test subject when it reached temperature.
And just what is this temperature that they are supposed to reach, you ask? Well, most sausage “experts” put that goal at 152 to 155 degrees; so I accepted 155 as my target. The reason for this was so that if my test sausage reached 155 in the middle of its thickest part, I would know that the rest of the sausages also reached at least 152 degrees, which would ensure that they would be safe and “ready to eat,” if desired.
As the klobásy came closer this this “finished” temperature,” they swelled a little more and began to sweat a little fat, which is indeed normal. By the time my “test sausage” reached 155 degrees, here is how they looked:

I think I did this right - or very close to it!
At this point, I immediately shut off the oven and removed the klobásy to a sink full of ice-cold water for a few minutes in order to stop the cooking process. I then drained the water and hit theklobásy with a shower of cold water:

Once I was sure that the klobásy were not cooking any longer, I gently dried them with paper towels; then, I then put them back on the racks of the rapidly-cooling oven to continue drying overnight and “bloom” to the colour that I was looking for. In theory, a person could hang them at room temperature and allow this process to happen for several days, but the oven racks were convenient, so I used them. The klobásy looked great, smelled great and and were getting more enticing by the minute.
After working on this project for so long, the rich and smoky aromas of the klobásy were simply too much to endure any longer, so I decided to sample the smallest klobása, which had been used to track the internal temperatures as they heated. I cut it loose and pan-fried it, first poaching it for a few minutes in a bit of water:

As the cast iron pan heated, I let the water boil away so that the klobása could begin frying until it was nice and crusty-browned on both sides:

When the klobása was finished, I cut it up and gave it a try, sharing it with my son, who had been such a tremendous help during the project:

I am happy to say that it tasted absolutely delicious! All of the flavours mentioned above dealing with my "test-fry patty" were present, plus a few that I assume developed through the smoking process. The wonderful balance between the spices and the garlic remained, and the oakwood smoke gave an amazing outdoorsy aroma - a terrific choice for this central-European sausage. There was also a bit of something else - perhaps from the beer; a full-bodied depth in the flavour that was really nice. All-around, a very good sausage, and I was extremely happy with it.
The remaining klobásy “bloomed” through the night on the oven racks, and looked great the next morning. Since I was leaving on a two-day business trip, I wrapped them in paper towels and put them in the refrigerator in order to continue maturing while I was gone.
Upon return from my trip, I was eager to see how the klobásy would look. To my delight, they had gotten better, if anything:

They were nice and dark - with beautiful colour - and were firm-yet-not-hard to the touch. They had a great aroma; a melding of spicy and sweet-smoky with rich undertones from the garlic and beer.

When the sausage was freshly made, these aromas were very assertive and wonderful in their own right, but the smoking and drying seemed to have the effect of lending them a mellower, deeper, more mature quality. It reminded me of the difference between a new and an aged wine or cheese.
Since I had sampled the smallest klobása on the night that I brought them up to temperature, I was left with eight klobásy of varying lengths. After a few moments' consideration, I elected to arrange them into of groups - each of two klobásy that were close to each other in length. Once this was done, I vacuum-sealed them:

From there, they went into the freezer, awaiting the time when they will be called upon to provide a wonderful meal for the family.
As far as how to use these klobásy, I have a few ideas. The package with the two largest ones will probably be used for a dish that I truly enjoy, a sausage, barley and sauerkraut casserole that is always a favourite in our house:
foodsoftheworld.activeboards.net/wurst-und-gerste-schmortopf_topic3835.html

As far as I know, this is not strictly a Slovak meal, but it is composed of ingredients that are definitely a part of Slovak life and it is a dish that could easily be plausible there.

The two packages of medium-sized klobásy will most likely be used for grilling sometime this summer, while the package containing the smallest ones will probably be sliced and sampled with cheese, bread and beer, a favourite preparation in Slovakia and other countries of the region.
I think that this project was - overall - a great success, especially in that I was able to learn quite a bit of new things; that the sausage looks and tastes great is a bonus! As a final note on this endeavour, I ‘d like to share a quote that I came across while I was making my first klobása; I think that it sums up projects like these very well:
Simplicity is the ultimate sophistication. ~ Leonardo da Vinci
I've seen examples of this truth so many times in life, not only in my cooking ventures, but nearly everywhere - at work, at home, in nature and in my spiritual life. Too often, it seems that many of us - myself included - fall into the trap of believing that what we are involved with at the time has to be an elaborate, gussied-up house of cards that may look or sound impressive, but in reality is far removed from fundamental truths and as such is very fragile. I can't count the number of times I've fallen prey to this notion and most times it has either come back to bite me or - even if it was technically a success - the returns were vastly out of proportion with the investment. Yet in nearly all cases when I stripped my efforts down to concentrating on and doing my best to practice the fundamentals, I was never disappointed with the results, and in fact I can say that I really never went wrong. Further, the lack of frivolity and nonsense allowed me to experience the true, unadulterated honesty that comes with an adherence to what made something good in the first place, without distractions or over-complications, and gave me the liberty to truly see where the real and significant possibilities could actually be found.
Such is the case with this Slovak klobása - It would be easy to tie in a plethora of add-ons and "improvements," and I am sure that most would even have tasted pretty good. But by staying true to the fundamentals and keeping it simple and in the right proportions (I resisted the temptation to add a little of this or an extra jolt of that), I was able to experience a really balanced and genuine rendition of the same sausage that has been experienced in my wife's ancestral land for hundreds of years. Salt, pepper, garlic, paprika, red pepper - a bit of caraway if you'd like, and a cure if you're smoking it - simple indeed, but such a simple combination has its own clean, honest credentials. Functional, yet delicious; disciplined, yet versatile. Sausage prepared this way is now ready to be used for anything that it might be called to do, yet it will also be able to speak for itself and stand on its own merits.
This, to me, is a little deeper than simply saying, "If it ain't broke, don't fix it;" such a constraining phrase closes doors and puts a limit on opportunities for growth. Instead, when taking da Vinci's advice to heart, my experience is that possibilities are expanded and true understanding really takes place, providing a fundamental foundation for taking a few basics and applying them not only to the task at hand, but also for future endeavours. While I was making and sampling this klobása, I found myself once again experiencing the significance of zabíjačka and what it means to the humble families that lay up meat for the cold months not simply to survive, but also to live their lives. That experience alone was worth the effort, and I got some delicious sausage, to boot. Wisdom such as this can indeed be passed down, but such lessons don't carry as much weight when learned by rote; it must be experienced to be truly appreciated.
With that, I do hope that you are inspired to give this sausage a try; it’s easy as can be, and it is as good as gold. I hope that this pictorial has contributed to an expanded awareness one of the best cuisines out there, and am very glad to share it with everyone. As always, I welcome questions, comments, thoughts and opinions, and if you do try this, please be sure to let me know.
Dobrú chuť!
Ron


