Post by TasunkaWitko on Jan 29, 2014 20:56:48 GMT -5
Khoubz Araby
Arab Bread
Wheat, acknowledged as mankind's oldest cultivated crop, was first domesticated at least 9,000 years ago from wild grasses found in this region; and the rest - as they say - is history. From these fertile valleys, golden, nutritious wheat - and other grains - nourished emerging civilisations and fed armies as glorious empires were forged. This, from Time-Life's Foods of the World - Middle Eastern Cooking, 1969:
The most basic use for cultivated wheat is to bake bread, and one of the most basic breads is a flat bread, which is easy to make, filling and deliciously satisfying. Stemming from the region that is now Kurdistan up into the Caucasus, along the Mediterranean shores and across the Middle East, a basic flat bread evolved that shares the same basic traits: quick to make, round and often with a characteristic puffiness that forms a hollow - to be filled with any number of good things. This flatbread, with only minor regional variations, is called pita in Greece, piada in Italy, pită de pecica in Romania, lavash in Armenia and naan farther to the East in Pakistan, Afghanistan and India; it is known as khoubz (also spelled khobz or khubz) in the various Arabic-speaking regions, from The Arabian Peninsula to Morocco and across the Levant.
Khoubz is a universal symbol of home, hospitality, comfort, nourishment - and even life itself. It can accompany any meal or snack, and is often used as a hand-held vehicle for kebabs, shaved meats or falafel - garnished with hummus, taratoor, baba ghannooj and various vegetables. But, as always, the simplest things are often best, and perhaps the best khoubz can be found on the shores of the Gulf of Aqaba, fresh off a hot, over-turned cast-iron cast iron skillet over a crackling fire and dusted with briny sea salt.

Here's the recipe, from Time/Life:
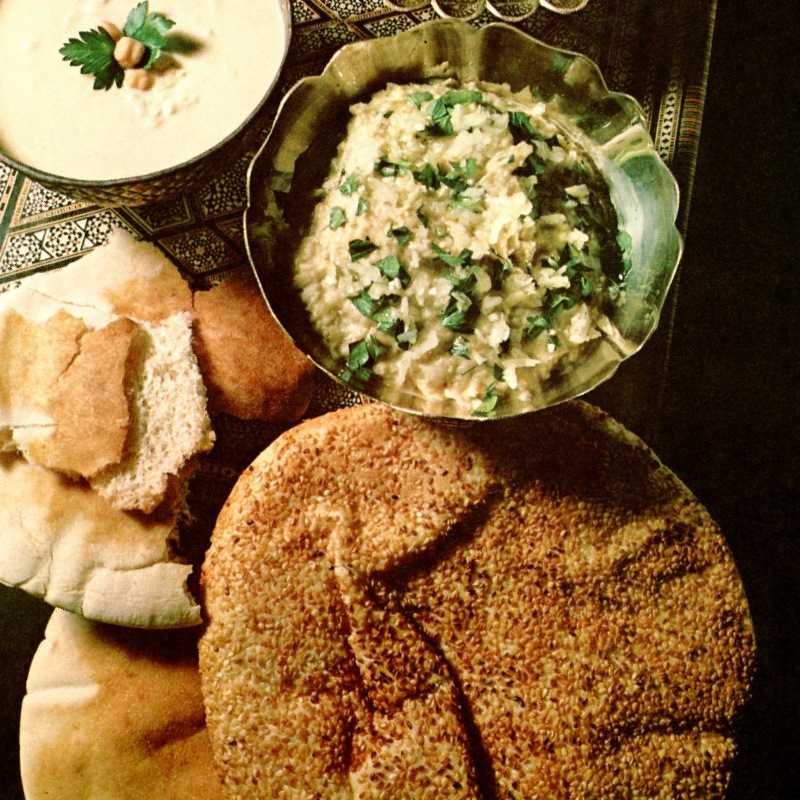
Note: In the photo above, it appears that sesame seeds were used to top the khoubz before baking; this is certainly an option - or perhaps a dusting of sea salt or flour, depending on individual tastes.
When I made this, I found it to be very easy, quite similar to Greek pitas that I had made in the past. I can't say for sure, but I believe that hydration is an important element when making khoubz or any similar flatbread that is intended to expand to form an internal pocket; my dough was just a little on the dry side, and I did not get the puffy expansion that I was looking for in all of the loaves. This could also be a function of the all-purpose flour that was used, as I had no high-protein bread flour available, which might have worked better. There are also a few other factors, enumerated below, that probably contributed. Nevertheless, the bread was absolutely delicious, and is one of those simple things that can really take you to another place; it was not difficult at all - even with the arctic-tundra landscapes outside my window - to imagine a scene quite similar to the painting above as I was sampling the khoubz when it came out of the oven.
As I said before, this is easy to make; here's all you need:
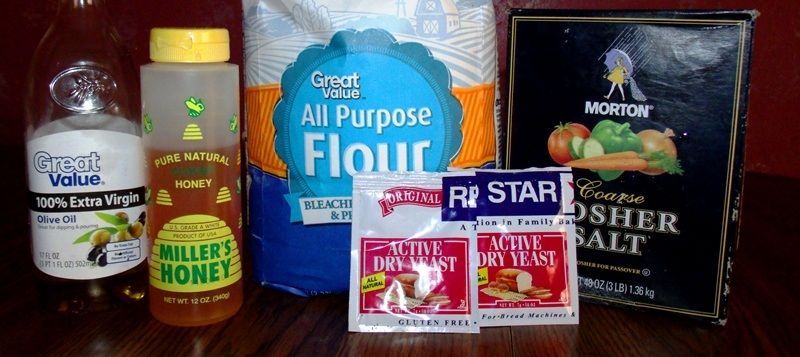
Left to right: olive oil, honey (in place of sugar), flour, yeast and kosher salt. If you do any baking at all, every one of these items is most likely already in your kitchen or pantry.
At its heart, we're simply making bread here, and it's quite easy to do; by following a few simple steps, you can assure yourself of best results. Following the recipe, I began by proofing the yeast, which is as simple as adding the yeast to 1/4 cup of blood-warm water, then adding the yeast and a dollop of honey:
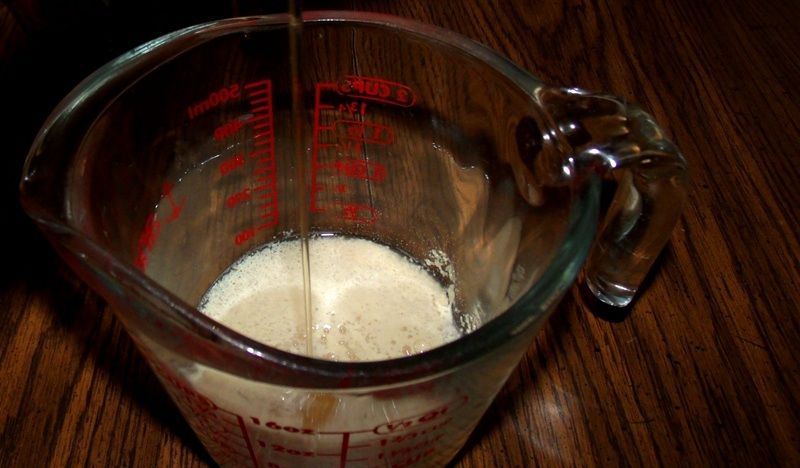
Any sugar, honey or similar thing can be used; I chose honey because it seemed to me to be a more traditional and rustic choice for the region.
After letting this concoction rest a couple of minutes, I gave it a gentle stir to dissolve and then placed the mixture into our (turn-off) oven for about 5 minutes so that it could double in volume. Meanwhile, I mixed 8 cups of flour and a generous two teaspoons of salt in a large bowl. When the yeast mixture was ready, I poured it into a well that I had made in the centre of the flour:
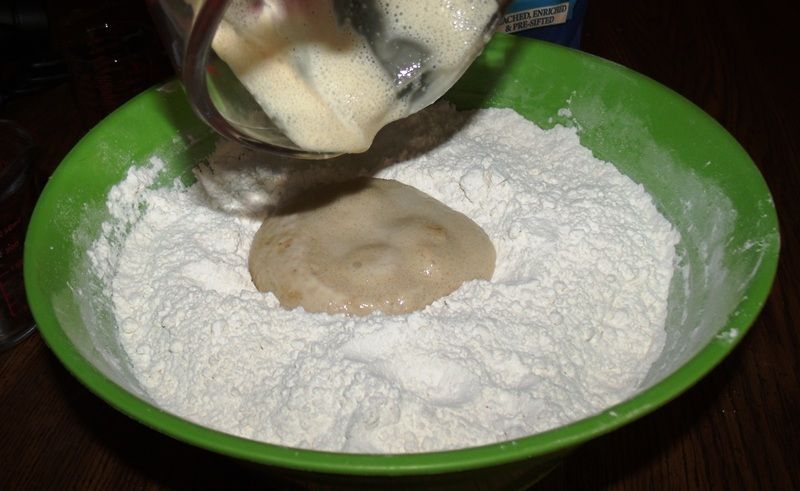
I then added most of the water called for in the recipe (2 cups); once again, the water was approximately 100 degrees, in order to best promote yeast action.
At this point, I departed from the recipe just a bit in order to employ a very simple technique that I've found to be quite helpful in bread making. Rather than adding the olive oil to the mixture right away, I stirred the mixture around and worked the water into the flour, adding about a quarter-cup more water, until it seemed like it would be close to the "correct" consistency (taking into account the oil that was yet to be added). I then let the flour-and-water mixture (it wouldn't be quite right to call it dough) rest for about 20 minutes before adding the oil. This process is called autolysation; there's quite a bit of science to the concept, but basically, what it does is to allow the flour to better absorb the water without the blocking interference of the oil. It is a very, very easy way to improve the bread that you make; all you have to do is simply cover the bowl and....wait for 20 minutes or so, before adding the oil.
After the 20-minute autolysation period (which sounds a lot more high-tech and scientific than it actually is), I added the oil to the flour/water mixture and worked it in, kneading the dough for about 20 minutes; as any amateur or experienced bread maker knows, this is quite a workout, and I was glad when it was over. The dough still seemed a little "stiff" or "dry," but I decided to give it a shot; looking back, I probably should have added a little more water for better results where the expansion and pocket-forming are concerned, since the puffiness and resulting pocket care caused be steam action. The bread I ended up with was just fine, and I want to stress that point, but I believe it could have been just a bit better had I added maybe a quarter-cup more water to the dough.
In any case, I formed the dough into a ball, then placed it in the lightly-oiled bowl and worked a drizzle of olive oil onto the surface:
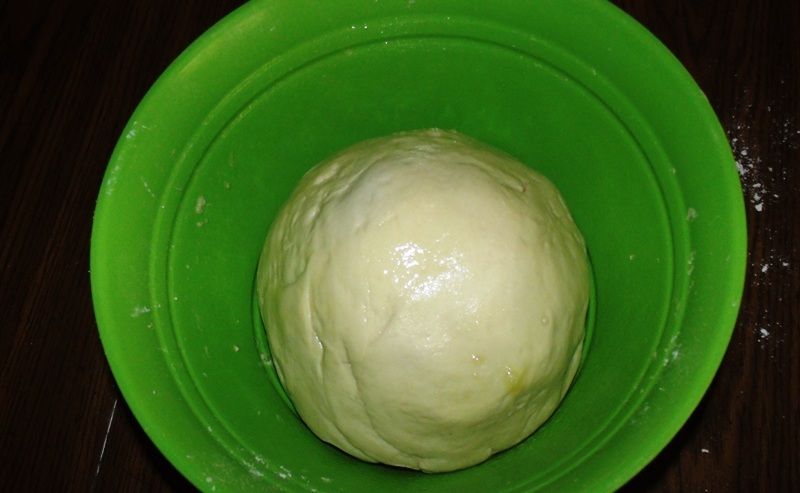
I then covered the bowl and set it back in the (turned off!) oven so that the dough could rise for just under an hour; during this time, it doubled in size, and then a little more.
I then took it out of the oven and punched the dough down; then worked it into 8 balls of equal size:
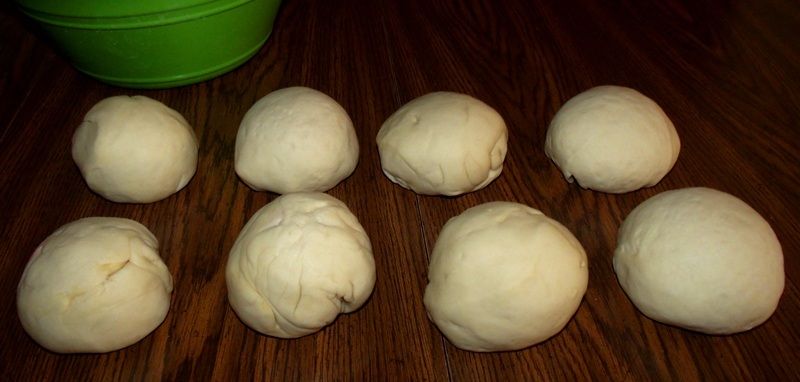
Looking at the photo above, it occurs to me that I could have done a much better job of forming the balls; as you can see, most of mine are not smooth and even, and this may or may not have had an effect later on, during baking. The "folds" and "wrinkles" - along with the other factors mentioned above - might have inhibited the puffing and pocket forming, but I can't say for sure.
After covering the dough balls and letting them rest for another 30 minutes, I got down the business of making the khoubz loaves. I repeated the following procedure 8 times, one for each dough ball:
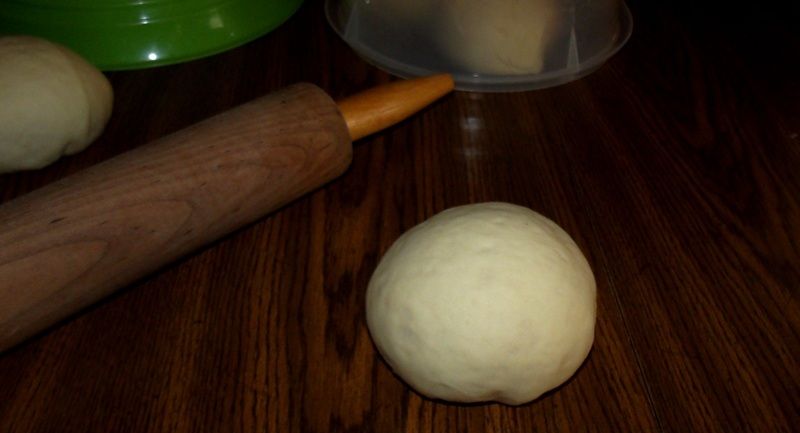
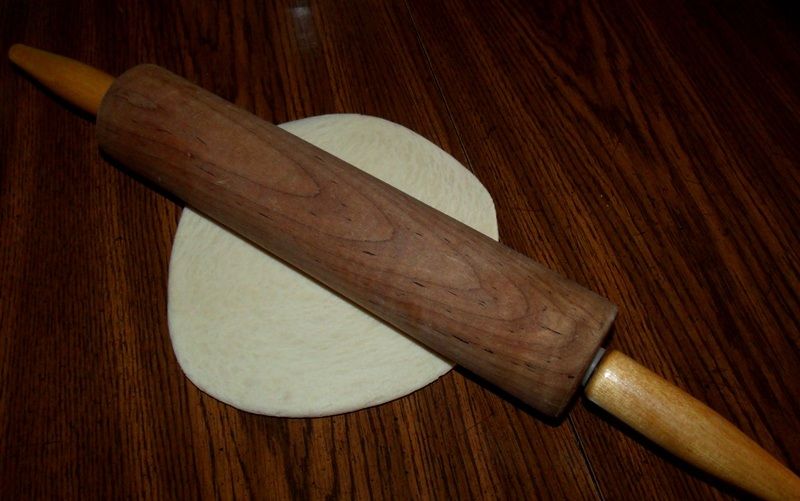
First, I rolled each ball out to a diametre of about 8 to 9 inches, trying to keep the disks around an eighth of an inch thick:
I then placed each disk on a baking sheet that had been dusted with kosher salt:
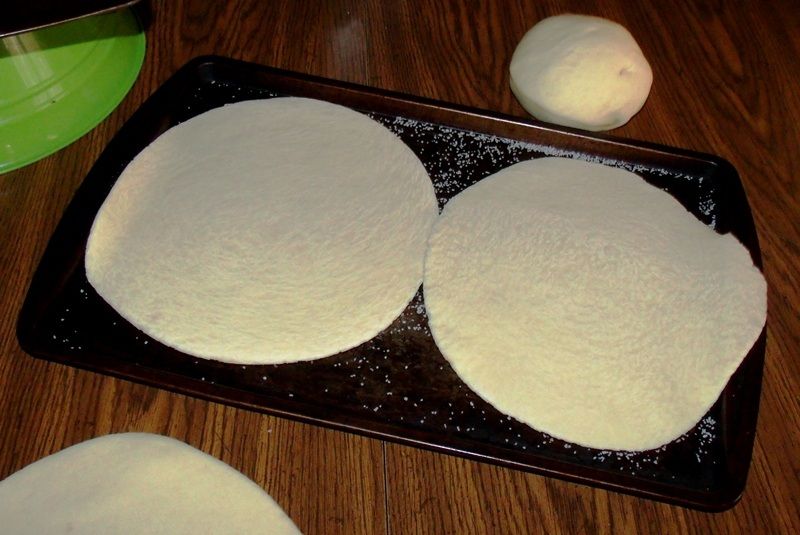
Sea salt, of course, would work just as well.
Before long, I had finished rolling out one batch of 4 disks (half the dough) - covering 2 baking sheets:
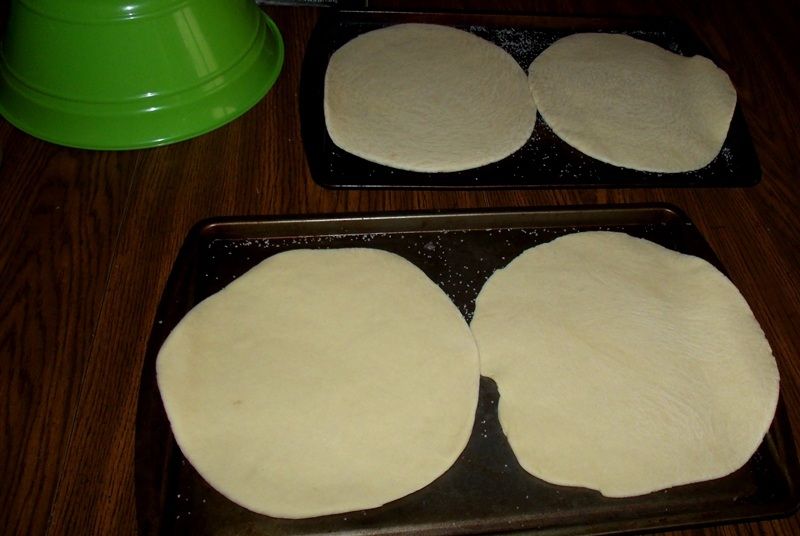
I covered the disks and let them rest for half an hour, while I pre-heated the oven to 500 degrees. Toward the end of the resting period, I rolled out the other four dough balls and covered them, so that they could have enough time to rest while the first batch of khoubz was baking
As you can see, there is a lot of "waiting" or "resting" time for the dough in this recipe. I don't know if that much waiting (as called for in the recipe) is strictly necessary, but when making a recipe for the first time, I almost always follow it as closely as I can, unless I see a good reason to depart from it (such as the autolysation step above). If anyone has any thoughts on the amount of resting time called for in the recipe, please feel free to comment.
Once the oven had finished pre-heating, I baked the first batch of khoubz; following the instructions in the recipe, I placed them on the lowest shelf of the oven for 5 minutes, before moving them up to the middle region of the oven to finish baking for another 5 minutes. Here is how the first batch looked coming out of the oven:
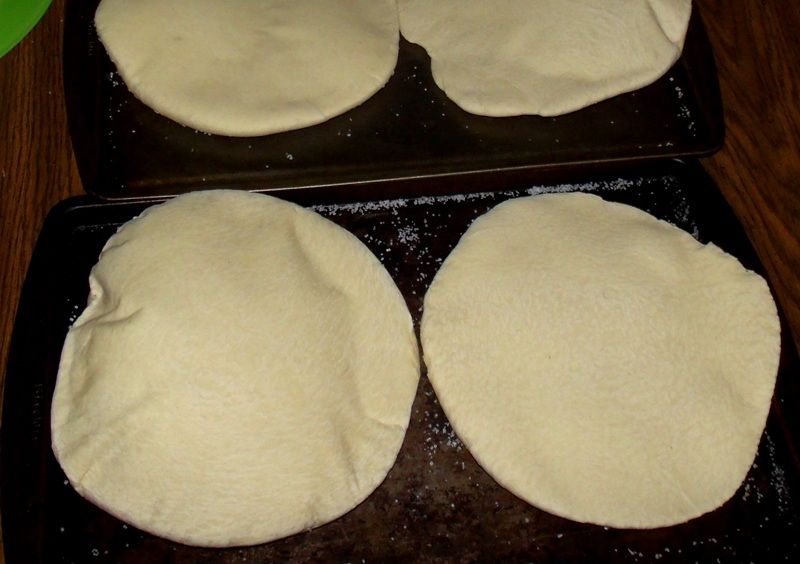
AS you can see, one of them puffed up quite nicely; two others puffed up moderately, and one didn't seem to puff up much at all:
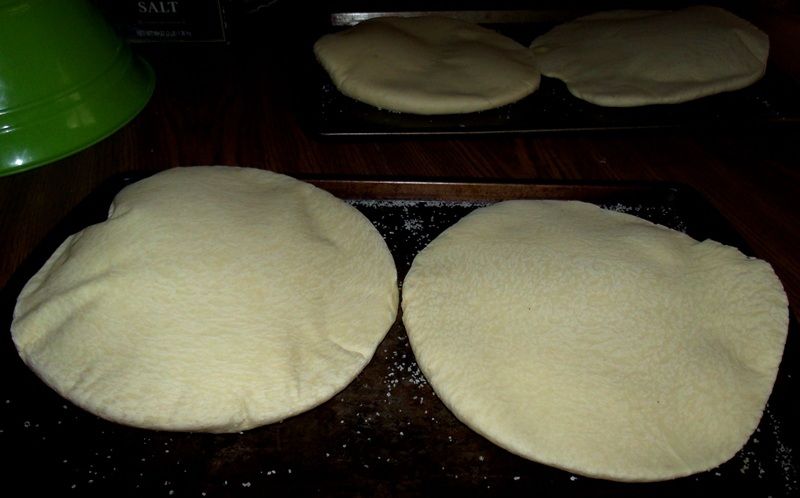
I also think that they could have used just a few moments longer in the oven - surely no more than a minute; the bread was done inside, though, and that is the primary thing.
A quick sampling of one loaf was almost like taking a bite of heaven; soft, warm, fresh-baked bread - with just a hint of salt - centuries of tradition wrapped up in a single bite. Good stuff!
After giving the oven a few short minutes to recover its temperature, I slid the second batch into the oven. I followed the same procedure as above, but the second batch ended up being in the oven a little too long, due to a knock at our door. By the time I was able to rescue them from the oven, perhaps 2 minutes of additional time had baked them, turning them into this:
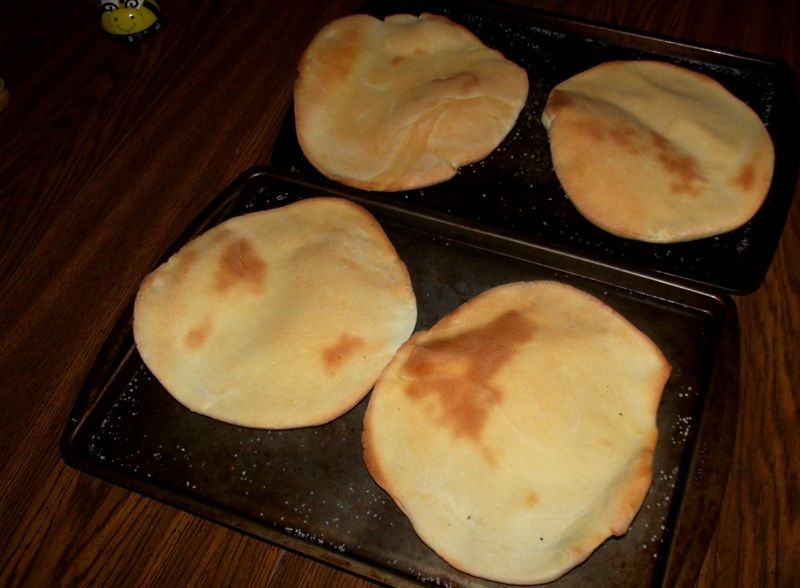
Nothing wrong with them at all as far as baking goes - and, in fact, some would even argue that they are better-tasting with a little extra baking; but as you can see, very little puffing up. Three out of the four loaves in the photo really could have been formed better, as well.
Nevertheless, I had made some very delicious Levantine bread, and I was looking forward to enjoying it with my supper. I wrapped the loaves and put them aside to rest until the rest of the meal was ready, at which time I served them simply, stacked on a platter:
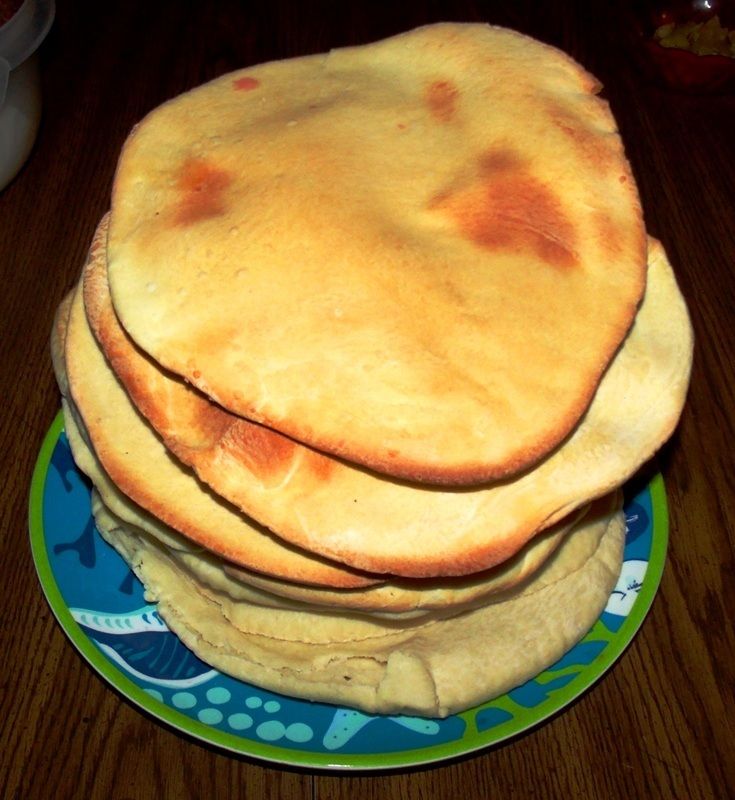
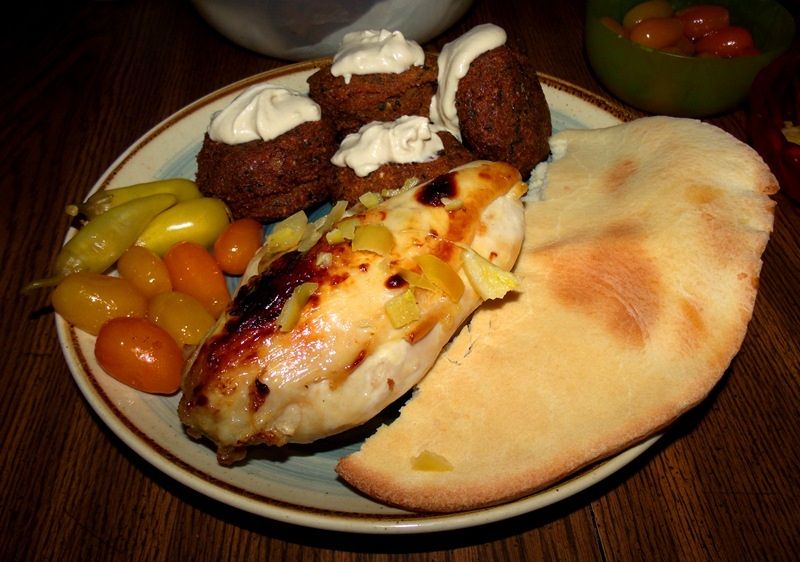
This bread, as I have been saying, tasted simply wonderful; it is amazing to me that the same ingredients - universal for bread around the world - can take on different characteristics depending on the proportions and methods used - even the shape that the bread is formed into, sometimes. The darker loaves were a little crisper on the outside, with a toasted flavour wrapping around the tender interior; the lighter loaves were soft throughout, and all had a delicious flavour, enhanced by the bit of salt clinging to the bottoms of the disks. The khoubz made an excellent accompaniment to our Levantine supper consisting of falafel with Lebanese taratoor, Israeli Tarnegolet Bemitz Hadarim, shipka peppers, kumquats and (not pictured) Lebanese lentil soup:
Bread is one of the oldest creations of mankind as a society; it nourishes us, comforts us and is a universal symbol of hospitality and life. Beyond that, it is a testament to man's mastery over the never-ending quest for survival, as well as our stewardship of the land that provides for all of our needs. It is no accident that - once early people no longer needed to spend every waking moment scrapping and scrabbling for food - time, imagination, effort and energy was liberated in favour of higher pursuits such as mathematics, art, literature, law, science, commerce, religion, philosophy and other civilisation-building concepts. If you really want experience the paradigm-shifting miracle that was discovered through the domestication of wheat, then I urge you to throw yourself into this bread, and touch the past.
Thanks for taking the time to embark on the journey with me; as always, questions, comments and discussion are encouraged!
Ron
Arab Bread
Wheat, acknowledged as mankind's oldest cultivated crop, was first domesticated at least 9,000 years ago from wild grasses found in this region; and the rest - as they say - is history. From these fertile valleys, golden, nutritious wheat - and other grains - nourished emerging civilisations and fed armies as glorious empires were forged. This, from Time-Life's Foods of the World - Middle Eastern Cooking, 1969:
North of the modern city of Baghdad begins Kurdistan, a hilly, grassy region in Iraq, Iran and Turkey with a pleasant, cool climate. It has few important modern cities or spectacular ruins; its peasants lead lives that for centuries have changed hardly at all. But historically, Kurdistan is in a class by itself; what makes the region unique is an ancient event in the history of food and mankind - the domestication of plants and animals.
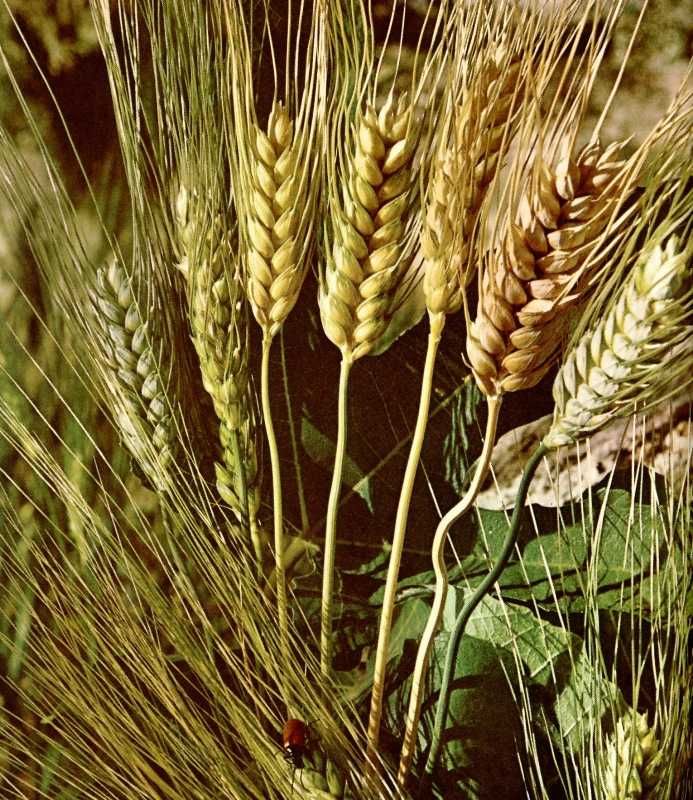
According to all available archeological evidence, this great achievement first took place here. It gave man his first dependable and manageable food supply, and it provided the foundation upon which was built all civilisation: villages, cities, nations, empires, writing, literature, law and science.... No one knows what those first farmers of Kurdistan looked like, what colour their faces were or what language they spoke.... But...these men and women turned mankind from total dependence on the accidental gifts of nature to control over sources of food.

According to all available archeological evidence, this great achievement first took place here. It gave man his first dependable and manageable food supply, and it provided the foundation upon which was built all civilisation: villages, cities, nations, empires, writing, literature, law and science.... No one knows what those first farmers of Kurdistan looked like, what colour their faces were or what language they spoke.... But...these men and women turned mankind from total dependence on the accidental gifts of nature to control over sources of food.
The most basic use for cultivated wheat is to bake bread, and one of the most basic breads is a flat bread, which is easy to make, filling and deliciously satisfying. Stemming from the region that is now Kurdistan up into the Caucasus, along the Mediterranean shores and across the Middle East, a basic flat bread evolved that shares the same basic traits: quick to make, round and often with a characteristic puffiness that forms a hollow - to be filled with any number of good things. This flatbread, with only minor regional variations, is called pita in Greece, piada in Italy, pită de pecica in Romania, lavash in Armenia and naan farther to the East in Pakistan, Afghanistan and India; it is known as khoubz (also spelled khobz or khubz) in the various Arabic-speaking regions, from The Arabian Peninsula to Morocco and across the Levant.
Khoubz is a universal symbol of home, hospitality, comfort, nourishment - and even life itself. It can accompany any meal or snack, and is often used as a hand-held vehicle for kebabs, shaved meats or falafel - garnished with hummus, taratoor, baba ghannooj and various vegetables. But, as always, the simplest things are often best, and perhaps the best khoubz can be found on the shores of the Gulf of Aqaba, fresh off a hot, over-turned cast-iron cast iron skillet over a crackling fire and dusted with briny sea salt.

Here's the recipe, from Time/Life:

To make 8 eight-inch round loaves:
2.25 to 2.75 cups lukewarm water
2 packages active dry yeast
A pinch of sugar [or honey]
8 cups all-purpose flour [bread flour recommended]
2 teaspoons salt
1/4 cup olive oil
1 cup cornmeal or flour
Pour about 1/4 cup of lukewarm water into a small bowl and sprinkle it with the yeast and sugar. Let the mixture rest for 2 or 3 minutes, then stir to dissolve the yeast completely. Set the bowl in a warm, draft-free place (such as a turned-off oven) for 5 minutes, or until the mixture doubles in volume.
In a deep bowl, combine the flour and salt, make a well in the centre, and pour in the yeast mixture, the olive oil and 2 cups of lukewarm water. Gently stir the centre ingredients together, then incorporate the flour and continue to beat until the ingredients are well combined. Add up to 1/2-cup more lukewarm water, beating it in a tablespoon at a time, and using as much as necessary to form a dough that can be gathered into a compact ball. If the dough is difficult to stir, work in the water with your fingers.
Place the dough on a lightly-floured surface and knead by pressing it down, pushing it forward several times with the heel of your hand and folding it back on itself. Repeat for 20 minutes, or until the dough is smooth and elastic. Shape the dough into a ball and place it in a lightly-oiled bowl. Drape loosely with a towel and set aside in the warm place for 45 minutes, or until the dough doubles in bulk. Punch it down with a blow of your fist and divide it into 8 equal pieces. Roll each piece into a ball about 2.5 inches in diametre, cover the balls with a towel and let them rest for 30 minutes.
Preheat the oven to 500 degrees. Sprinkle 2 large baking sheets with 1/2-cup of the cornmeal or flour. On a lightly-floured surface, roll 4 of the balls into round loaves each about 8 inches in diametre and no more than 1/8-inch thick. Arrange them 2 to 3 inches apart on the baking sheets, cover with towels and allow them to rest for 30 minutes. If you have a gas oven, bake the bread on the floor of the oven for 5 minutes, then transfer the loaves to a shelf 3 or 4 inches above the oven floor and continue baking for 5 minutes, or until they puff up in the centre and are a delicate brown. If your oven is electric, bake the bread on the lowest shelf for 5 minutes, then raise it 3 or 4 inches and continue baking until the breads are puffed and browned.
Remove the bread from the baking sheets, wrap each loaf in foil, and set aside for 10 minutes. Sprinkle the pans with the remaining 1/2 cup of cornmeal or flour and bake the remaining 4 loaves of bread in a similar fashion.
When the loaves are unwrapped, the tops will have fallen and there will be a shallow pocket of air in their centres. Serve warm or at room temperature.
Note: In the photo above, it appears that sesame seeds were used to top the khoubz before baking; this is certainly an option - or perhaps a dusting of sea salt or flour, depending on individual tastes.
When I made this, I found it to be very easy, quite similar to Greek pitas that I had made in the past. I can't say for sure, but I believe that hydration is an important element when making khoubz or any similar flatbread that is intended to expand to form an internal pocket; my dough was just a little on the dry side, and I did not get the puffy expansion that I was looking for in all of the loaves. This could also be a function of the all-purpose flour that was used, as I had no high-protein bread flour available, which might have worked better. There are also a few other factors, enumerated below, that probably contributed. Nevertheless, the bread was absolutely delicious, and is one of those simple things that can really take you to another place; it was not difficult at all - even with the arctic-tundra landscapes outside my window - to imagine a scene quite similar to the painting above as I was sampling the khoubz when it came out of the oven.
As I said before, this is easy to make; here's all you need:

Left to right: olive oil, honey (in place of sugar), flour, yeast and kosher salt. If you do any baking at all, every one of these items is most likely already in your kitchen or pantry.
At its heart, we're simply making bread here, and it's quite easy to do; by following a few simple steps, you can assure yourself of best results. Following the recipe, I began by proofing the yeast, which is as simple as adding the yeast to 1/4 cup of blood-warm water, then adding the yeast and a dollop of honey:

Any sugar, honey or similar thing can be used; I chose honey because it seemed to me to be a more traditional and rustic choice for the region.
After letting this concoction rest a couple of minutes, I gave it a gentle stir to dissolve and then placed the mixture into our (turn-off) oven for about 5 minutes so that it could double in volume. Meanwhile, I mixed 8 cups of flour and a generous two teaspoons of salt in a large bowl. When the yeast mixture was ready, I poured it into a well that I had made in the centre of the flour:

I then added most of the water called for in the recipe (2 cups); once again, the water was approximately 100 degrees, in order to best promote yeast action.
At this point, I departed from the recipe just a bit in order to employ a very simple technique that I've found to be quite helpful in bread making. Rather than adding the olive oil to the mixture right away, I stirred the mixture around and worked the water into the flour, adding about a quarter-cup more water, until it seemed like it would be close to the "correct" consistency (taking into account the oil that was yet to be added). I then let the flour-and-water mixture (it wouldn't be quite right to call it dough) rest for about 20 minutes before adding the oil. This process is called autolysation; there's quite a bit of science to the concept, but basically, what it does is to allow the flour to better absorb the water without the blocking interference of the oil. It is a very, very easy way to improve the bread that you make; all you have to do is simply cover the bowl and....wait for 20 minutes or so, before adding the oil.
After the 20-minute autolysation period (which sounds a lot more high-tech and scientific than it actually is), I added the oil to the flour/water mixture and worked it in, kneading the dough for about 20 minutes; as any amateur or experienced bread maker knows, this is quite a workout, and I was glad when it was over. The dough still seemed a little "stiff" or "dry," but I decided to give it a shot; looking back, I probably should have added a little more water for better results where the expansion and pocket-forming are concerned, since the puffiness and resulting pocket care caused be steam action. The bread I ended up with was just fine, and I want to stress that point, but I believe it could have been just a bit better had I added maybe a quarter-cup more water to the dough.
In any case, I formed the dough into a ball, then placed it in the lightly-oiled bowl and worked a drizzle of olive oil onto the surface:

I then covered the bowl and set it back in the (turned off!) oven so that the dough could rise for just under an hour; during this time, it doubled in size, and then a little more.
I then took it out of the oven and punched the dough down; then worked it into 8 balls of equal size:

Looking at the photo above, it occurs to me that I could have done a much better job of forming the balls; as you can see, most of mine are not smooth and even, and this may or may not have had an effect later on, during baking. The "folds" and "wrinkles" - along with the other factors mentioned above - might have inhibited the puffing and pocket forming, but I can't say for sure.
After covering the dough balls and letting them rest for another 30 minutes, I got down the business of making the khoubz loaves. I repeated the following procedure 8 times, one for each dough ball:

First, I rolled each ball out to a diametre of about 8 to 9 inches, trying to keep the disks around an eighth of an inch thick:

I then placed each disk on a baking sheet that had been dusted with kosher salt:

Sea salt, of course, would work just as well.
Before long, I had finished rolling out one batch of 4 disks (half the dough) - covering 2 baking sheets:

I covered the disks and let them rest for half an hour, while I pre-heated the oven to 500 degrees. Toward the end of the resting period, I rolled out the other four dough balls and covered them, so that they could have enough time to rest while the first batch of khoubz was baking
As you can see, there is a lot of "waiting" or "resting" time for the dough in this recipe. I don't know if that much waiting (as called for in the recipe) is strictly necessary, but when making a recipe for the first time, I almost always follow it as closely as I can, unless I see a good reason to depart from it (such as the autolysation step above). If anyone has any thoughts on the amount of resting time called for in the recipe, please feel free to comment.
Once the oven had finished pre-heating, I baked the first batch of khoubz; following the instructions in the recipe, I placed them on the lowest shelf of the oven for 5 minutes, before moving them up to the middle region of the oven to finish baking for another 5 minutes. Here is how the first batch looked coming out of the oven:

AS you can see, one of them puffed up quite nicely; two others puffed up moderately, and one didn't seem to puff up much at all:

I also think that they could have used just a few moments longer in the oven - surely no more than a minute; the bread was done inside, though, and that is the primary thing.
A quick sampling of one loaf was almost like taking a bite of heaven; soft, warm, fresh-baked bread - with just a hint of salt - centuries of tradition wrapped up in a single bite. Good stuff!
After giving the oven a few short minutes to recover its temperature, I slid the second batch into the oven. I followed the same procedure as above, but the second batch ended up being in the oven a little too long, due to a knock at our door. By the time I was able to rescue them from the oven, perhaps 2 minutes of additional time had baked them, turning them into this:

Nothing wrong with them at all as far as baking goes - and, in fact, some would even argue that they are better-tasting with a little extra baking; but as you can see, very little puffing up. Three out of the four loaves in the photo really could have been formed better, as well.
Nevertheless, I had made some very delicious Levantine bread, and I was looking forward to enjoying it with my supper. I wrapped the loaves and put them aside to rest until the rest of the meal was ready, at which time I served them simply, stacked on a platter:

This bread, as I have been saying, tasted simply wonderful; it is amazing to me that the same ingredients - universal for bread around the world - can take on different characteristics depending on the proportions and methods used - even the shape that the bread is formed into, sometimes. The darker loaves were a little crisper on the outside, with a toasted flavour wrapping around the tender interior; the lighter loaves were soft throughout, and all had a delicious flavour, enhanced by the bit of salt clinging to the bottoms of the disks. The khoubz made an excellent accompaniment to our Levantine supper consisting of falafel with Lebanese taratoor, Israeli Tarnegolet Bemitz Hadarim, shipka peppers, kumquats and (not pictured) Lebanese lentil soup:

Bread is one of the oldest creations of mankind as a society; it nourishes us, comforts us and is a universal symbol of hospitality and life. Beyond that, it is a testament to man's mastery over the never-ending quest for survival, as well as our stewardship of the land that provides for all of our needs. It is no accident that - once early people no longer needed to spend every waking moment scrapping and scrabbling for food - time, imagination, effort and energy was liberated in favour of higher pursuits such as mathematics, art, literature, law, science, commerce, religion, philosophy and other civilisation-building concepts. If you really want experience the paradigm-shifting miracle that was discovered through the domestication of wheat, then I urge you to throw yourself into this bread, and touch the past.
Thanks for taking the time to embark on the journey with me; as always, questions, comments and discussion are encouraged!
Ron


