Post by TasunkaWitko on Dec 9, 2013 22:46:15 GMT -5
Scandinavian Cured Venison
Gravad Älg
Gravad älg (Norweigian gravet elg) is an ancient, traditional Swedish method for curing wild game, such as moose (älg) or reindeer. In days gone by, is used primarily for preservation; however, in modern, refrigerated times, it has become more of a way of flavouring and serving meats, similar to Italy's carpaccio. It is quite unique, very flavourful and extremely easy to make, as I recently discovered.
I found gravad älg to be a bit of an elusive topic, as there simply wasn't much to be found on this subject; indeed, I only learned of its existence by stumbling across a casual reference to it while reading a forgotten article on Scandinavian cuisine. One of my favourite things to do is to learn about foods from other lands in order to try to come as close as possible to a "plausible" rendition of those foods in my own kitchen, using the resources available to me. In this case, the subject matter touches home a bit, due to my Swedish ancestry and the fact that it brings together many of my interests - including hunting, history and charcuterie; only with food can such diverse subjects come together in such a tangible (and often delicious) way!
This project was especially meaningful in that during my reading and research on gravad älg, I had the pleasure of consulting many Scandinavians actually living in Sweden, Norway and Denmark; I must say that it was both a joy and a privilege to be able to learn about this tradition from such helpful and friendly sources, and would like to acknowledge that assistance here ~ thank you very much!
Based on the sum total of my research, and trying to keep it traditional, I determined that the basic method for gravad älg employs curing venison in roughly equal amounts of sea salt and sugar, with some cracked black pepper and juniper berries added. These ingredients are applied to the venison, which is then wrapped in plastic wrap or put in a plastic ZipLock-style bag and placed in a baking dish or similar vessel. It is then weighted down in order to press out the resulting liquids, and is allowed to cure in the refrigerator for a few days as the accumulated juices drain off. The product is then allowed to air dry for an hour or so before it is sliced paper-thin and served. Gravad älgcan be air-dried for a longer period if desired; but evidently, this is not necessary to the identity of the product.
In many ways, gravad älg is very similar to the more-familiar gravad lax or gravlax:
Similarities include the use of a simple sea-salt cure with a similar proportion (to taste) of sugar, supplemented by a modest amount of black pepper. The protein to be cured is covered with this "gravad mix" and then "buried" under a heavy weight. In the old days, the curing process was actually carried out with the protein buried in the earth - a process that provided the weight for liquid extration; this subterranean method resulted in the appelation gravad, which translates to "grave," an apt analogy to be sure.
The primary difference between gravad älg and gravad lax can be found in the name itself: lax translates as "salmon" and älg, translates as "elk" or "moose," implying venison or wild game meat. The other big difference is that - where gravad lax adds dill to the salt/sugar/pepper curing mix - gravad älg usually employs crushed junpier berries instead; my reading indicates that arctic thyme can also be used.
Such products would be quite well preserved, especially in the northern cold climates, and it is quite easy to imagine these foods being important historical staples for the Scandinavian people, whether in the villages or out on the sea. After reading and reflecting on the subject, I decided to give this project a go; in my case, either species of native Montana deer (white-tailed deer or mule deer) makess a very-available substitute, and my new-found Scandinavian friends confirmed that I was on the right track with my plan. Encouraged, I collected the necessary components:
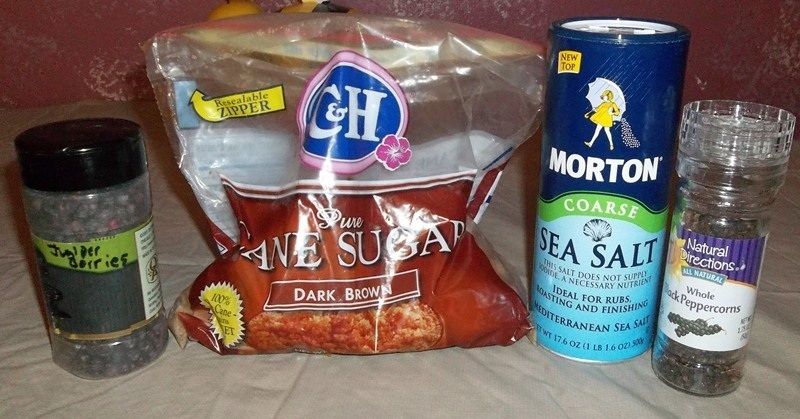
As you can see above, you do not need much for this!
For the venison, I selected a sirloin roast from a mule deer doe that we had shot the year before:
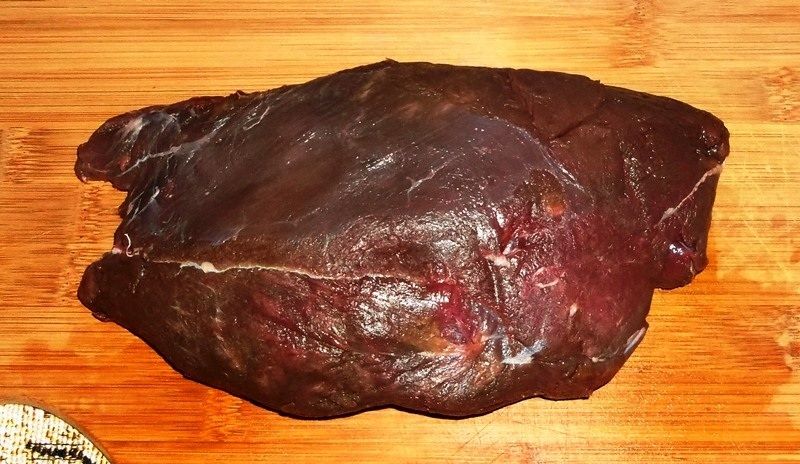
The carcass had been dry-aged for 10 to 14 days in our shed, then boned, trimmed, packaged and frozen following a careful and thorough procedure that I had been using since my earliest hunting days; my father taught me that the more care taken in the field and at the butchering table, the better the meat will taste at the dinner table - and I have found this advice to be true every time. Normally, A roast such as this would have been disassembled, the silverskin trimmed out and the meat cut into steaks or cubes before packaging, but I had set it aside for a potential project, and this seemed like a good one.
The sirloin is a very nice roast; it is a good size for projects such as this and it had very good texture and flavour. Also, it is not a super-tender "prime" cut - such as a loin - that would be wasted on a curing project and would shown to much better advantage when cut and prepared as a whole roast or in steaks. Yes, the sirloin is indeed a nice roast, but it does have one draw-back: a couple of layers of inedible silverskin between the musclegroups. I am 98% confident that I could have cured it as it was - whole - with no troubles at all, but my years of "training" simply wouldn't allow me to abide the silverskin that I knew to be tucked within the muscle layers, so I made the decision to trim it out. The decision made, I proceeded to do so, carefully slicing down alongside each layer and then gently removing the silverskin:
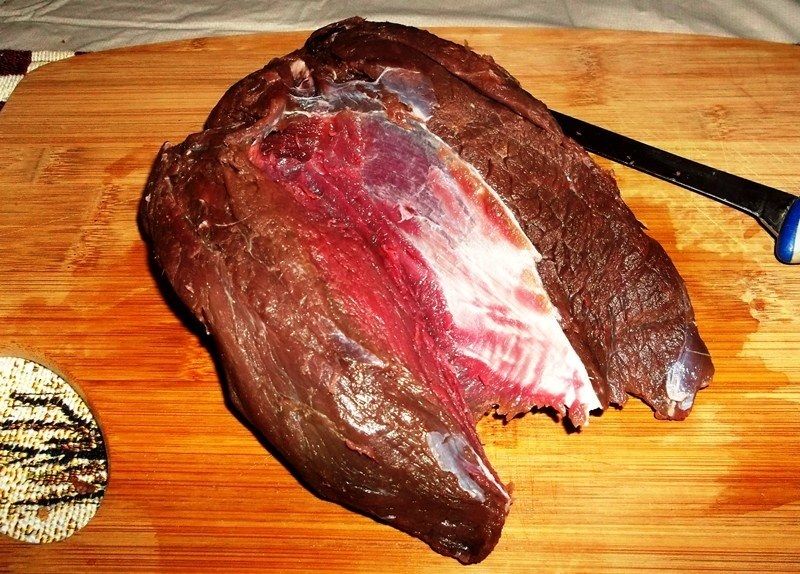
One obvious consequence of this decision is that I ended up with a completely disassembled roast:
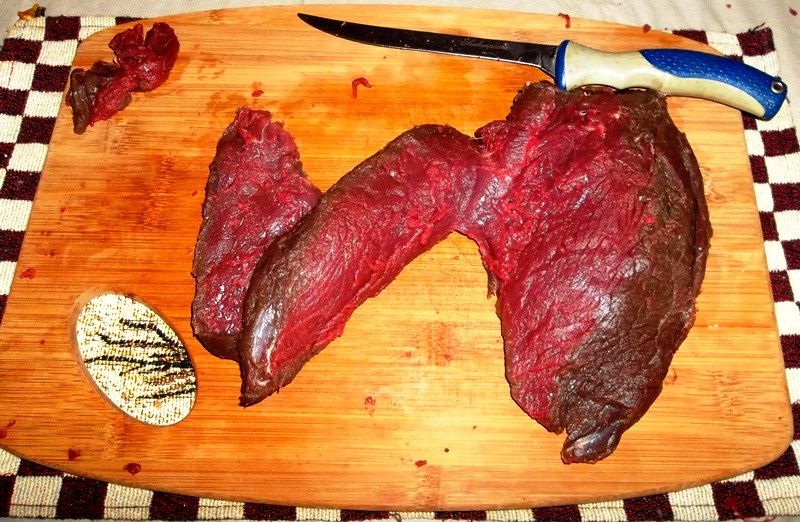
I didn't worry too much about it at the time, figuring that I could simply re-assemble it, cure it and then use it from there. In a sense, my conclusion was correct; however, as you will see, I might have been better off in the long run if I would have simply left the sirloin intact - or, if I would have used a cut that had no internal silverskin issues, such as a top or bottom round. Any chunk of venison (or even beef) will do, so long as it is as free of fat and especially membrane as possible. Then again, in this case - with this project - the "problem" might have actually been an advantage, because in trimming the roast out, I created a butterflied roast that was composed of three loosely-connected layers of venison that were all about the right thickness for good penetration of the cure - in fact, they reminded me of salmon fillets, which this method of curing was designed for. In any case, this is what I decided to do, and it did work, but it is probable that the result would have looked a lot better using a whole cut, so keep that in mind if you try this.
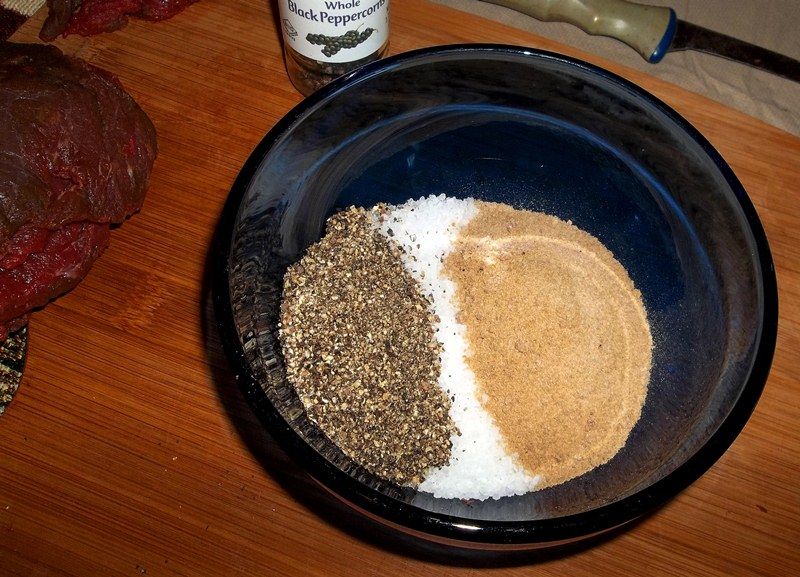
Moving along, I started making a dry gravad mix of sea salt, dark brown sugar and cracked black pepper:
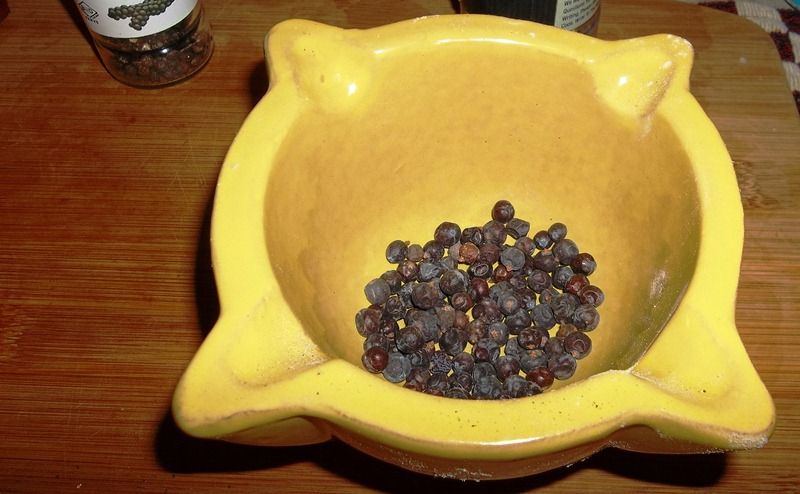
I also measured some dried juniper berries:
And gave them a good pulverising in my mortar and pestle:
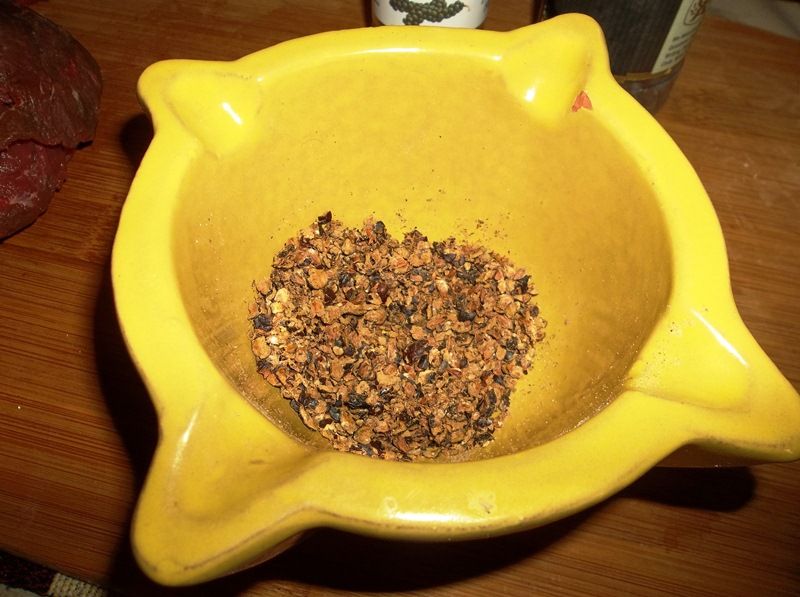
I then added them to the salt, sugar and pepper and mixed everything together to complete my curing mixture:
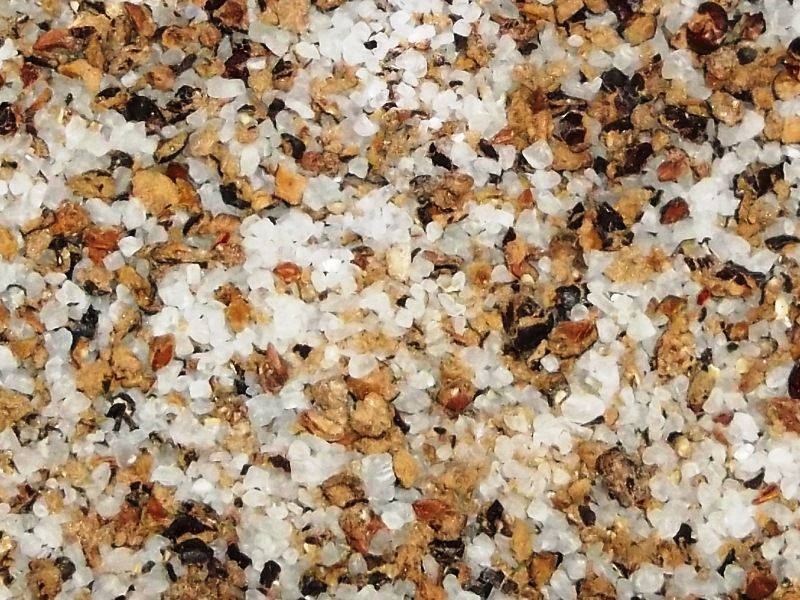
It is true that I was flying a little blind here, with no formal "recipe" to use; but the fact is that everything about this product and the method for making it is very closely-related to making traditional gravad lax, which I had done a few times, so it was a familiar process.
As far as amounts go, a good ratio for gravlax is 5 (salt) to 5 (sugar) to 2 (dill), usually with an additional 2 for freshly-cracked black pepper. In this case, juniper berries were substituted for dill, and I cut the amount of juniper berries (and also the pepper) in half, since this was a first attempt and I wanted to be conservative with my spices. I also incorporated advice that I had gotten from my Scandinavian sources, some of which suggested using slightly less sugar than salt. So, when all was said and done, my ratio was 5:4:1:1, measured in tablespoons. Based on all of this information, my amounts were:
5 tablespoons of sea salt
4 tablespoons of dark brown sugar
1 tablespoon of freshy-cracked black pepper
1 tablespoon of freshly-crushed juniper berries
The total weight of the trimmed roast was very close to 1 kilogram (a little over 2 pounds), and the amount of gravad mix that resulted from my measurements might have been a little too much, but it did seem to work and at this time I can recommend it with reasonable confidence.
It is often traditional to add a shot of aquavit to the gravad mix for either product (gravad lax or gravad älg); whiskey or brandy can be substituted in place of aquavit. However, I didn't have any of these spirits in the house at the time, so I decided to forego the concept. I do usually have some Jägermeister, however, and perhaps I will add a shot of this German liqueur as a nod to the other half of my ancestry the next time that I make this.
I'm going to pause for a moment and discuss the use of commercially-available curing agents: in a nutshell, I didn't use any for this, and I do not believe that a commercial curing agent is necessary for this product due to the ingredients used to make it and the process by which it is cured. The sea salt content - combined with the low temperatures involved and the extraction of excess moisture - results in an environment where I am personally satisfied that food-borne pathogens are not a concern. This is a whole cut of solid meat that is refrigerated the entire curing time, so there are are none of the typical concerns that are involved when making sausage using ground meat, or with a product that spends a long time in a warm smoking chamber. Keep in mind that, as noted above, gravad älg (made with meat) employs essentially the same process as gravad lax (made with salmon), which I have prepared and enjoyed many times; my own feeling is that if I am going to use the same method with raw fish that came from an unknown source, then I am certainly not going to have a problem using it on venison that has been in my care, custody and control since the moment I saw it standing on the side of the hill and shot it. Finally, let's face it - this is a product that is eaten all the time by Scandinavians, by Italians (in the form of carpaccio, which is similar), and by many other cultures around the world where "raw" meat is consumed with no concern for such worries - tartare, anyone?
As I said before, my own focus is on the tradition and history involved, and I am comfortable using only sea salt with no commercial cure. Please understand that these are my conclusions, as in me, myself and I; your own mileage may vary, and you may or may not be as confident in the circumstances. If anyone wants to try this time-honoured and traditional method for Scandinavian charcuterie, I strongly advise you to please read up on it and make your decision based on what works best for you. If your conclusions are different than mine, then please do use a commercial cure in accordance with the package directions in an appropriate amount for the weight of meat you are curing, as I would not want someone missing out on a great, traditional experience over concerns or worries about cure. The bottom line is that a commercial cure will not adversely affect the product, and it is, after all, very cheap insurance, so use a commerical cure if you want to, or don't if you don't want to. When one becomes interested in attempting charcuterie projects, one educates oneself on the dynamics that are in play, and one exercises due diligence in engaging in the necessary research in order to come to informed decisions on the matter. Part of the interest in charcuterie is to "embrace the Old-World process of curing meats," and this is about as Old-World as it can get.
Anyway, since a couple of spots still seemed a little thick, I slashed them across the grain (the same as if the finished product were being sliced) in order to open them up a little:
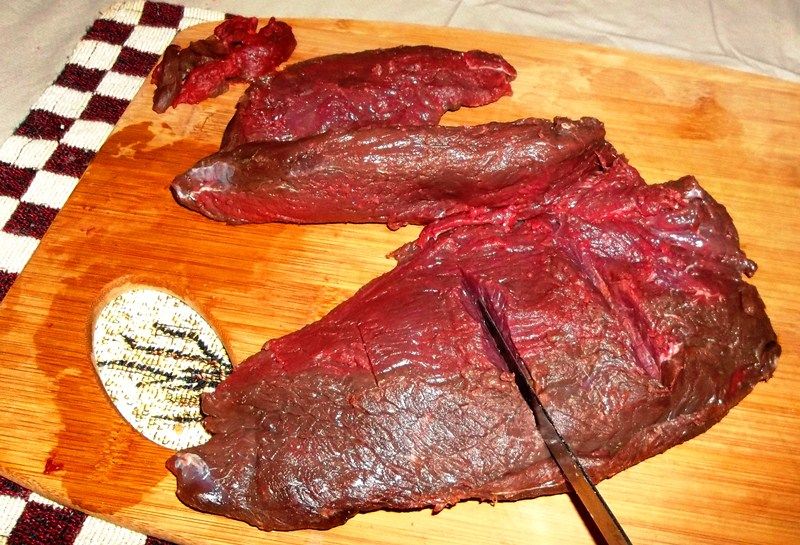
I am not sure if this was necessary, but I had read about it with other "Old-World" charcuterie methods using whole cuts of meat and decided to give it a try in order to see if it helped with the meat's absorbtion of the gravad mix. It seems to me that this is a good practice to employ whenever one is using larger cuts of meat, especially when no commercial curing agent is used, so that you can be sure that the salt penetrates the meat.
To apply the gravad mix, I spread some out on a plate, and then re-assembled the sirloin roast in layers on top of the base, starting with the bottom:
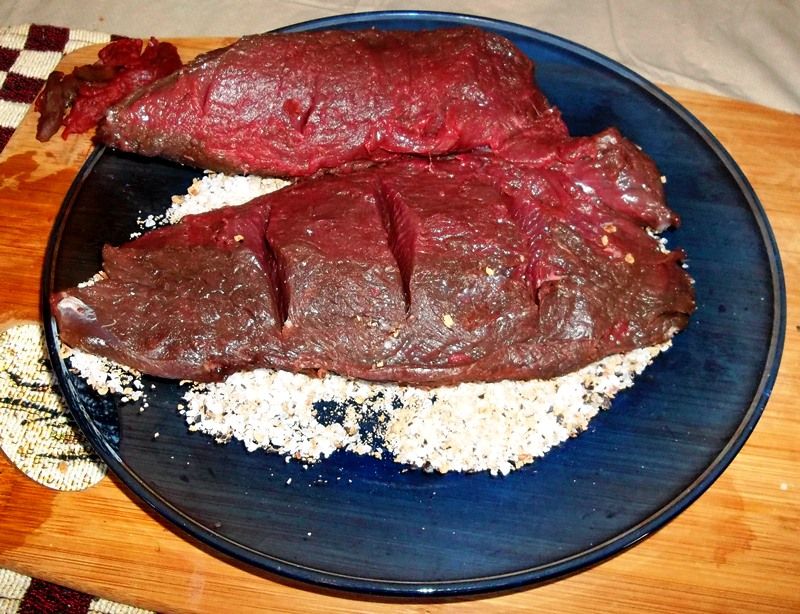
I continued to add a layer of the cure in between the layers of venison:
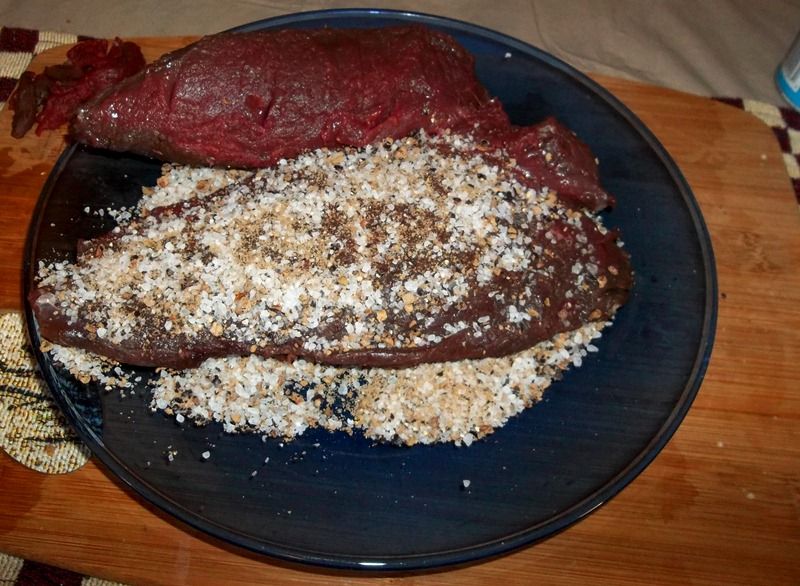
Looking back, I probably used more gravad mix than necessary:
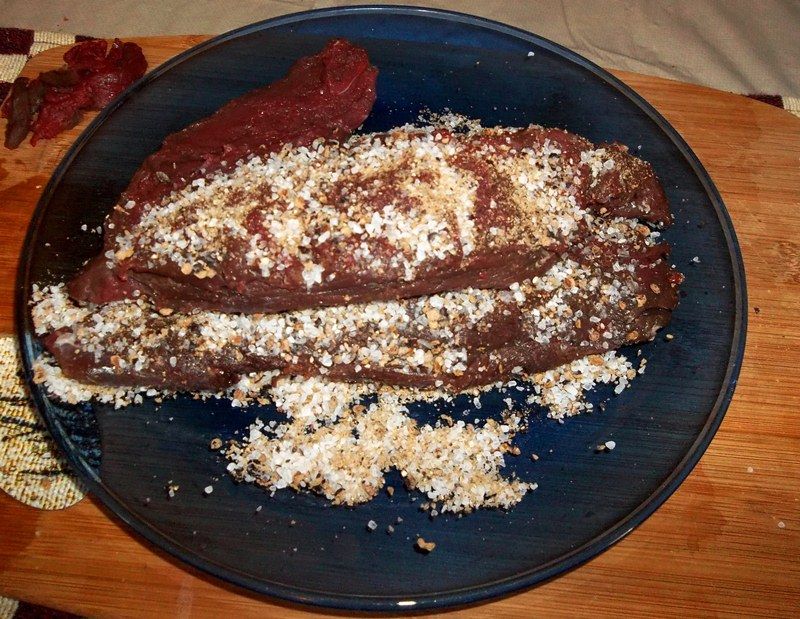
But at the time - for my first attempt - I wasn't sure how much would be an appropriate amount, so I erred on the side of caution; reasoning that it's probably better to have too much, rather than not enough. My primary concern, of course, was an end product that would be too salty, but between the curing and the draining off of the liquids, I guessed that things would be fine. Besides, this is meant to be a rather salty product - part of the reason that it was developed (for meat preservation) - and it is to be sliced very thin when served. With this in mind, I was sure that things would be alright in the end.
When the roast was completely re-assembled and well-coated with the cure, I sealed it in a ZipLock-type bag:
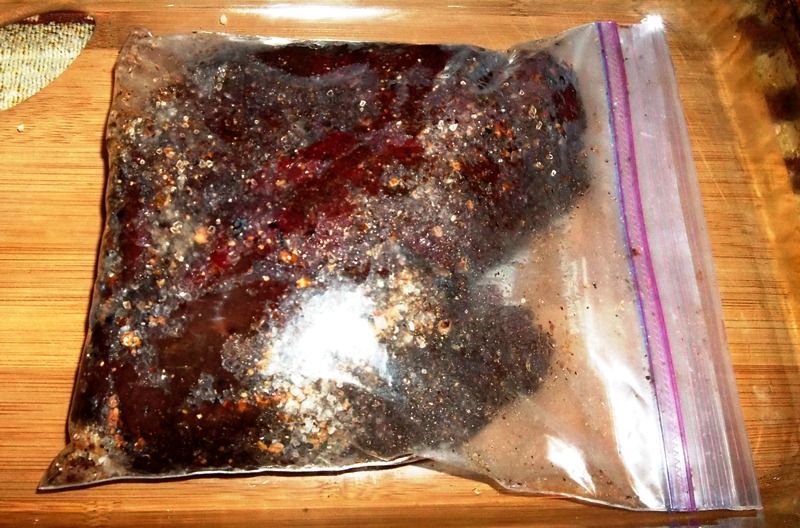
I placed the bag in a shallow baking dish, and then placed a square, glass baking dish on top of the zip-lock bag and weighed it down with around 5 pounds or so of canned goods:
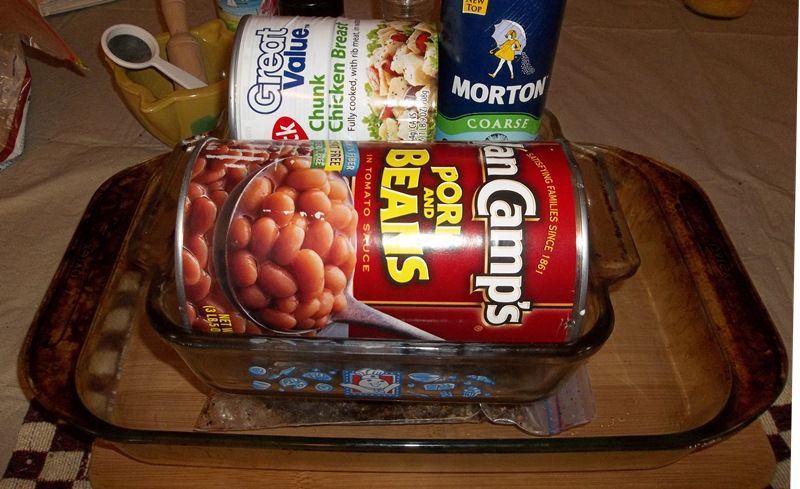
As mentioned above, the weight would simulate the ancient practice of burying the meat underground, where the weight of the earth would help to extract the juices produced by the curing process. If I would have been thinking, I probably would have left a corner of the storage bag open in order to allow drainage, since said juices were "trapped" in the bag with the meat. Doing it this way, it was necessary to pat the meat dry and allow it to "air dry" for an hour or two once the curing was complete. One could, if one wishes, vacuum-seal the meat into an air-tight package, but I do not think that this is the optimum way to do it, considering the goals of the procedure. An alternate method (which would possibly work better) would be to wrap the roast in saran wrap, which would allow much of the liquid to actually seep out and not be in contact with the meat, but the fact is that any of these methods will work - it's just a matter of choosing the best method for desired goal.
I then placed the entire assembly in the refrigerator; there to cure for two-and-a-half to three days. The curing time is a bit subjective and depends largely on the thickness of the meat being cured; not enough time, and the product ends up watery and limp - too much time, and the product will have a strange texture that is both too mushy and too firm at the same time. I can't explain it better than that, but it has happened on occasion with thin fillets of salmon when making gravlax, and it is rather unpleasant, even though it is perfectly safe to eat. Anyway, 3 days seems to be a good maximum for meat that is around 3 inches thick, so that's the curing time that I went with. Periodically throughout the curing time, I rotated the venison in order to ensure that it was being thoroughly cured.
When the curing time had passed, I was eager to see what the result would be. Here's what I discovered when I removed the gravad älg from the package:
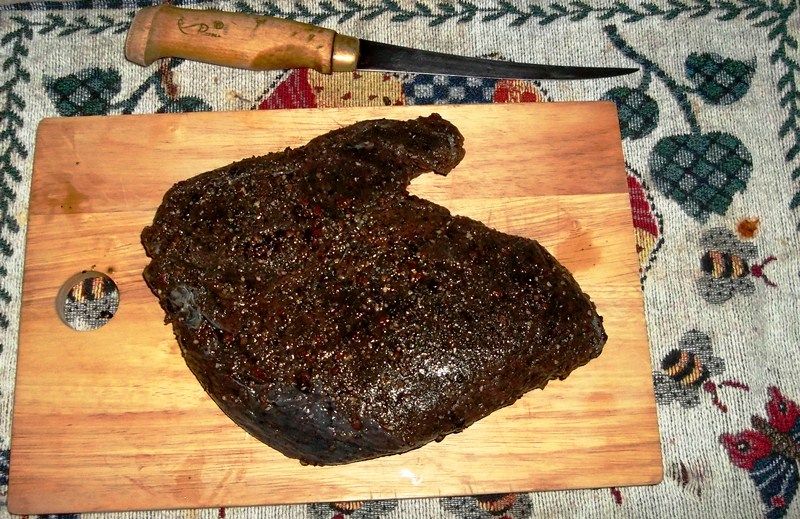
In general, it had a similar look (except for the colour, of course) in comparison to what I had seen before, making gravlax, so I was encouraged.
I then separated the "layers" of the roast:
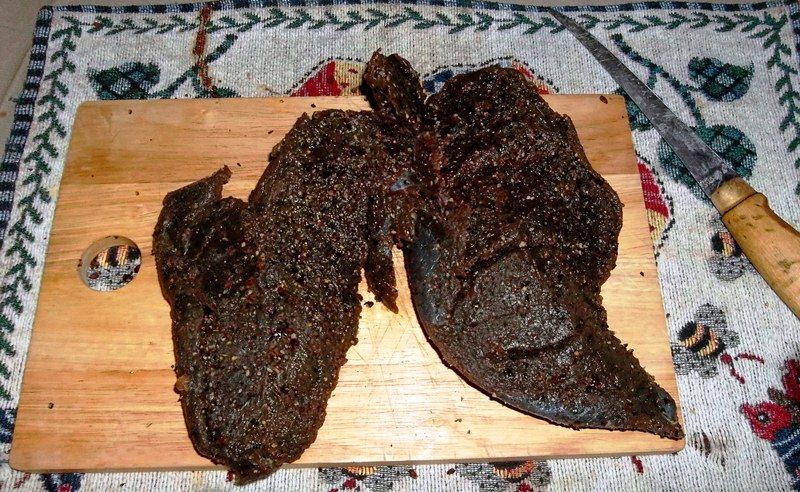
Some people rinse off the roast before patting it dry, but since I prefer the bold zestiness that hits the tongue when the spices are left on the exterior, I did not do this.
I did, however, allow the gravad älg to air-dry for an hour or so (similar to developing a pellicle for smoking). This removes the exterior moisture and keeps the product from being a soggy mess. It can also be air-dried for for a much longer time - if one prefers - and this will lengthen the shelf-life considerably; however, keep in mind that it will also concentrate the flavours quite a bit, including the saltiness of the end product.
Eager to see what I would find, I sliced one of the chunks of venison across the middle in order to see what I ended up with:
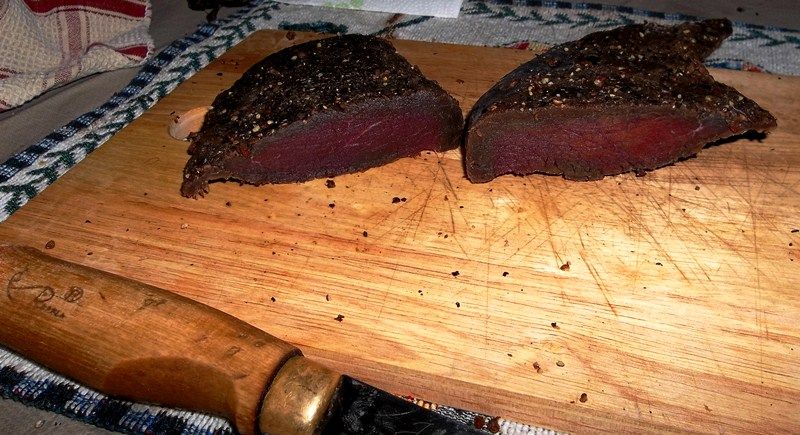
This is pretty much what I was expecting to see, based on some other photos of gravad älg that I had seen on the internet:


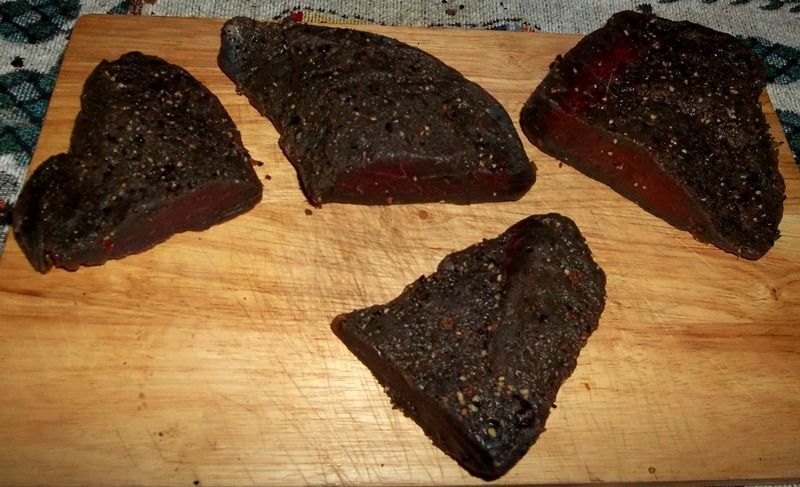
Feeling pretty good about the project, I cut the rest of the roasts and and witnessed the same result:
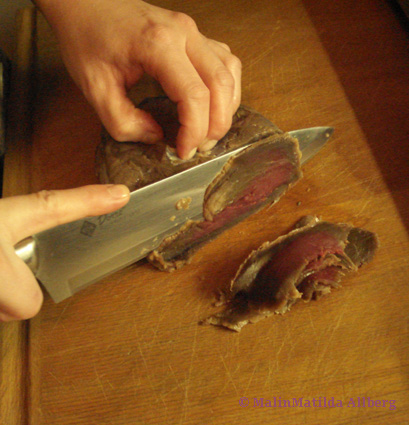
I did't "prepare" the gravad älg in any way, I simply sliced it and tried it; however, gravad älg can be served on crackers, on rye toast, on salad greens or in a dozen other ways. I suppose it could also be added to many cooked dishes. From what I've learned, the Danes serve it with a vinaigrette and a sweet-tart sauce; the Swedes serve it with a mustard/sour cream sauce. I'm not sure if the Norwegians have any unique preparations. All countries like to enjoy it with some form of alcoholic beverage, and it is well-enjoyed at various social events. It should be sliced thinly across the grain:
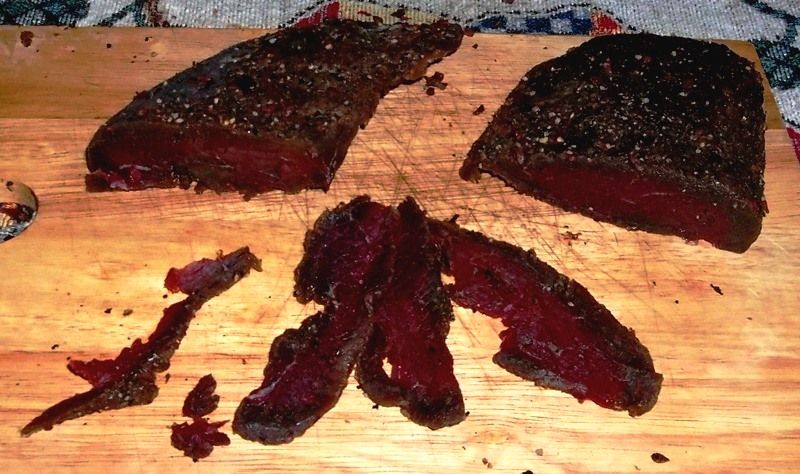
As with gravlax - and just about any charcuterie - the thinner you can slice gravad älg, the better, both for flavour and texture.
All-in-all, it was a very good first attempt, I think. Due to the splitting-up of the roast, the individual, compressed sections of meat that I ended up with might have been lacking in thickness, making for some awkwardness when slicing; other than that, I think it came off very well. The finished texture was very much like the successful attempts at gravlax I have had: firm yet tender, dry yet moist. Gravad älg should be basically free of moisture and appear "almost-but-not-quite" dry - with no excess liquids; if you're familiar with gravlax, this product should be basically the same in terms of characteristics, yet with its own flavour, brought about by the interaction between the venison and the other ingredients, including then juniper berries.
Speaking of this, the ratio of juniper berries and pepper that I used seemed just about right, and the assertive spices were pretty-well balanced with the salt and sugar; maybe just a little on the salty side, but not by much, and considering that the purpose of the product is to preserve it for long-term storage, I'd rather have a little too much than not enough. The flavour was excellent, and it seemed to me to be very well suited for wild game. In a lot of ways, I prefered this to gravlax, but it really isn't fair to compare the two where flavour is concerned is concerned, even though they use similar ingredients.
Thanks for looking, and if you have any questions, please feel free to ask them as this is really highly recommended. I realise that this is much different from most things you are probably accustomed to, yet it is quite good over-all and is certainly worth a try if you are interested in these types of projects, or if you have an interest in Scandinavian cuisine. Basically, if you've done gravlax, you can do this with absolutely no problem; the only difference is that you're using venison (or beef) rather than salmon, and juniper berries (crushed) rather than dill. Other than that, everything is essentially the same.
Oh - one last thing that I did discover is that when put in the freezer,gravad älg doesn't quite freeze solid; it becomes stiff, yet flexible - making it as easy to slice as balsawood. If you're having trouble slicing it when it is in a thawed state, freezing could help; slice it thin, serve it with some schnapps, aquavit or other booze, and live the good life!
Gravad Älg
Gravad älg (Norweigian gravet elg) is an ancient, traditional Swedish method for curing wild game, such as moose (älg) or reindeer. In days gone by, is used primarily for preservation; however, in modern, refrigerated times, it has become more of a way of flavouring and serving meats, similar to Italy's carpaccio. It is quite unique, very flavourful and extremely easy to make, as I recently discovered.
I found gravad älg to be a bit of an elusive topic, as there simply wasn't much to be found on this subject; indeed, I only learned of its existence by stumbling across a casual reference to it while reading a forgotten article on Scandinavian cuisine. One of my favourite things to do is to learn about foods from other lands in order to try to come as close as possible to a "plausible" rendition of those foods in my own kitchen, using the resources available to me. In this case, the subject matter touches home a bit, due to my Swedish ancestry and the fact that it brings together many of my interests - including hunting, history and charcuterie; only with food can such diverse subjects come together in such a tangible (and often delicious) way!
This project was especially meaningful in that during my reading and research on gravad älg, I had the pleasure of consulting many Scandinavians actually living in Sweden, Norway and Denmark; I must say that it was both a joy and a privilege to be able to learn about this tradition from such helpful and friendly sources, and would like to acknowledge that assistance here ~ thank you very much!
Based on the sum total of my research, and trying to keep it traditional, I determined that the basic method for gravad älg employs curing venison in roughly equal amounts of sea salt and sugar, with some cracked black pepper and juniper berries added. These ingredients are applied to the venison, which is then wrapped in plastic wrap or put in a plastic ZipLock-style bag and placed in a baking dish or similar vessel. It is then weighted down in order to press out the resulting liquids, and is allowed to cure in the refrigerator for a few days as the accumulated juices drain off. The product is then allowed to air dry for an hour or so before it is sliced paper-thin and served. Gravad älgcan be air-dried for a longer period if desired; but evidently, this is not necessary to the identity of the product.
In many ways, gravad älg is very similar to the more-familiar gravad lax or gravlax:
Similarities include the use of a simple sea-salt cure with a similar proportion (to taste) of sugar, supplemented by a modest amount of black pepper. The protein to be cured is covered with this "gravad mix" and then "buried" under a heavy weight. In the old days, the curing process was actually carried out with the protein buried in the earth - a process that provided the weight for liquid extration; this subterranean method resulted in the appelation gravad, which translates to "grave," an apt analogy to be sure.
The primary difference between gravad älg and gravad lax can be found in the name itself: lax translates as "salmon" and älg, translates as "elk" or "moose," implying venison or wild game meat. The other big difference is that - where gravad lax adds dill to the salt/sugar/pepper curing mix - gravad älg usually employs crushed junpier berries instead; my reading indicates that arctic thyme can also be used.
Such products would be quite well preserved, especially in the northern cold climates, and it is quite easy to imagine these foods being important historical staples for the Scandinavian people, whether in the villages or out on the sea. After reading and reflecting on the subject, I decided to give this project a go; in my case, either species of native Montana deer (white-tailed deer or mule deer) makess a very-available substitute, and my new-found Scandinavian friends confirmed that I was on the right track with my plan. Encouraged, I collected the necessary components:

As you can see above, you do not need much for this!
For the venison, I selected a sirloin roast from a mule deer doe that we had shot the year before:

The carcass had been dry-aged for 10 to 14 days in our shed, then boned, trimmed, packaged and frozen following a careful and thorough procedure that I had been using since my earliest hunting days; my father taught me that the more care taken in the field and at the butchering table, the better the meat will taste at the dinner table - and I have found this advice to be true every time. Normally, A roast such as this would have been disassembled, the silverskin trimmed out and the meat cut into steaks or cubes before packaging, but I had set it aside for a potential project, and this seemed like a good one.
The sirloin is a very nice roast; it is a good size for projects such as this and it had very good texture and flavour. Also, it is not a super-tender "prime" cut - such as a loin - that would be wasted on a curing project and would shown to much better advantage when cut and prepared as a whole roast or in steaks. Yes, the sirloin is indeed a nice roast, but it does have one draw-back: a couple of layers of inedible silverskin between the musclegroups. I am 98% confident that I could have cured it as it was - whole - with no troubles at all, but my years of "training" simply wouldn't allow me to abide the silverskin that I knew to be tucked within the muscle layers, so I made the decision to trim it out. The decision made, I proceeded to do so, carefully slicing down alongside each layer and then gently removing the silverskin:

One obvious consequence of this decision is that I ended up with a completely disassembled roast:

I didn't worry too much about it at the time, figuring that I could simply re-assemble it, cure it and then use it from there. In a sense, my conclusion was correct; however, as you will see, I might have been better off in the long run if I would have simply left the sirloin intact - or, if I would have used a cut that had no internal silverskin issues, such as a top or bottom round. Any chunk of venison (or even beef) will do, so long as it is as free of fat and especially membrane as possible. Then again, in this case - with this project - the "problem" might have actually been an advantage, because in trimming the roast out, I created a butterflied roast that was composed of three loosely-connected layers of venison that were all about the right thickness for good penetration of the cure - in fact, they reminded me of salmon fillets, which this method of curing was designed for. In any case, this is what I decided to do, and it did work, but it is probable that the result would have looked a lot better using a whole cut, so keep that in mind if you try this.
Moving along, I started making a dry gravad mix of sea salt, dark brown sugar and cracked black pepper:

I also measured some dried juniper berries:

And gave them a good pulverising in my mortar and pestle:

I then added them to the salt, sugar and pepper and mixed everything together to complete my curing mixture:

It is true that I was flying a little blind here, with no formal "recipe" to use; but the fact is that everything about this product and the method for making it is very closely-related to making traditional gravad lax, which I had done a few times, so it was a familiar process.
As far as amounts go, a good ratio for gravlax is 5 (salt) to 5 (sugar) to 2 (dill), usually with an additional 2 for freshly-cracked black pepper. In this case, juniper berries were substituted for dill, and I cut the amount of juniper berries (and also the pepper) in half, since this was a first attempt and I wanted to be conservative with my spices. I also incorporated advice that I had gotten from my Scandinavian sources, some of which suggested using slightly less sugar than salt. So, when all was said and done, my ratio was 5:4:1:1, measured in tablespoons. Based on all of this information, my amounts were:
5 tablespoons of sea salt
4 tablespoons of dark brown sugar
1 tablespoon of freshy-cracked black pepper
1 tablespoon of freshly-crushed juniper berries
The total weight of the trimmed roast was very close to 1 kilogram (a little over 2 pounds), and the amount of gravad mix that resulted from my measurements might have been a little too much, but it did seem to work and at this time I can recommend it with reasonable confidence.
It is often traditional to add a shot of aquavit to the gravad mix for either product (gravad lax or gravad älg); whiskey or brandy can be substituted in place of aquavit. However, I didn't have any of these spirits in the house at the time, so I decided to forego the concept. I do usually have some Jägermeister, however, and perhaps I will add a shot of this German liqueur as a nod to the other half of my ancestry the next time that I make this.
I'm going to pause for a moment and discuss the use of commercially-available curing agents: in a nutshell, I didn't use any for this, and I do not believe that a commercial curing agent is necessary for this product due to the ingredients used to make it and the process by which it is cured. The sea salt content - combined with the low temperatures involved and the extraction of excess moisture - results in an environment where I am personally satisfied that food-borne pathogens are not a concern. This is a whole cut of solid meat that is refrigerated the entire curing time, so there are are none of the typical concerns that are involved when making sausage using ground meat, or with a product that spends a long time in a warm smoking chamber. Keep in mind that, as noted above, gravad älg (made with meat) employs essentially the same process as gravad lax (made with salmon), which I have prepared and enjoyed many times; my own feeling is that if I am going to use the same method with raw fish that came from an unknown source, then I am certainly not going to have a problem using it on venison that has been in my care, custody and control since the moment I saw it standing on the side of the hill and shot it. Finally, let's face it - this is a product that is eaten all the time by Scandinavians, by Italians (in the form of carpaccio, which is similar), and by many other cultures around the world where "raw" meat is consumed with no concern for such worries - tartare, anyone?
As I said before, my own focus is on the tradition and history involved, and I am comfortable using only sea salt with no commercial cure. Please understand that these are my conclusions, as in me, myself and I; your own mileage may vary, and you may or may not be as confident in the circumstances. If anyone wants to try this time-honoured and traditional method for Scandinavian charcuterie, I strongly advise you to please read up on it and make your decision based on what works best for you. If your conclusions are different than mine, then please do use a commercial cure in accordance with the package directions in an appropriate amount for the weight of meat you are curing, as I would not want someone missing out on a great, traditional experience over concerns or worries about cure. The bottom line is that a commercial cure will not adversely affect the product, and it is, after all, very cheap insurance, so use a commerical cure if you want to, or don't if you don't want to. When one becomes interested in attempting charcuterie projects, one educates oneself on the dynamics that are in play, and one exercises due diligence in engaging in the necessary research in order to come to informed decisions on the matter. Part of the interest in charcuterie is to "embrace the Old-World process of curing meats," and this is about as Old-World as it can get.
Anyway, since a couple of spots still seemed a little thick, I slashed them across the grain (the same as if the finished product were being sliced) in order to open them up a little:

I am not sure if this was necessary, but I had read about it with other "Old-World" charcuterie methods using whole cuts of meat and decided to give it a try in order to see if it helped with the meat's absorbtion of the gravad mix. It seems to me that this is a good practice to employ whenever one is using larger cuts of meat, especially when no commercial curing agent is used, so that you can be sure that the salt penetrates the meat.
To apply the gravad mix, I spread some out on a plate, and then re-assembled the sirloin roast in layers on top of the base, starting with the bottom:

I continued to add a layer of the cure in between the layers of venison:

Looking back, I probably used more gravad mix than necessary:

But at the time - for my first attempt - I wasn't sure how much would be an appropriate amount, so I erred on the side of caution; reasoning that it's probably better to have too much, rather than not enough. My primary concern, of course, was an end product that would be too salty, but between the curing and the draining off of the liquids, I guessed that things would be fine. Besides, this is meant to be a rather salty product - part of the reason that it was developed (for meat preservation) - and it is to be sliced very thin when served. With this in mind, I was sure that things would be alright in the end.
When the roast was completely re-assembled and well-coated with the cure, I sealed it in a ZipLock-type bag:

I placed the bag in a shallow baking dish, and then placed a square, glass baking dish on top of the zip-lock bag and weighed it down with around 5 pounds or so of canned goods:

As mentioned above, the weight would simulate the ancient practice of burying the meat underground, where the weight of the earth would help to extract the juices produced by the curing process. If I would have been thinking, I probably would have left a corner of the storage bag open in order to allow drainage, since said juices were "trapped" in the bag with the meat. Doing it this way, it was necessary to pat the meat dry and allow it to "air dry" for an hour or two once the curing was complete. One could, if one wishes, vacuum-seal the meat into an air-tight package, but I do not think that this is the optimum way to do it, considering the goals of the procedure. An alternate method (which would possibly work better) would be to wrap the roast in saran wrap, which would allow much of the liquid to actually seep out and not be in contact with the meat, but the fact is that any of these methods will work - it's just a matter of choosing the best method for desired goal.
I then placed the entire assembly in the refrigerator; there to cure for two-and-a-half to three days. The curing time is a bit subjective and depends largely on the thickness of the meat being cured; not enough time, and the product ends up watery and limp - too much time, and the product will have a strange texture that is both too mushy and too firm at the same time. I can't explain it better than that, but it has happened on occasion with thin fillets of salmon when making gravlax, and it is rather unpleasant, even though it is perfectly safe to eat. Anyway, 3 days seems to be a good maximum for meat that is around 3 inches thick, so that's the curing time that I went with. Periodically throughout the curing time, I rotated the venison in order to ensure that it was being thoroughly cured.
When the curing time had passed, I was eager to see what the result would be. Here's what I discovered when I removed the gravad älg from the package:

In general, it had a similar look (except for the colour, of course) in comparison to what I had seen before, making gravlax, so I was encouraged.
I then separated the "layers" of the roast:

Some people rinse off the roast before patting it dry, but since I prefer the bold zestiness that hits the tongue when the spices are left on the exterior, I did not do this.
I did, however, allow the gravad älg to air-dry for an hour or so (similar to developing a pellicle for smoking). This removes the exterior moisture and keeps the product from being a soggy mess. It can also be air-dried for for a much longer time - if one prefers - and this will lengthen the shelf-life considerably; however, keep in mind that it will also concentrate the flavours quite a bit, including the saltiness of the end product.
Eager to see what I would find, I sliced one of the chunks of venison across the middle in order to see what I ended up with:

This is pretty much what I was expecting to see, based on some other photos of gravad älg that I had seen on the internet:


Feeling pretty good about the project, I cut the rest of the roasts and and witnessed the same result:

I did't "prepare" the gravad älg in any way, I simply sliced it and tried it; however, gravad älg can be served on crackers, on rye toast, on salad greens or in a dozen other ways. I suppose it could also be added to many cooked dishes. From what I've learned, the Danes serve it with a vinaigrette and a sweet-tart sauce; the Swedes serve it with a mustard/sour cream sauce. I'm not sure if the Norwegians have any unique preparations. All countries like to enjoy it with some form of alcoholic beverage, and it is well-enjoyed at various social events. It should be sliced thinly across the grain:

As with gravlax - and just about any charcuterie - the thinner you can slice gravad älg, the better, both for flavour and texture.
All-in-all, it was a very good first attempt, I think. Due to the splitting-up of the roast, the individual, compressed sections of meat that I ended up with might have been lacking in thickness, making for some awkwardness when slicing; other than that, I think it came off very well. The finished texture was very much like the successful attempts at gravlax I have had: firm yet tender, dry yet moist. Gravad älg should be basically free of moisture and appear "almost-but-not-quite" dry - with no excess liquids; if you're familiar with gravlax, this product should be basically the same in terms of characteristics, yet with its own flavour, brought about by the interaction between the venison and the other ingredients, including then juniper berries.
Speaking of this, the ratio of juniper berries and pepper that I used seemed just about right, and the assertive spices were pretty-well balanced with the salt and sugar; maybe just a little on the salty side, but not by much, and considering that the purpose of the product is to preserve it for long-term storage, I'd rather have a little too much than not enough. The flavour was excellent, and it seemed to me to be very well suited for wild game. In a lot of ways, I prefered this to gravlax, but it really isn't fair to compare the two where flavour is concerned is concerned, even though they use similar ingredients.
Thanks for looking, and if you have any questions, please feel free to ask them as this is really highly recommended. I realise that this is much different from most things you are probably accustomed to, yet it is quite good over-all and is certainly worth a try if you are interested in these types of projects, or if you have an interest in Scandinavian cuisine. Basically, if you've done gravlax, you can do this with absolutely no problem; the only difference is that you're using venison (or beef) rather than salmon, and juniper berries (crushed) rather than dill. Other than that, everything is essentially the same.
Oh - one last thing that I did discover is that when put in the freezer,gravad älg doesn't quite freeze solid; it becomes stiff, yet flexible - making it as easy to slice as balsawood. If you're having trouble slicing it when it is in a thawed state, freezing could help; slice it thin, serve it with some schnapps, aquavit or other booze, and live the good life!


