Post by TasunkaWitko on Mar 19, 2013 9:32:41 GMT -5
Portuguese Cornbread
Pão do Milho
Not long ago, my friend Brook sent an absolutely awesome book to me titled Bread: The Breads of the World and How to Bake Them at Home. It is an outstanding resource, with captivating photos and a well-organised breakdown of breads by country and region, as well as some great-looking recipes for many, many examples of the word's greatest breads. I am quite grateful to Brook for this gift, and look forward to many delicious loaves.
Along about the same time, I attempted to make a Basque dish called bacalao al pil-pil which features salt cod as the primary ingredient. In order to choose an accompanying bread to bake for this dish, I turned toward the excellent resource that Brook provided, and found this bread. I decided that it fit the bill perfectly, for these reasons:
1. Dave, who made the meal possible by procuring the salt cod for me, got it from a Portuguese market, and I wanted to pay some tribute to him for the gift.
2. Consulting Basque Chef José María Busca Isusi, I learned that corn is mentioned very prominently in importance as a source of food for Basque country.
3. There were some similar cornbread recipes from Basque country, mostly from the French part, it seemed.
4. Cornbread goes great with fish - who doesn't love catfish and hush-puppies?
For those reasons, I decided that this bread would be very plausible, and went with it - a great choice, for sure. Making this bread was very easy, and it was very good tasting; I strongly recommend it as a wonderful bread to bake any time of year, either for its own sake or as part of a meal.
Here's the recipe, from Bread: The Breads of the World and How to Bake Them at Home, by Christine Ingram and Jennie Shapter, 2003:
By the numbers, this is a very easy bread to make; there are, however, certain key steps that help ensure success when making it. Because of this, I tried to be very thorough in documenting the process, and I hope that I was successful. By necessity, I deviated from the recipe 2 or 3 very minor ways, which I will explain as the pictorial progresses; as far as I can tell, those deviations did not in any way affect the over-all outcome of the bread.
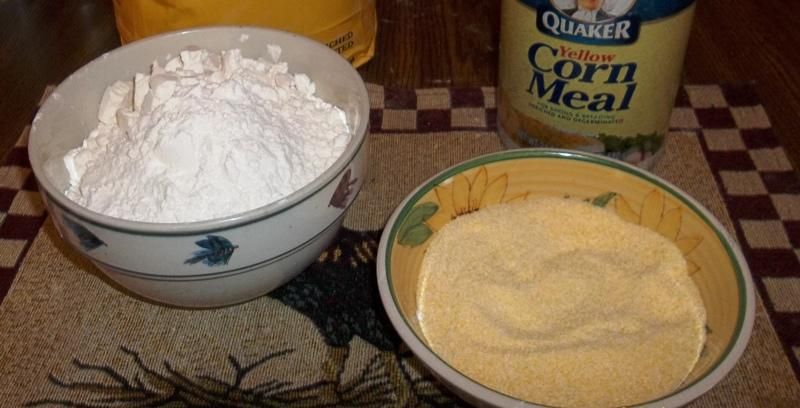
To get started, here's a shot of everything you need:
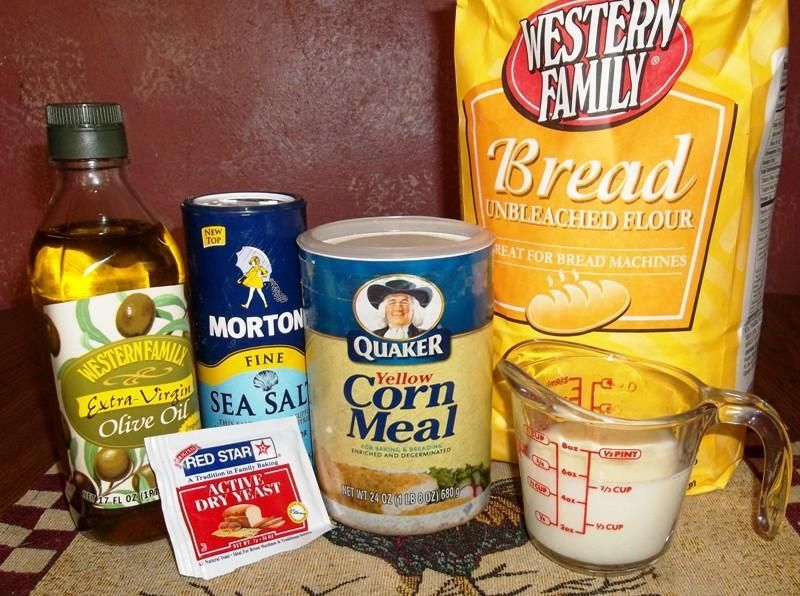
See how easy this bread is? Chances are, you've already got all of these ingredients in your pantry!
A note on yeast: The recipe calls for "fresh yeast;" well, that might be easier to find in some places than others, so I consulted Brook's outstanding bread primer:
foodsoftheworld.activeboards.net/the-staff-of-life-a-primer-on-baking-bread_topic3089.html
After learning that yeast is essentially inter-changeable, I employed an envelope of plain old active dry yeast, with no ill effects.
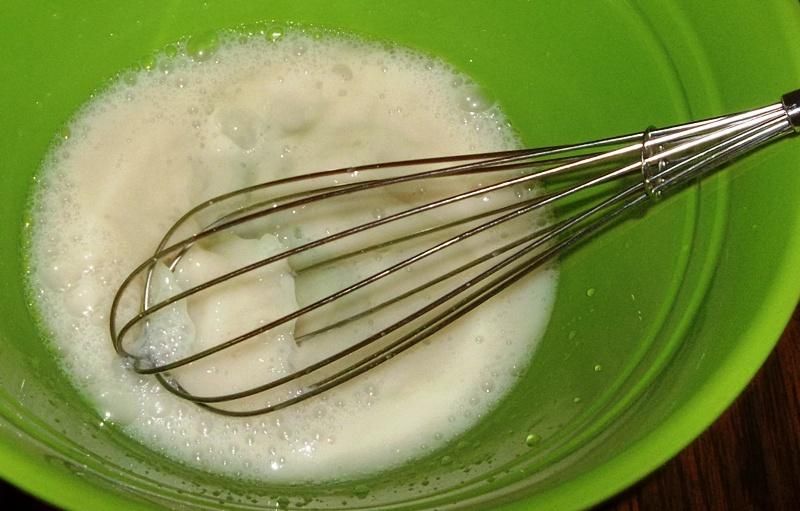
To begin, I combined the yeast with 1 cup of lukewarm water:
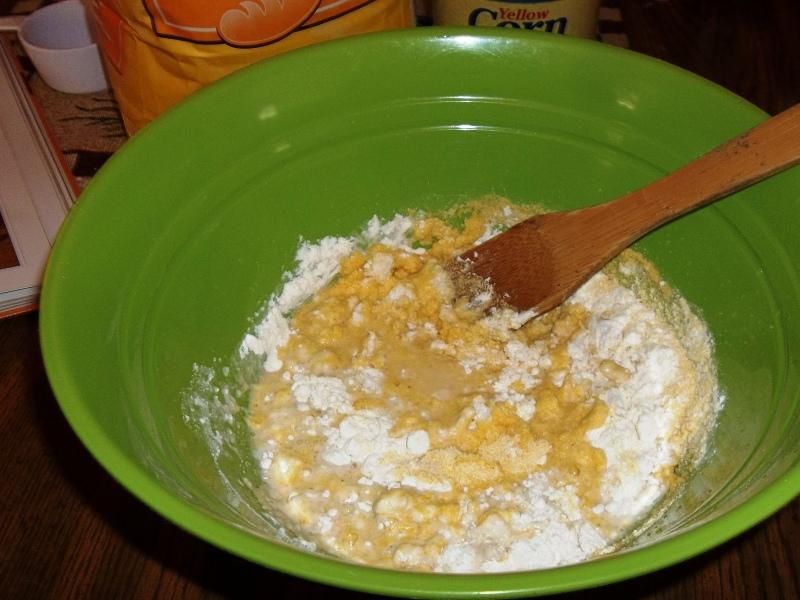
I then added half the cornmeal and 1/2 cup of the flour to the slurry, as proscribed by the recipe:
Once the flour and cornmeal were mixed into a fairly-well-incorporated batter:
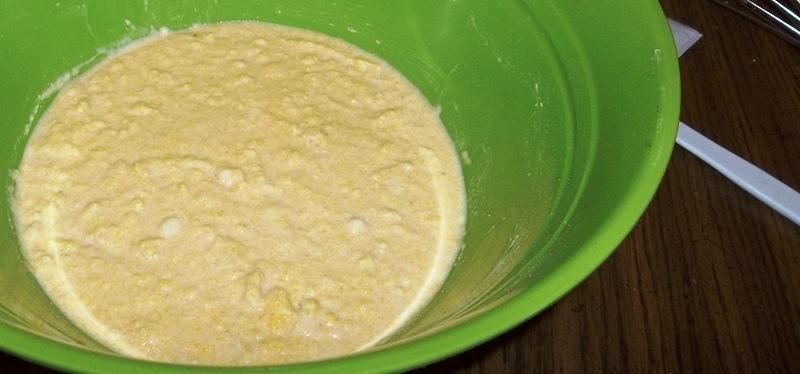
I covered the bowl with plastic wrap and put it in the (turned-off) oven with the light on in order to continue proofing for half an hour.
Meanwhile, since I had nothing better to do, I measured out the remainder of the cornmeal and flour required by the recipe:
After 30 minutes, the "starter batter" was coming along nicely; I believe this is called a sponge:
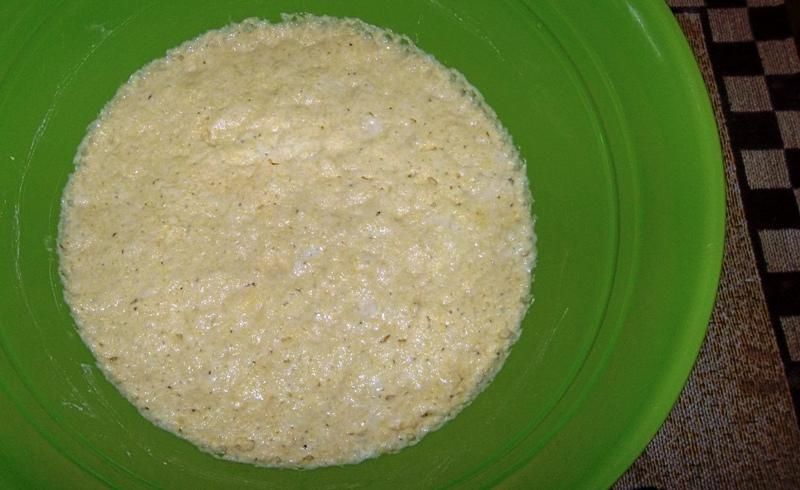
Note that this process did not require any added sugar - the natural sugars in the cornmeal seemed to be quite adequate.
Ready to proceed, I added the milk:
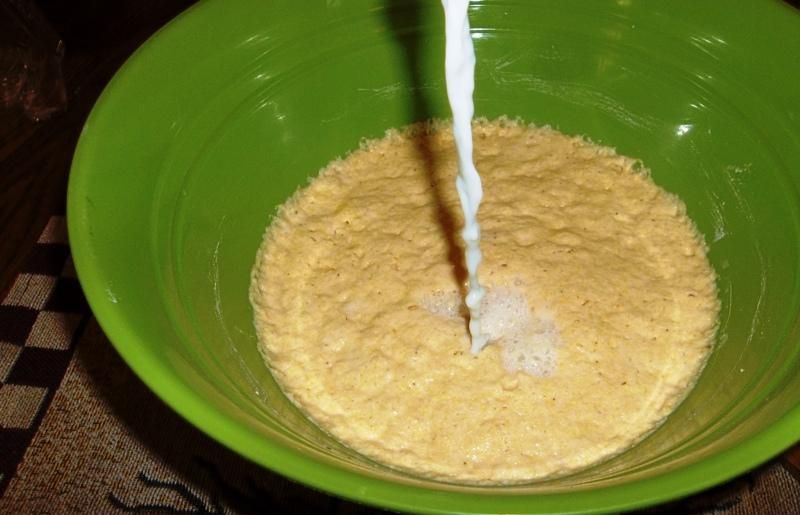
After stirring it into the batter, I then added the olive oil:
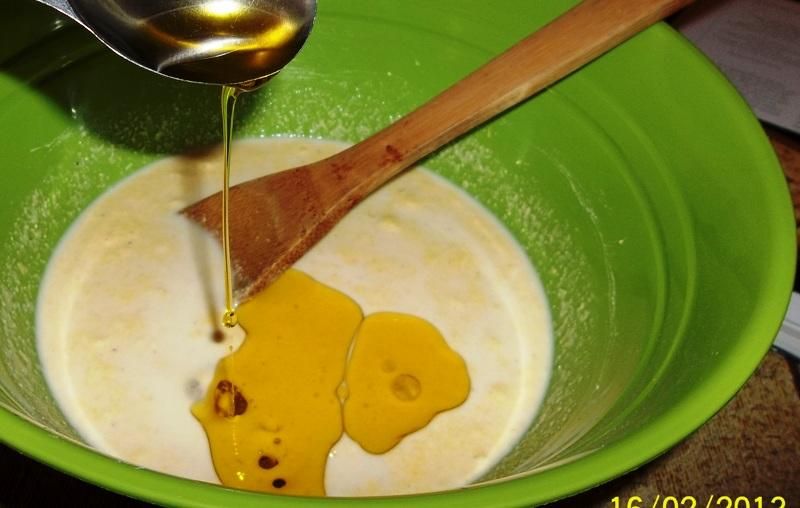
I then began stirring to incorporate the olive oil into the batter; this was a slow process at first:
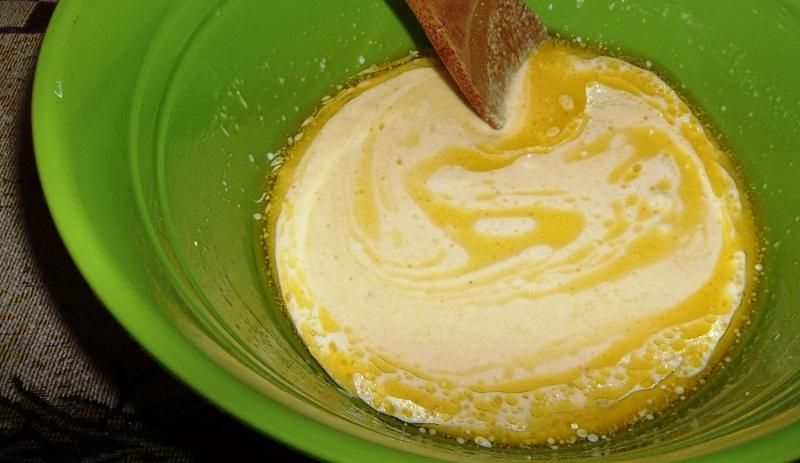
But before too long, everything was well-blended and ready for the next step:
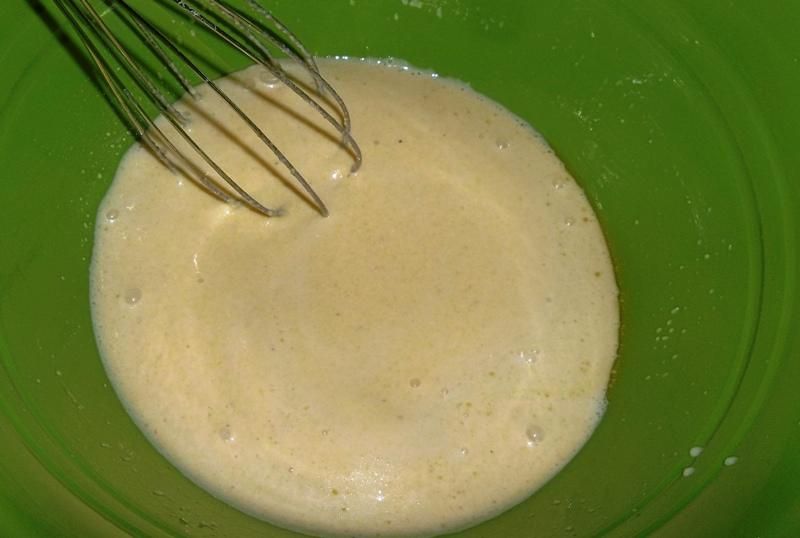
Once the olive oil was completely worked into the batter, I added the cornmeal:
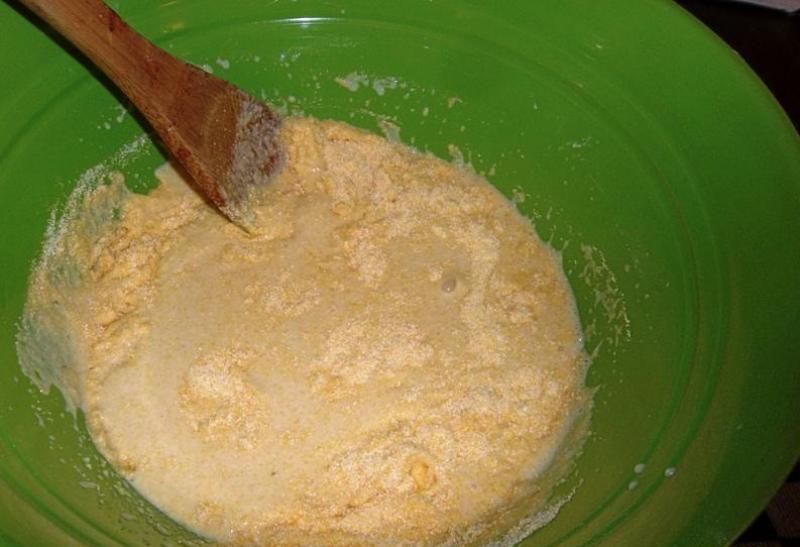
I then added the salt:
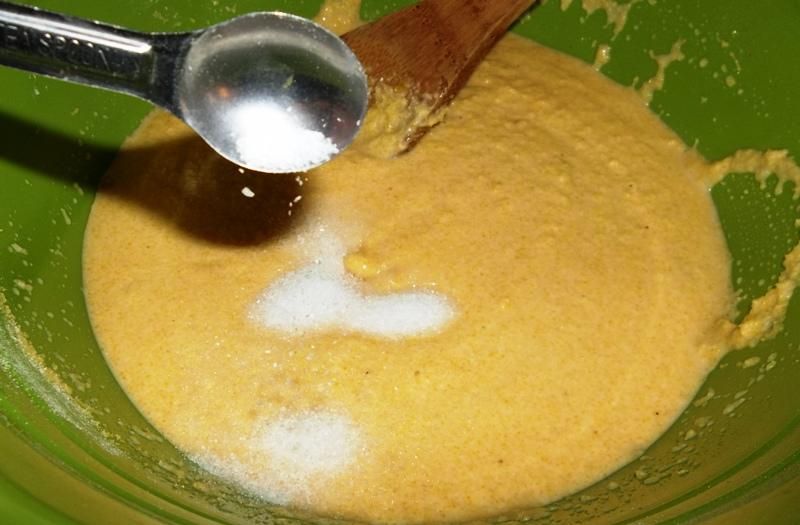
And stirred those components in thoroughly.
Finally, I came to the step that I had been dreading a bit: adding the flour. When making a bread recipe for the first time, the actual, final amount of flour that is used is always subject to a little bit of tweaking; you will most likely end up using slightly more or less than is called for in a bread recipe, simply due to different characteristics of flours. The problem this time, however, is that I had never made a bread of this type before, which was a combination of cornmeal and flour. I wasn't sure exactly what texture and density to expect from the bread dough, so I decided that for this first attempt I would trust the recipe and stick with what was called for.
With that, I began adding the flour gradually, a little at a time:
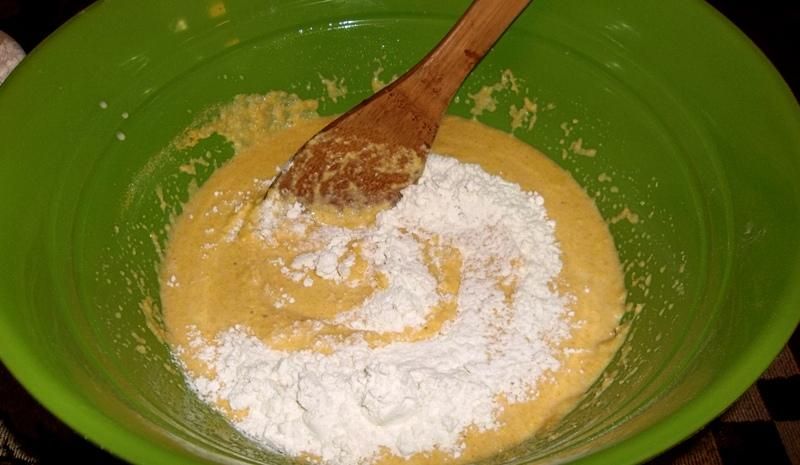
Once I had added enough flour that I could no longer stir it with the wooden paddle, I turned the dough out onto a wooden board and worked the flour into the dough, a little at a time. I was indeed able to get all of the flour into the dough:
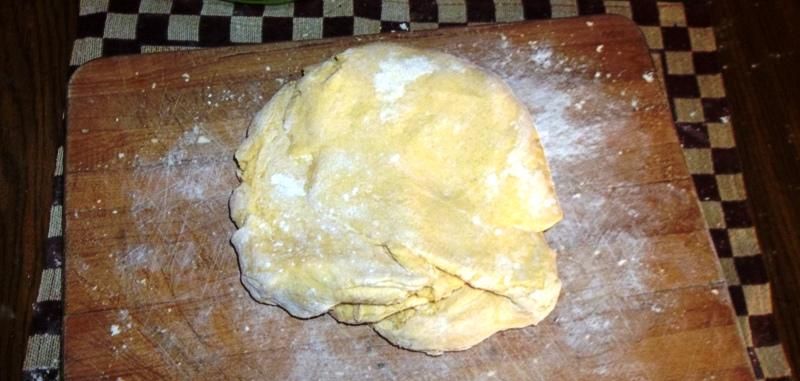
Having said that, the dough seemed awfully dry and stiff; because of this, I worried that I may have added too much, but decided to wait until I was done kneading to decide what to do about it.
After 10 minutes of good, hard kneading, working the dough as best as I could, I ended up with this:
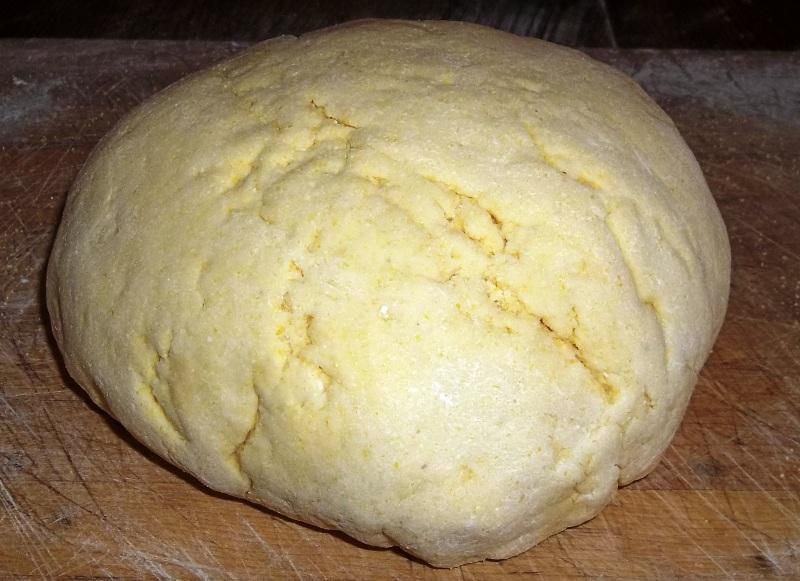
It still seemed a little stiff and dry, but not nearly as much as it had before, so I decided that it was probably very close to the way it should be, and would most likely soften up while resting.
Deciding to leave the dough the way it was, I then oiled it slightly and put it in the bowl, covered with lightly-oiled plastic wrap:
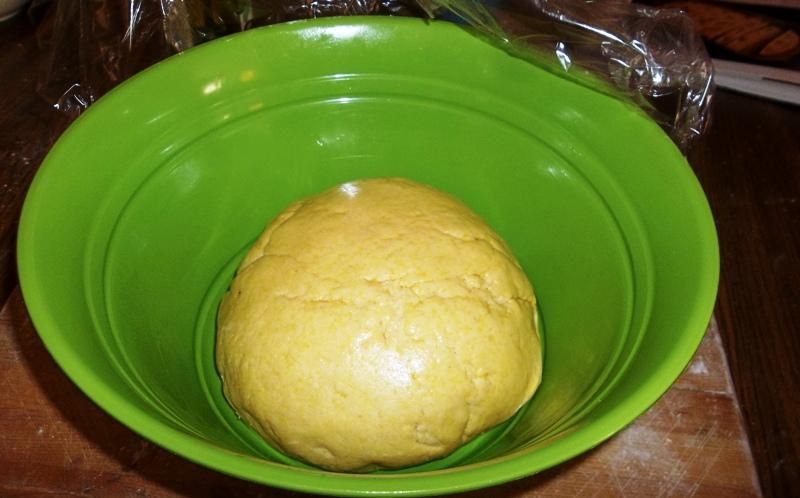
The recipe recommended giving it an hour-and-a-half to two hours to rise; because of different things going on that day, it actually ended up rising for about three hours:
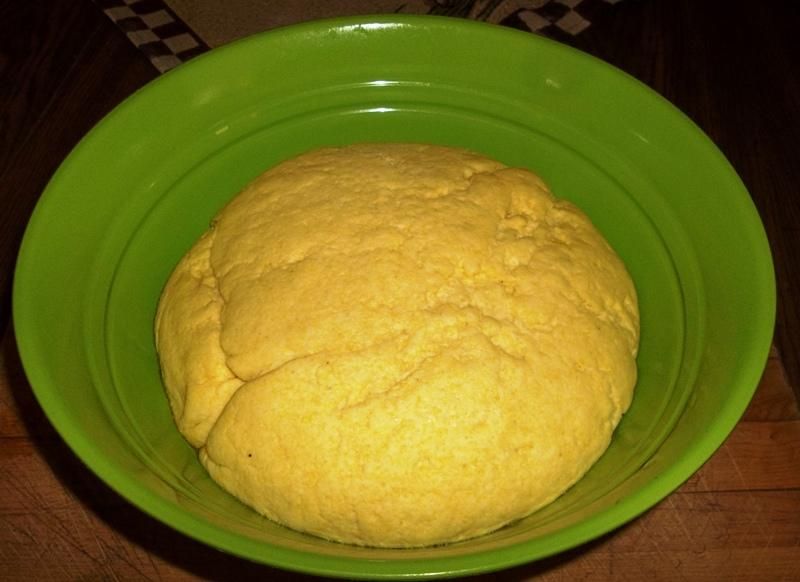
But no worries there - the extra time allowed for "ripening" and flavour development, I think. One thing is for sure: this bread dough, which had been smelling pretty darn good, was really taking on some wonderful aroma - it's nothing that I can adequately describe, but I've smelled it before during some other baking projects, and I always associate it with great bread. It's a very pleasant aroma that really promises all of the warmth and nourishment that good bread will always provide. I'm sure it has to do with the chemical reactions between the yeast and the sugars, but I am no scientist.
In any case, we were coming around the third turn here, so I punched down the dough and formed it into a flattened ball:
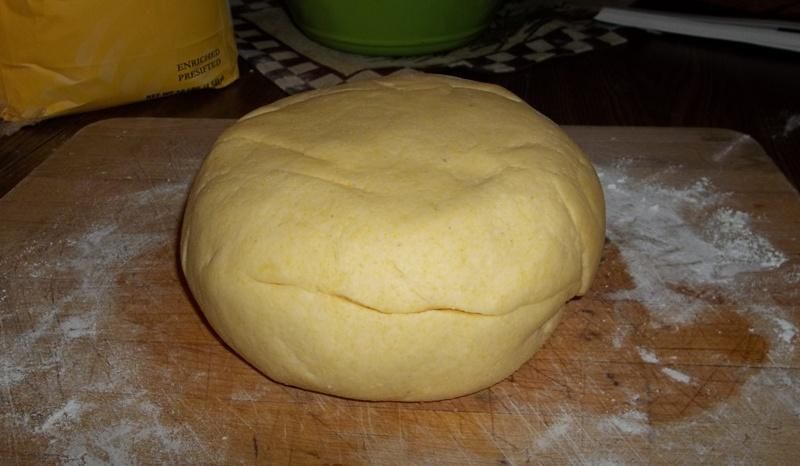
I noticed that it had indeed gotten more soft and pliable while resting, but it was still very stiff compared to what I am used to with conventional bread doughs. No worries, things seemed to be coming along nicely!
Moving along, I spread some cornmeal on my baking stone, then placed the dough on top of it; the recipe says at this point to dust the dough with polenta, but we're in rural Montana, where polenta and cornmeal are pretty much the same thing, even if they aren't, so I dusted mine with cornmeal:
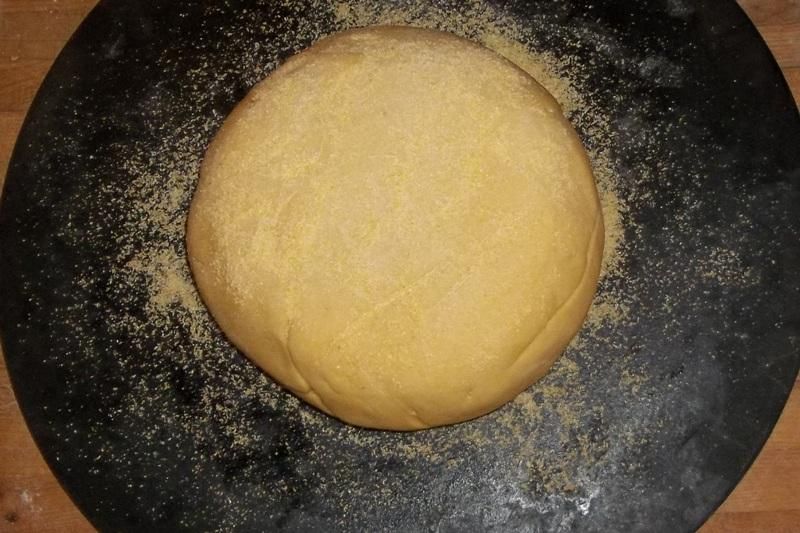
Following the recipe, I covered the dough with a large, upturned bowl and set it in a warm, draft-free place (the turned-off oven with the light on) for another hour. This had the effect of allowing the dough to rise again, and also spread out a bit:
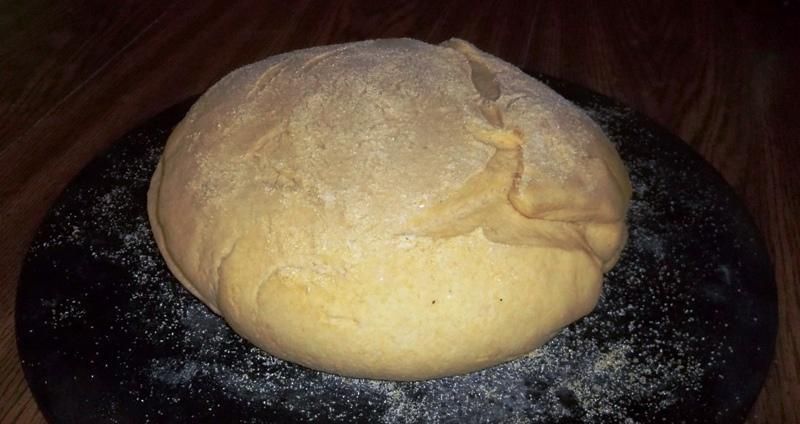
By now, it was looking pretty good, and smelling even better, and I was looking forward to baking the bread. I carefully removed it from the oven while I pre-heated it to 450 degrees, then placed it back in.
If you read the recipe above, you will see that it outlines a water-spraying procedure, which aids in the development of the crust; I had never tried this before, but it seemed like a good idea, so I followed the spraying procedure for the first 10 minutes of baking, and then continued as the recipe advises.
While the bread was baking in the oven, I once again couldn't get over how good it smelled - this really is some wonderful bread, and I urge you to give it a try for something a little different.
By the time that the total baking time was finished, the bread had a nice, toasty colour and a solid, hollow thump when tapped on the bottom. I brought it out and took a look at what I had wrought, and it seemed to me that I had come pretty close to duplicating the loaf of bread that was shown in the book:
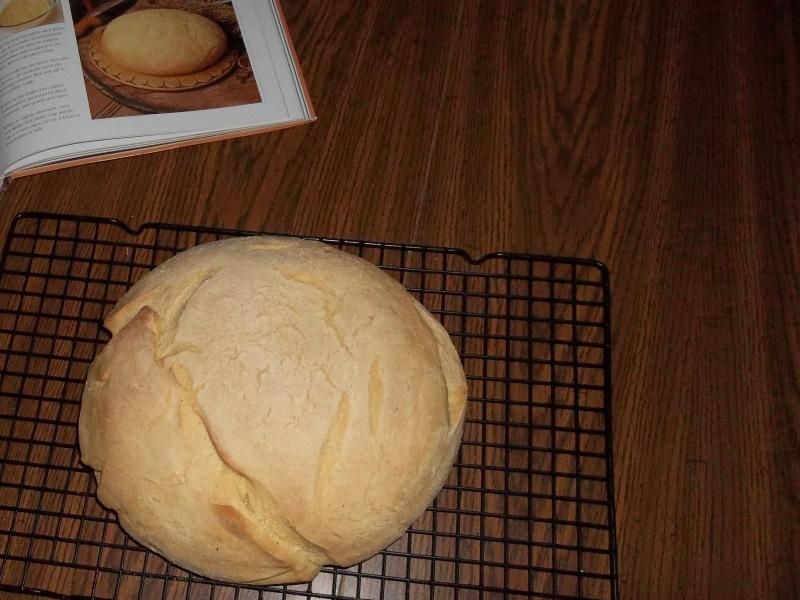
Not too bad at all, for a very first attempt by a rank amateur!
Here's another shot:
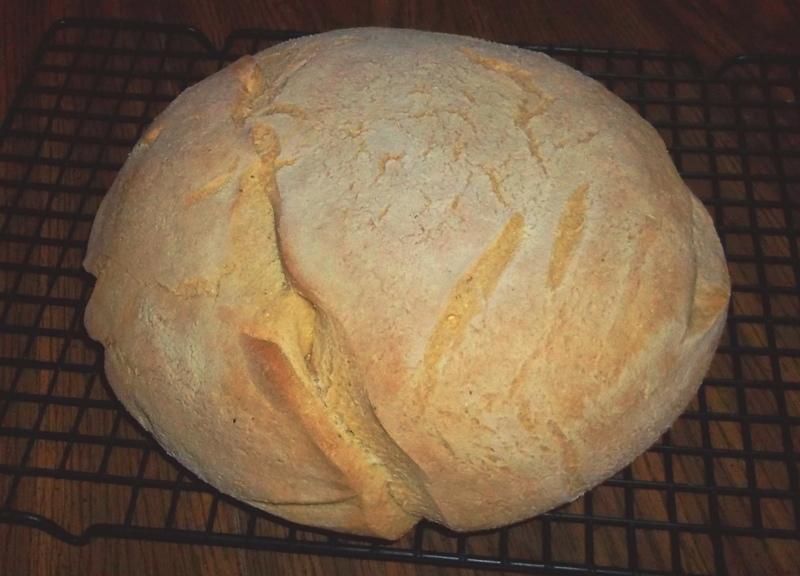
The surface of the bread wasn't as smoothed-out and "perfect-looking" as shown in the book, but considering the stiffness of the dough, I was leery of attempting any forming of the dough; besides, I kind of like the look of "imperfectly-formed" bread - to me, it seems more "home-made" and has certain credentials of its own.
Fresh out of the oven, this bread smelled absolutely amazing; it was a real challenge to let this bread cool, and I desperately wanted to tear right into it and try it. Luckily, I needed to start my bacalao al pil-pil project, so my attention was diverted from this beautiful bread. When I finally did cut into it before serving, however, I was treated to a wonderful sight:
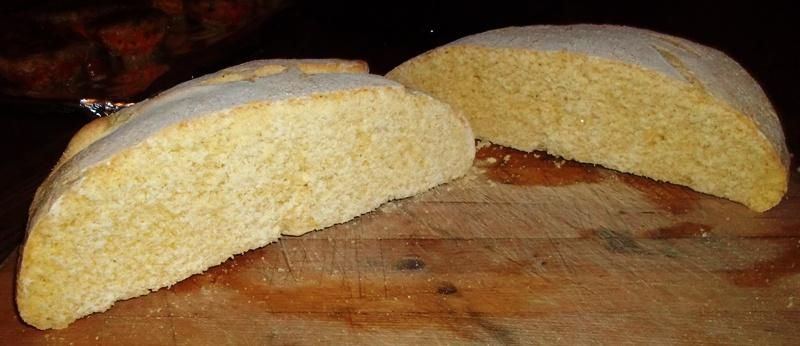
I am certainly no expert, but it seems to me that this bread did exactly what it was supposed to do, springing slightly during baking and developing a nice crumb that was slightly-open but naturally dense due to the nature of the cornmeal.
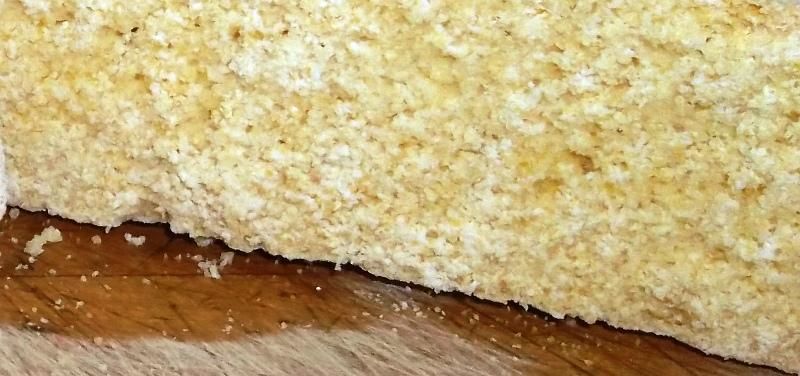
The crumb seemed - to my un-trained eye - to be a little dry and crumbly, but it was less so than I thought it would be, given the nature of the dough; also, the crust seemed to me to be very dry and crunchy, but once again, having no experience with this bread, I figured that it was pretty close to the way it should be, and was eventually proven correct. The Beautiful Mrs. Tas thought the crust to be overly-hard during the meal, but after resting over-night in a plastic bag, the moisture in the bread equalised and the crust was quite a bit softer, but still crusty on the surface.
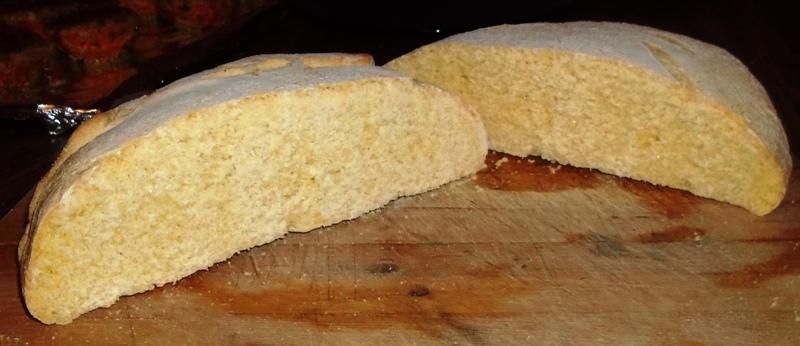
All-in-all, I was pretty sure that the characteristics that I "thought" were mistakes were actually right for this cornbread, and was eventually proven correct. After some private discussions with Brook, he was intrigued enough to try this bread for himself, and his conclusions were the same as mine; here's a link to his experience with this excellent bread, with some thorough notes that should be helpful for anyone wishing to try it:
foodsoftheworld.activeboards.net/portuguese-corn-bread_topic3248.html
One thing for sure, it was absolutely delicious, wholesome and satisfying - an amazingly good bread that was easy to make. It went perfectly with this meal, and I am sure would also go very well with any meal, especially one with gravy or sauce to "sop up."
Thanks for taking the time to read this, and I hope you give this a try. If anyone has any questions after reading this thread, and Brooks, please ask away, and we'll get some answers for you. I'm looking forward to the next bread that I bake from this outstanding book, and can't thank Brook enough for sending it to me.
Happy baking!
Ron
Pão do Milho
Not long ago, my friend Brook sent an absolutely awesome book to me titled Bread: The Breads of the World and How to Bake Them at Home. It is an outstanding resource, with captivating photos and a well-organised breakdown of breads by country and region, as well as some great-looking recipes for many, many examples of the word's greatest breads. I am quite grateful to Brook for this gift, and look forward to many delicious loaves.
Along about the same time, I attempted to make a Basque dish called bacalao al pil-pil which features salt cod as the primary ingredient. In order to choose an accompanying bread to bake for this dish, I turned toward the excellent resource that Brook provided, and found this bread. I decided that it fit the bill perfectly, for these reasons:
1. Dave, who made the meal possible by procuring the salt cod for me, got it from a Portuguese market, and I wanted to pay some tribute to him for the gift.
2. Consulting Basque Chef José María Busca Isusi, I learned that corn is mentioned very prominently in importance as a source of food for Basque country.
3. There were some similar cornbread recipes from Basque country, mostly from the French part, it seemed.
4. Cornbread goes great with fish - who doesn't love catfish and hush-puppies?
For those reasons, I decided that this bread would be very plausible, and went with it - a great choice, for sure. Making this bread was very easy, and it was very good tasting; I strongly recommend it as a wonderful bread to bake any time of year, either for its own sake or as part of a meal.
Here's the recipe, from Bread: The Breads of the World and How to Bake Them at Home, by Christine Ingram and Jennie Shapter, 2003:
Portuguese Cornbread
3/4 ounce fresh yeast
1 cup lukewarm water
2 cups yellow cornmeal
4 cups unbleached bread flour
2/3 cup lukewarm milk
2 tablespoons olive oil
1.5 teaspoons salt
Polenta for dusting
Dust a baking sheet with a little cornmeal.
Put the yeast in a large bowl and gradually mix in the lukewarm water until smooth. Stir in half the cornmeal and 1/2 cup of the flour and mix to a batter with a wooden spoon. Cover the bowl with lightly oiled plastic wrap and let the batter sit, undisturbed in a warm place for about 30 minutes or until bubbles start to appear on the surface. Remove the plastic wrap.
Stir the milk into the batter, then stir in the olive oil. Gradually mix in the remaining cornmeal, flour, and salt to form a pliable dough.
Turn out the dough onto a lightly floured surface and knead for about ten minutes until smooth and elastic. Place in a lightly oiled bowl, cover with lightly oiled plastic wrap, and let rise in a warm place, for 1.5 to 2 hours, or until doubled in bulk
Turn out the dough onto a lightly floured surface and punch down. Shape into a round ball, flatten slightly and place on the prepared baking sheet. Dust with polenta, cover with a large upturned bowl and let rise, in a warm place, for about 1 hour or until doubled in size. Meanwhile, preheat the oven to 450F.
Bake for 10 minutes, spraying the inside of the oven with water 2 to 3 times. Reduce the oven temperature to 375F and bake for another 20 to 25 minutes or until golden and hollow sounding when tapped on the bottom. Transfer to a wire rack to cool.
By the numbers, this is a very easy bread to make; there are, however, certain key steps that help ensure success when making it. Because of this, I tried to be very thorough in documenting the process, and I hope that I was successful. By necessity, I deviated from the recipe 2 or 3 very minor ways, which I will explain as the pictorial progresses; as far as I can tell, those deviations did not in any way affect the over-all outcome of the bread.
To get started, here's a shot of everything you need:

See how easy this bread is? Chances are, you've already got all of these ingredients in your pantry!
A note on yeast: The recipe calls for "fresh yeast;" well, that might be easier to find in some places than others, so I consulted Brook's outstanding bread primer:
foodsoftheworld.activeboards.net/the-staff-of-life-a-primer-on-baking-bread_topic3089.html
After learning that yeast is essentially inter-changeable, I employed an envelope of plain old active dry yeast, with no ill effects.
To begin, I combined the yeast with 1 cup of lukewarm water:

I then added half the cornmeal and 1/2 cup of the flour to the slurry, as proscribed by the recipe:

Once the flour and cornmeal were mixed into a fairly-well-incorporated batter:

I covered the bowl with plastic wrap and put it in the (turned-off) oven with the light on in order to continue proofing for half an hour.
Meanwhile, since I had nothing better to do, I measured out the remainder of the cornmeal and flour required by the recipe:

After 30 minutes, the "starter batter" was coming along nicely; I believe this is called a sponge:

Note that this process did not require any added sugar - the natural sugars in the cornmeal seemed to be quite adequate.
Ready to proceed, I added the milk:

After stirring it into the batter, I then added the olive oil:

I then began stirring to incorporate the olive oil into the batter; this was a slow process at first:

But before too long, everything was well-blended and ready for the next step:

Once the olive oil was completely worked into the batter, I added the cornmeal:

I then added the salt:

And stirred those components in thoroughly.
Finally, I came to the step that I had been dreading a bit: adding the flour. When making a bread recipe for the first time, the actual, final amount of flour that is used is always subject to a little bit of tweaking; you will most likely end up using slightly more or less than is called for in a bread recipe, simply due to different characteristics of flours. The problem this time, however, is that I had never made a bread of this type before, which was a combination of cornmeal and flour. I wasn't sure exactly what texture and density to expect from the bread dough, so I decided that for this first attempt I would trust the recipe and stick with what was called for.
With that, I began adding the flour gradually, a little at a time:

Once I had added enough flour that I could no longer stir it with the wooden paddle, I turned the dough out onto a wooden board and worked the flour into the dough, a little at a time. I was indeed able to get all of the flour into the dough:

Having said that, the dough seemed awfully dry and stiff; because of this, I worried that I may have added too much, but decided to wait until I was done kneading to decide what to do about it.
After 10 minutes of good, hard kneading, working the dough as best as I could, I ended up with this:

It still seemed a little stiff and dry, but not nearly as much as it had before, so I decided that it was probably very close to the way it should be, and would most likely soften up while resting.
Deciding to leave the dough the way it was, I then oiled it slightly and put it in the bowl, covered with lightly-oiled plastic wrap:

The recipe recommended giving it an hour-and-a-half to two hours to rise; because of different things going on that day, it actually ended up rising for about three hours:

But no worries there - the extra time allowed for "ripening" and flavour development, I think. One thing is for sure: this bread dough, which had been smelling pretty darn good, was really taking on some wonderful aroma - it's nothing that I can adequately describe, but I've smelled it before during some other baking projects, and I always associate it with great bread. It's a very pleasant aroma that really promises all of the warmth and nourishment that good bread will always provide. I'm sure it has to do with the chemical reactions between the yeast and the sugars, but I am no scientist.
In any case, we were coming around the third turn here, so I punched down the dough and formed it into a flattened ball:

I noticed that it had indeed gotten more soft and pliable while resting, but it was still very stiff compared to what I am used to with conventional bread doughs. No worries, things seemed to be coming along nicely!
Moving along, I spread some cornmeal on my baking stone, then placed the dough on top of it; the recipe says at this point to dust the dough with polenta, but we're in rural Montana, where polenta and cornmeal are pretty much the same thing, even if they aren't, so I dusted mine with cornmeal:

Following the recipe, I covered the dough with a large, upturned bowl and set it in a warm, draft-free place (the turned-off oven with the light on) for another hour. This had the effect of allowing the dough to rise again, and also spread out a bit:

By now, it was looking pretty good, and smelling even better, and I was looking forward to baking the bread. I carefully removed it from the oven while I pre-heated it to 450 degrees, then placed it back in.
If you read the recipe above, you will see that it outlines a water-spraying procedure, which aids in the development of the crust; I had never tried this before, but it seemed like a good idea, so I followed the spraying procedure for the first 10 minutes of baking, and then continued as the recipe advises.
While the bread was baking in the oven, I once again couldn't get over how good it smelled - this really is some wonderful bread, and I urge you to give it a try for something a little different.
By the time that the total baking time was finished, the bread had a nice, toasty colour and a solid, hollow thump when tapped on the bottom. I brought it out and took a look at what I had wrought, and it seemed to me that I had come pretty close to duplicating the loaf of bread that was shown in the book:

Not too bad at all, for a very first attempt by a rank amateur!
Here's another shot:

The surface of the bread wasn't as smoothed-out and "perfect-looking" as shown in the book, but considering the stiffness of the dough, I was leery of attempting any forming of the dough; besides, I kind of like the look of "imperfectly-formed" bread - to me, it seems more "home-made" and has certain credentials of its own.
Fresh out of the oven, this bread smelled absolutely amazing; it was a real challenge to let this bread cool, and I desperately wanted to tear right into it and try it. Luckily, I needed to start my bacalao al pil-pil project, so my attention was diverted from this beautiful bread. When I finally did cut into it before serving, however, I was treated to a wonderful sight:

I am certainly no expert, but it seems to me that this bread did exactly what it was supposed to do, springing slightly during baking and developing a nice crumb that was slightly-open but naturally dense due to the nature of the cornmeal.

The crumb seemed - to my un-trained eye - to be a little dry and crumbly, but it was less so than I thought it would be, given the nature of the dough; also, the crust seemed to me to be very dry and crunchy, but once again, having no experience with this bread, I figured that it was pretty close to the way it should be, and was eventually proven correct. The Beautiful Mrs. Tas thought the crust to be overly-hard during the meal, but after resting over-night in a plastic bag, the moisture in the bread equalised and the crust was quite a bit softer, but still crusty on the surface.

All-in-all, I was pretty sure that the characteristics that I "thought" were mistakes were actually right for this cornbread, and was eventually proven correct. After some private discussions with Brook, he was intrigued enough to try this bread for himself, and his conclusions were the same as mine; here's a link to his experience with this excellent bread, with some thorough notes that should be helpful for anyone wishing to try it:
foodsoftheworld.activeboards.net/portuguese-corn-bread_topic3248.html
One thing for sure, it was absolutely delicious, wholesome and satisfying - an amazingly good bread that was easy to make. It went perfectly with this meal, and I am sure would also go very well with any meal, especially one with gravy or sauce to "sop up."
Thanks for taking the time to read this, and I hope you give this a try. If anyone has any questions after reading this thread, and Brooks, please ask away, and we'll get some answers for you. I'm looking forward to the next bread that I bake from this outstanding book, and can't thank Brook enough for sending it to me.
Happy baking!
Ron


